


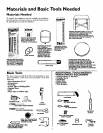
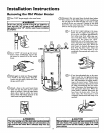
Installation Instructions (cont'd)
Water Piping
AWARNING
HOTTERWATERCAN SCALD:.Water heatersareintendedto
producehot water.Water heatedto a temperature .whichwill
saUsfyclotheswashing,dishwashing,andothersanitizingneeds;
canscaldandpermanentlyinjureyouuponcontact.Somepeo-
Poleare morelikelyto bepermanentlyinjuredbyhotwaterthan
rs.Theseincludetheelder_,children,the infirm,or physical.
ly/mentallyhandicapped.Ifanyoneusinghotwater inyour home
fitsintooneofthesegroupsorifthereisalocalcodeor statelaw
requiringa certaintemperaturewaterat the hotw_er taR then
you musttakespecialprecautions.Inadditionto usingthe lowest
possib/etemperaturesettingthat satisfiesyour hotwater needs,
a meanssuchasa mixingvalve,shouldbeusedatthe hotwater
tapsusedby these peopleor at the waterheater.Mixingvalves
areavailableat plumbingsupplyor hardwarestores.Followman-
ufacturersinstructionsfor installationof the valves.Before
changingthe factory setting on the thermostat, read the
"Temperature Regulation"sectioninthismanual.
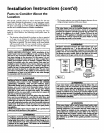
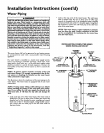
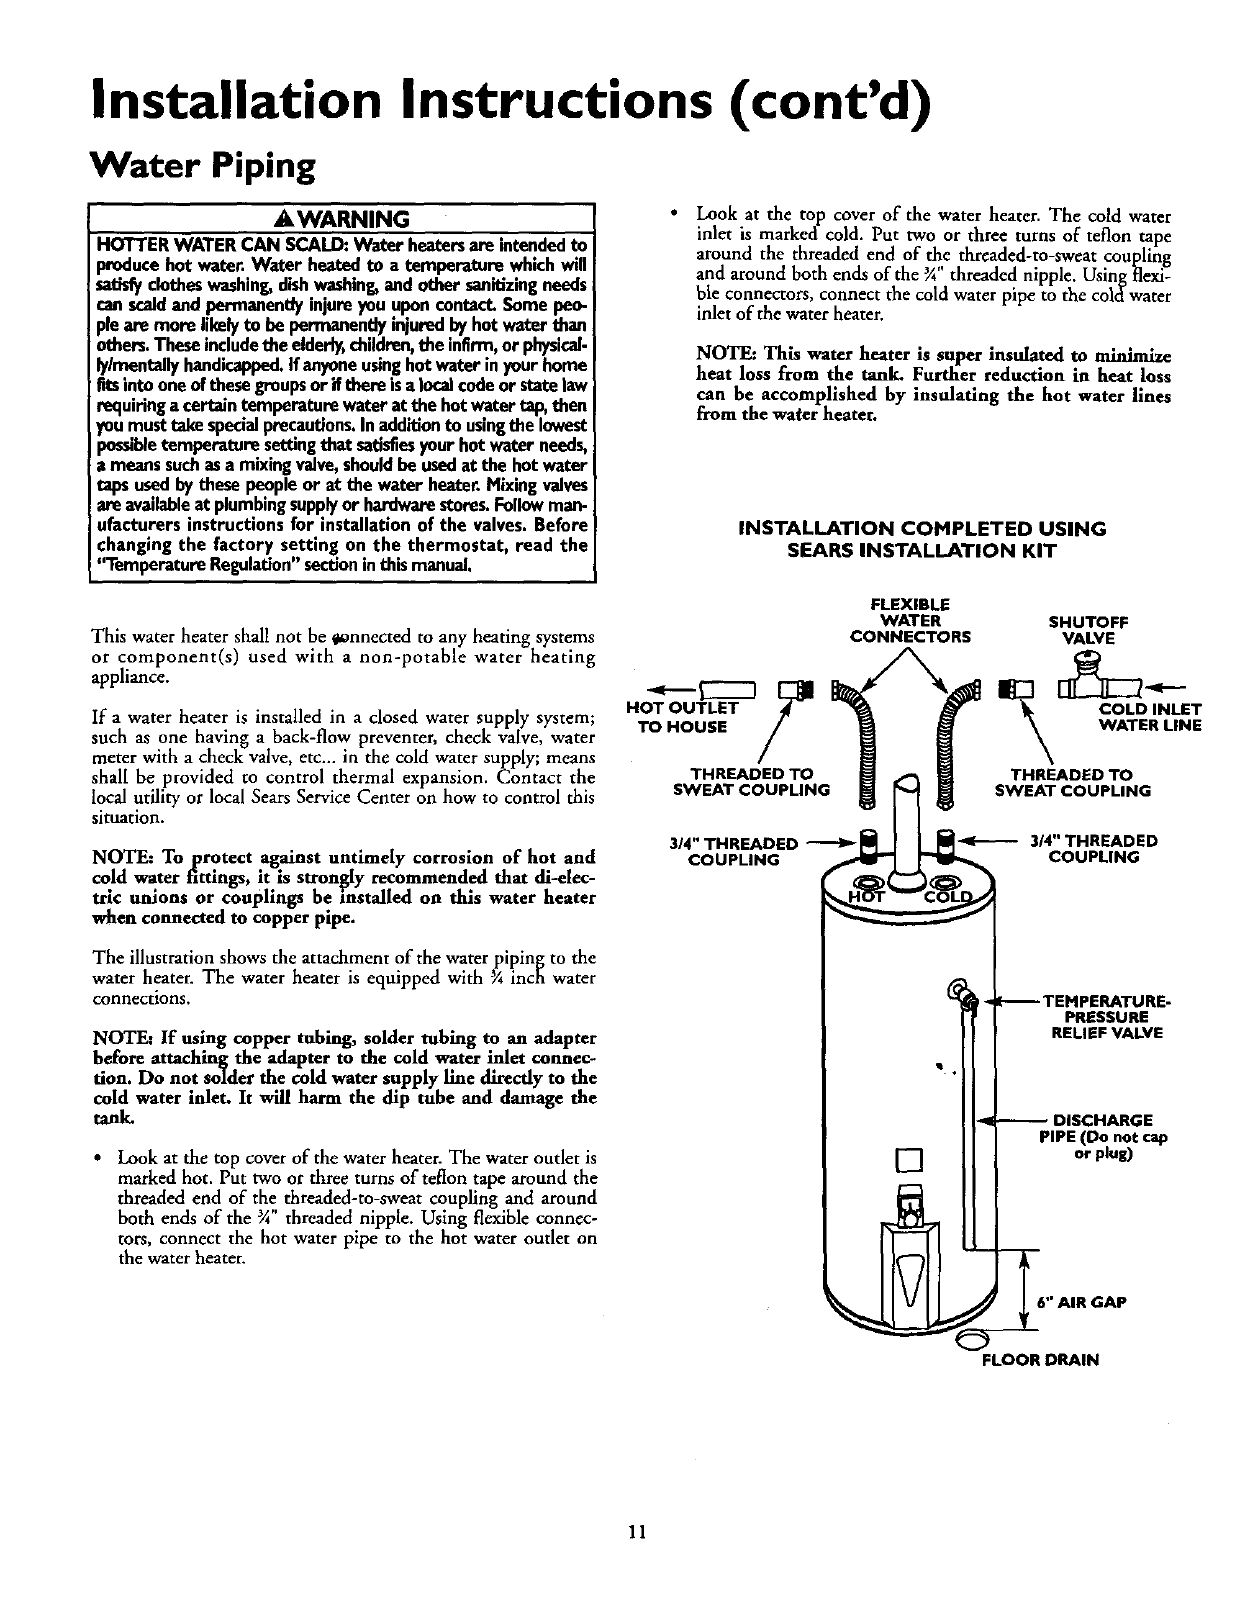
Look at the top cover of the water heater. The cold water
inlet is marked cold. Put two or three turns of"teflon tape
around the threaded end of _e threaded-to-sweat coupling
and around both ends of the ¾ threaded nipple. Using flexi-
ble connectors, connect the cold water pipe to the coldwater
inlet of the water heater.
NOTE: This water heater is super insulated to minimize
heat loss from the tank. Further reduction in heat loss
can be accomplished by insulating the hot water lines
from the water heater.
INSTALLATION COMPLETED USING
SEARS INSTALLATION KIT
This water heater shall not be #onnected to any heating systems
or component(s) used with a non-potable water heating
appliance.
If a water heater is installed in a closed water supply system;
such as one having a back-flow preventer, check valve, water
meter with a check valve, etc.., in the cold water supply; means
shall be provided to control thermal expansion. Contact the
local utility or local Sears Service Center on how to control this
situation.
NOTE: Toprotect against untimely corrosion of hot and
cold water fittings, it is stronl_ly recommended that di-elec-
tric untons or couplings be mstalled on this water heater
when connected to copper pipe.
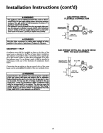
The illustration shows the attachment of the water piping to the
water heater. The water heater is equipped with ¾ inch water
connections.
NOTE: If using copper tubing, solder tubing to an adapter
before attaching the adapter to the cold w,.ater'.mletconnec-
tion. Do not solder the cold water supply llne directly to the
cold water inlet. It will harm the dip tube and damage the
tank.
• Look at the top cover of the water heater. The water outlet is
marked hot. Put two or three turns of teflon tape around the
threaded end of the threaded-to-sweat coupling and around
both ends of the ¾" threaded nipple. Using flexible connec-
tors, connect the hot water pipe to the hot water outlet on
the water heater.
HOT OUTLET
TO HOUSE /
THREADED TO
SWEAT COUPLING
3/4" THREADED
COUPLING
FLEXIBLE
WATER
CONNECTORS
[]
SHUTOFF
VALVE
COLD, ; T
WATER LINE
THREADED TO
SWEAT COUPLING
3/4" THREADED
COUPLING
PRESSURE
RELIEF VALVE
DISCHARGE
PIPE (Do not cap
or plug)
6" AIR GAP
FLOOR DRAIN
11