


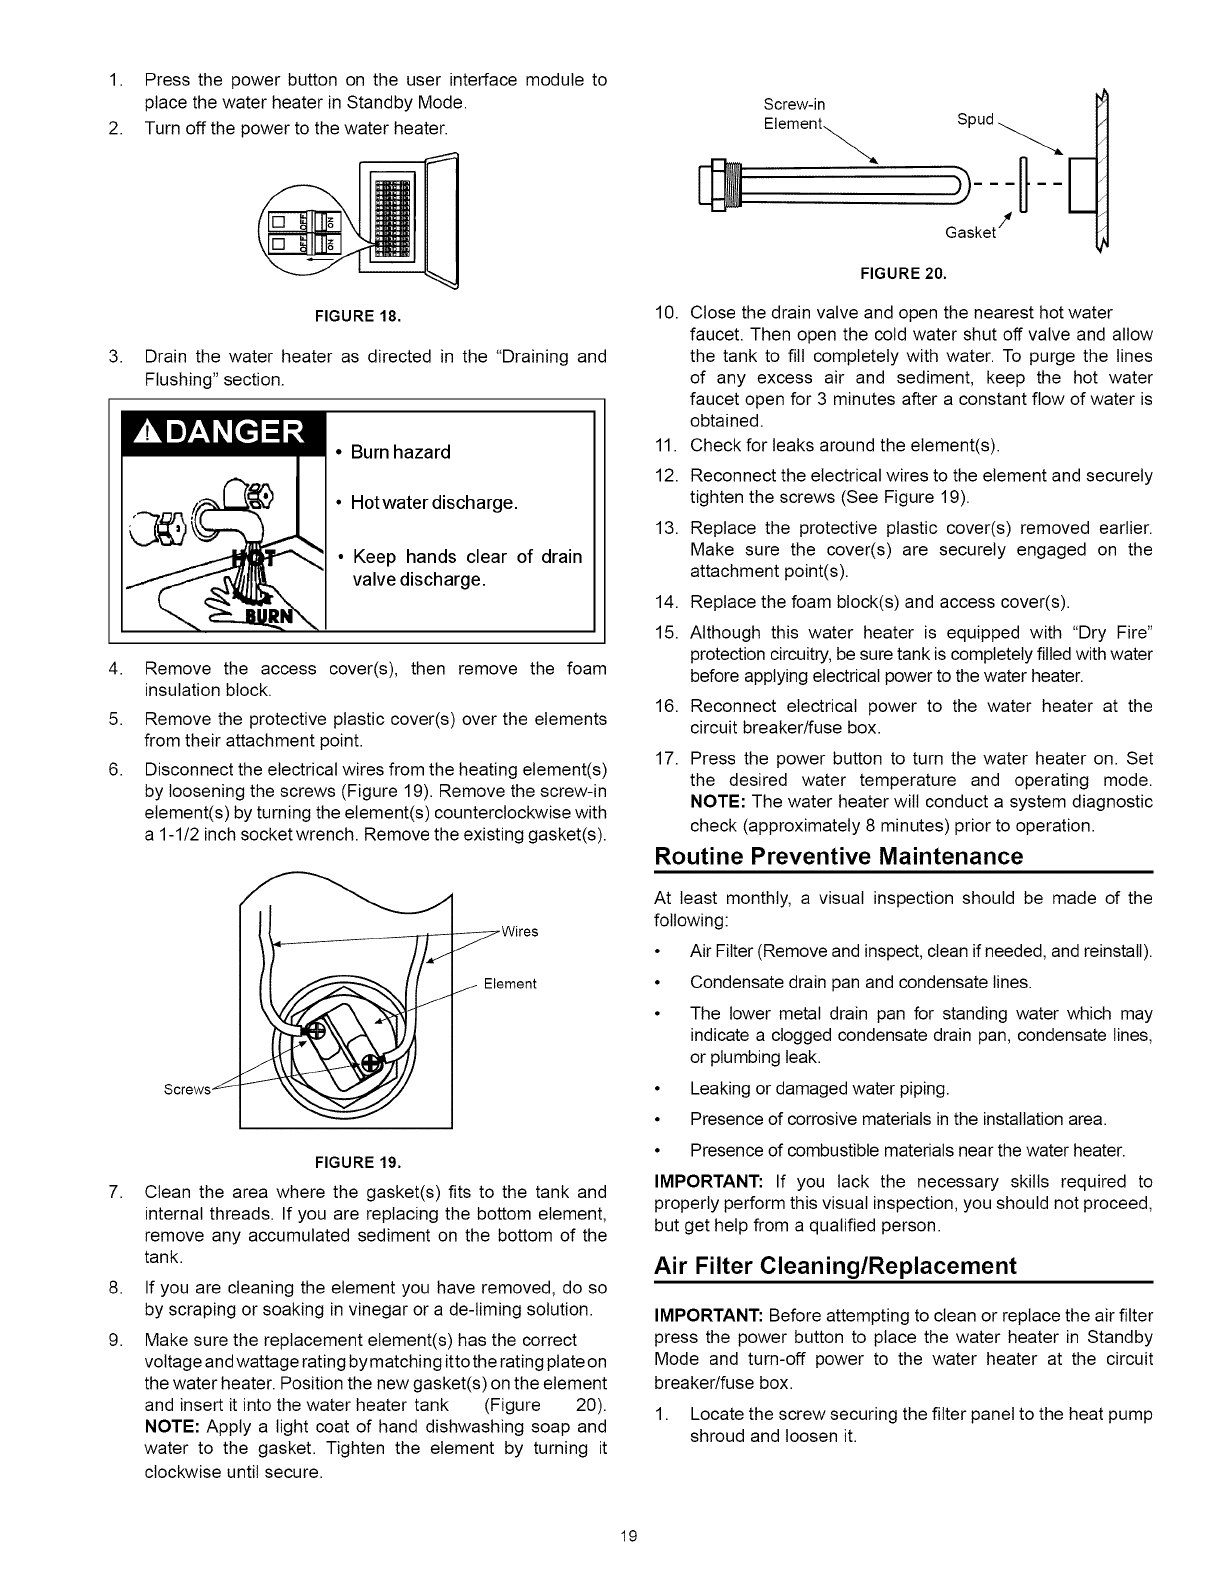
1. Press the power button on the user interface module to
place the water heater in Standby Mode.
2. Turn off the power to the water heater.
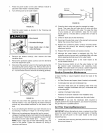
3,
FIGURE 18.
Drain the water heater as directed in the "Draining and
Flushing" section.
• Burn hazard
• Hotwater discharge.
• Keep hands clear of drain
valve discharge.
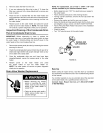
4,
5.
6.
Remove the access cover(s), then remove the foam
insulation block.
Remove the protective plastic cover(s) over the elements
from their attachment point.
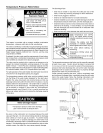
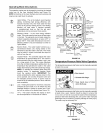
Disconnect the electrical wires from the heating element(s)
by loosening the screws (Figure 19). Remove the screw-in
element(s) by turning the element(s) counterclockwise with
a 1-1/2 inch socket wrench. Remove the existing gasket(s).
Screws _
_Wires
/ Element
7,
8,
9.
FIGURE 19.
Clean the area where the gasket(s) fits to the tank and
internal threads. If you are replacing the bottom element,
remove any accumulated sediment on the bottom of the
tank.
If you are cleaning the element you have removed, do so
by scraping or soaking in vinegar or a de-liming solution.
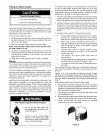
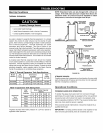
Make sure the replacement element(s) has the correct
voltage and wattage rating by matching itto the rating ptate on
the water heater. Position the new gasket(s) on the element
and insert it into the water heater tank (Figure 20).
NOTE: Apply a light coat of hand dishwashing soap and
water to the gasket. Tighten the element by turning it
clockwise until secure.
Screw-in
Element_
Gasket_
FIGURE 20.
10. Close the drain valve and open the nearest hot water
faucet. Then open the cold water shut off valve and allow
the tank to fill completely with water. To purge the lines
of any excess air and sediment, keep the hot water
faucet open for 3 minutes after a constant flow of water is
obtained.
11. Check for leaks around the element(s).
12. Reconnect the electrical wires to the element and securely
tighten the screws (See Figure 19).
13. Replace the protective plastic cover(s) removed earlier.
Make sure the cover(s) are securely engaged on the
attachment point(s).
14. Replace the foam block(s) and access cover(s).
15. Although this water heater is equipped with "Dry Fire"
protection circuitry, be sure tank is completely filled with water
before applying electrical power to the water heater.
16. Reconnect electrical power to the water heater at the
circuit breaker/fuse box.
17. Press the power button to turn the water heater on. Set
the desired water temperature and operating mode.
NOTE: The water heater wilt conduct a system diagnostic
check (approximately 8 minutes) prior to operation.
Routine Preventive Maintenance
At least monthly, a visual inspection should be made of the
following:
• Air Filter (Remove and inspect, clean if needed, and reinstall).
• Condensate drain pan and condensate lines.
• The lower metal drain pan for standing water which may
indicate a clogged condensate drain pan, condensate lines,
or plumbing leak.
• Leaking or damaged water piping.
• Presence of corrosive materials in the installation area.
• Presence of combustible materials near the water heater.
IMPORTANT: If you tack the necessary skills required to
properly perform this visual inspection, you should not proceed,
but get help from a qualified person.
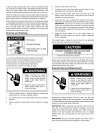
Air Filter Cleaning/Replacement
IMPORTANT: Before attempting to clean or replace the air filter
press the power button to place the water heater in Standby
Mode and turn-off power to the water heater at the circuit
breaker/fuse box.
1. Locate the screw securing the filter panel to the heat pump
shroud and loosen it.
19