22
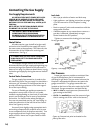
Flame Appearance / Air Shutter
Adjustment
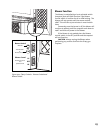
THE GI425 GAS FIREPLACE IS SHIPPED FROM THE
FACTORY EQUIPPED TO USE NATURAL GAS. IF THE
BURNER HAS BEEN CONVERTED FOR USE WITH
PROPANE, IT WILL BE NECESSARY TO ADJUST THE AIR
SHUTTER ON THE BURNER TUBE TO ACHIEVE THE
PROPER GAS TO AIR MIX. See fig. 27.
WARNING:
AIR SHUTTER ADJUSTMENTS SHOULD ONLY
BE PERFORMED BY A QUALIFIED PROFES-
SIONAL SERVICE TECHNICIAN.
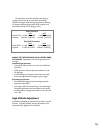
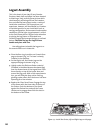
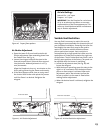
The air shutter adjustment can also help achieve the
desired flame appearance. Generally, flame appear-
ance is a matter of individual preference, however a
warm yellowish flame is most common. See fig. 26.
Closing the air shutter - will generate very long
yellow flames resulting in soot. Sooting produces
black deposits on the logs, on the inside walls of
the appliance, and potentially on the exterior
termination cap.
Sooting is caused by incomplete combustion in
the flames and lack of combustion air entering
the air shutter opening.
Opening the air shutter - will generate a flame that is
blue and transparent, or an “anemic” flame. This
flame is generally more efficient but not as pretty.
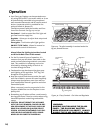
3. BURNER ADJUSTMENT: Your Jøtul GI425 gas
fireplace is equipped with a variable gas control
valve. This valve provides easy adjustment of the
flame height appearance and heat output. To
adjust the flame between the HI and LO setting,
rotate the HI/LO knob, located in the center of
the valve face. Flame height will adjust approxi-
mately 1.0” to 1.5” between the HI and LO
settings.
NO SMOKE OR SOOT SHOULD BE PRESENT. CHECK
LOG PLACEMENT IF ANY SOOT OR SMOKE IS DE-
TECTED. IF SOOT OR SMOKE PERSISTS, THE AIR
SHUTTER MAY NEED TO BE ADJUSTED.
CAUTION:
DO NOT ATTEMPT TO ALTER THE FLAME
APPEARANCE BY POSITIONING THE GAS
VALVE IN ANY OTHER POSITION OTHER
THAN THE FULL “ON” POSITION.
System Check
1. PURGING THE GAS LINE: When lighting the
appliance for the first time it will take a few
moments to clear the gas line of air. Once this
purge is complete, the appliance will operate as
described in the lighting instructions located on
the fireplace’s rating plate and back cover of this
manual.
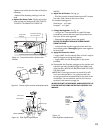
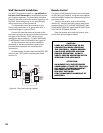
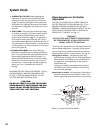
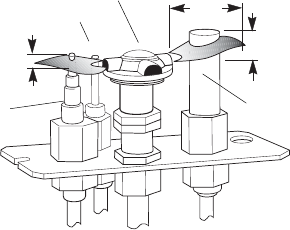
2. PILOT FLAME: The pilot flame should be steady,
not lifting or floating. The flame should be blue
in color around the pilot hood, with traces of
yellow toward the outer edges. It is imperative
that the pilot flame engulf the top 3/8” of the
thermopile (power generator) and the top 1/8” of
the quick drop out thermocouple. The pilot flame
should project out of the pilot hood 1” at all three
ports. See Figure 48.
1
(25mm)
3/8
(8mm)
Min.
1/8
(3mm)
Min.
Thermocouple
Ignitor
Thermopile
Pilot Hood
Figure 25. Correct Pilot Flame Pattern


