3
INSTALLATION INSTRUCTIONS
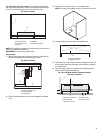
Install Cooktop in the Cabinet
Follow the manufacturer’s recommended instructions for
installing your downdraft cooktop with the downdraft blower
exhaust scroll turned straight down.
To rotate the blower exhaust scroll down, complete the following
steps.
Rotate Blower
IMPORTANT: The following additional steps must be performed
if the cooktop is being installed in a peninsula or island cabinetry.
The blower exhaust scroll is shipped from the factory set to
exhaust straight out the back of the cabinet through an exterior
wall.
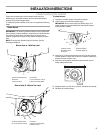
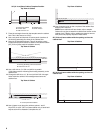
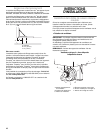
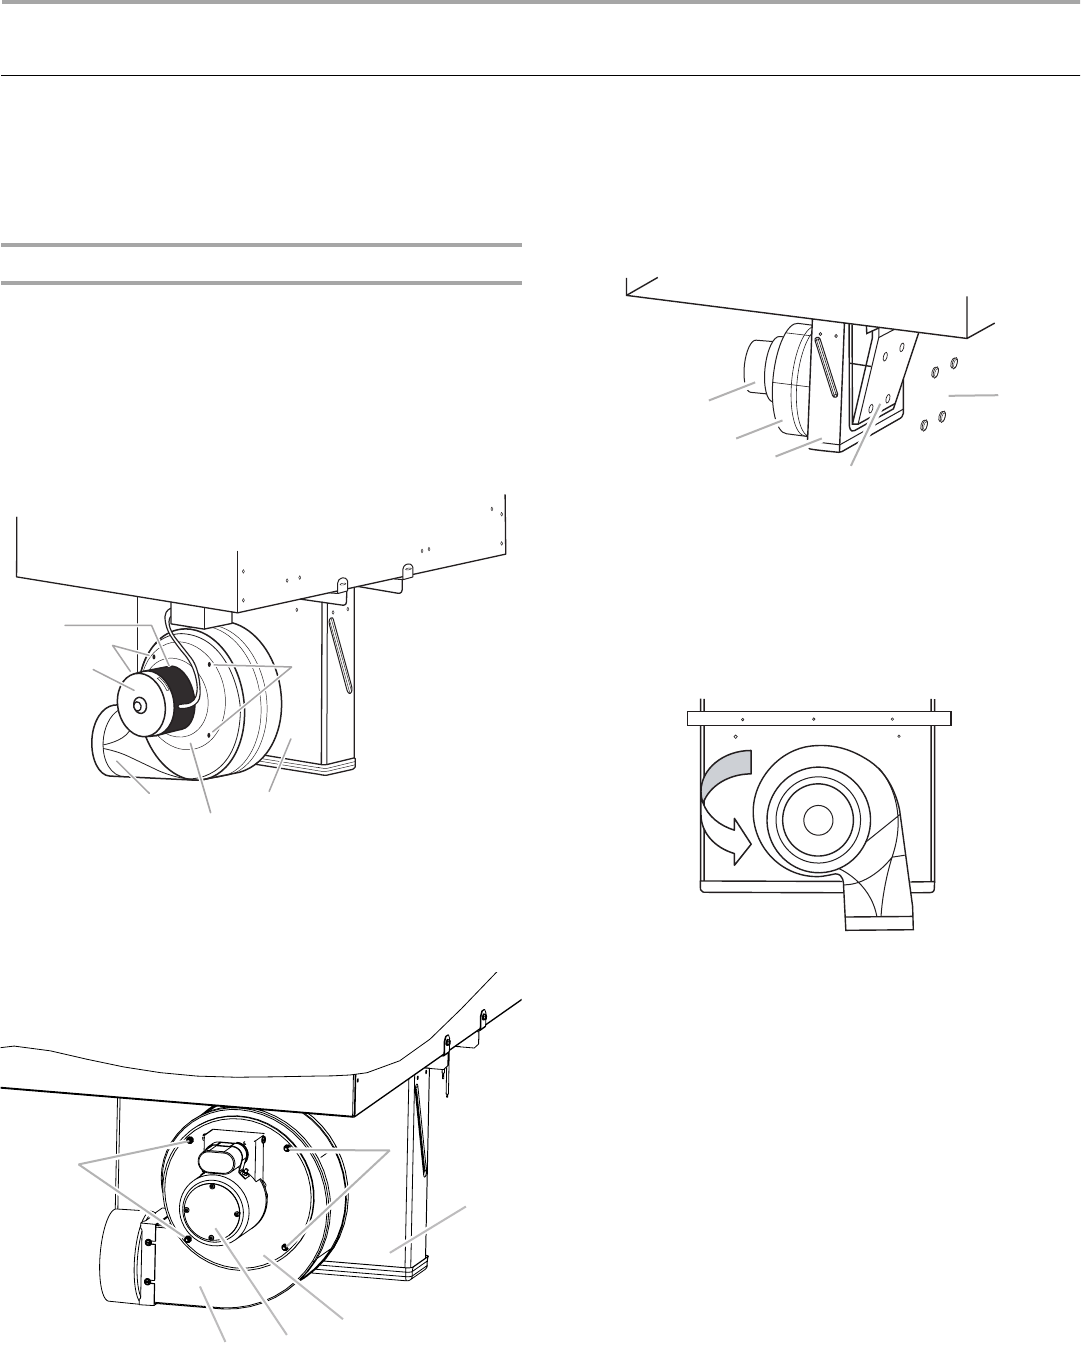
NOTE: There are two different styles of blowers. See the
following illustrations.
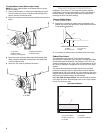
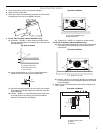
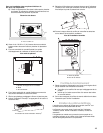
To rotate blower:
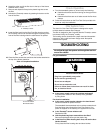
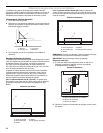
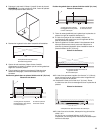
1. Locate the 4 plastic plugs in the plenum bypass.
2. Use the pliers to remove the plastic plugs.
IMPORTANT: Do not throw away the plastic plugs. The
plastic plugs must be reinstalled after the blower exhaust
scroll has been rotated.
3. Insert the ³⁄₈" socket and extension into the hole and use the
ratchet handle to loosen the nut half of a rotation. Repeat this
process for each of the 4 nuts.
4. With the nuts loosened, the blower exhaust scroll can be
easily rotated downward.
5. Retighten each nut with the ³⁄₈" socket, extension and ratchet.
6. Reinstall the 4 plastic plugs.
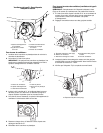
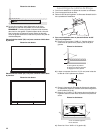
Blower Style A - With Top Label
A. Blower exhaust scroll
B. Plenum
C. Blower motor
D. Top label
E.10-32 machine nuts (4)
F. Motor mounting plate
Blower Style B - Without Top Label
A.Blower exhaust scroll
B.10-32 machine nuts (4)
C.Plenum
D. Motor mounting plate
E.Blower motor
D
E
C
A
E
F
B
B
B
C
D
E
A
A. Blower motor
B.Exhaust scroll
C.Plenum
D.Blower bypass
E.Plastic plugs (4)
A
B
C
D
E


