


13
41277-01 05/98
®
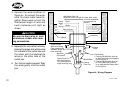
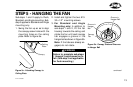
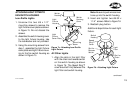
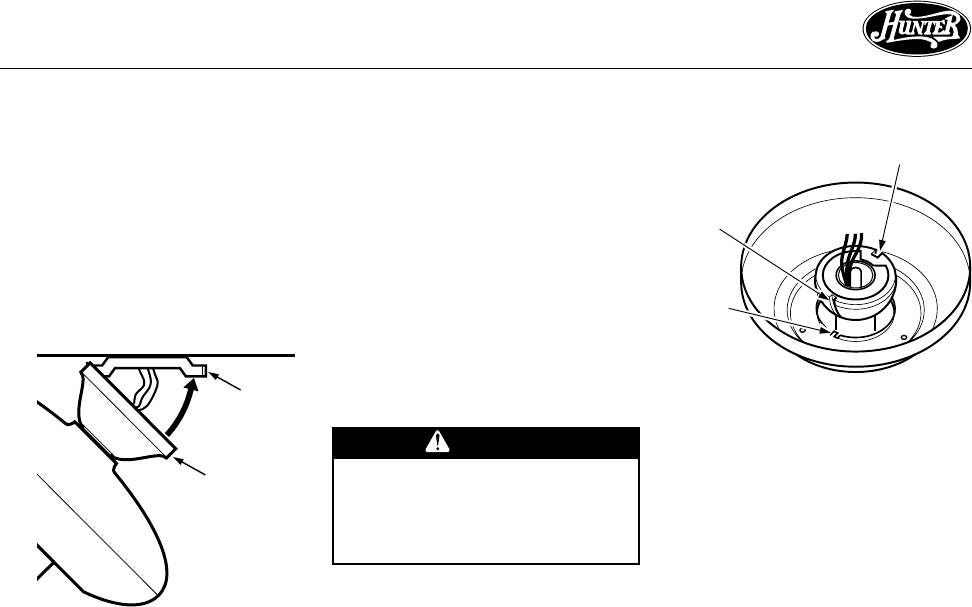
STEP 5 - HANGING THE FAN
Figure 5a - Attaching Canopy to
Ceiling Plate
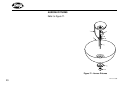
Figure 5b - Canopy Tabs and Grooves
in Hanger Ball
Sub-steps 1 and 2 apply to Flush,
Standard, and Angle mounting. Sub-
step 3 applies to Standard and Angle
mounting only.
1. Swing the fan up so as to align
the canopy screw holes with the
mounting holes on the ceiling
plate. Refer to Figure 5a.
2. Install and tighten the two #10-
32 x 1/2" mounting screws.
3. For Standard and Angle
Mounting only: In addition to
sub-steps 1 and 2, lift the fan
housing towards the ceiling and
rotate the fan until each canopy
tab engages a groove in the
hanger ball as shown in Figure 5b.
Note: If the tabs are already en-
gaged, do not rotate.
WARNING
Failure to complete sub-steps
1 through 3 could cause fan to
fall. (Sub-step 3 not applicable
for flush mounting.)
Ceiling
Plate
Canopy
Groove in
Hanger
Ball
Canopy
Tab
Groove in
Hanger Ball
continued