


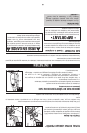
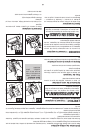
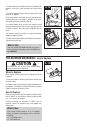
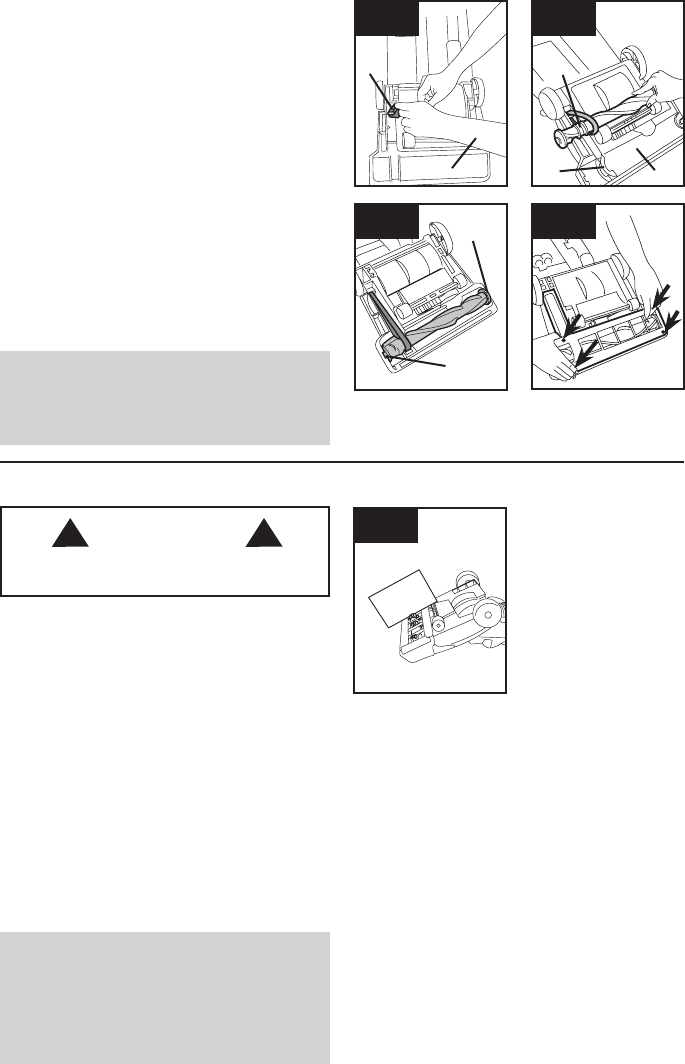
4.12 With lettering on outside of belt and positioned as
shown in box on (D), slide new belt over motor pulley
(B).
4.13 Insert agitator through belt and place belt in belt
guide (C) on agitator.
Should the agitator shield (D) become dislodged while
replacing the belt or the agitator, reposition it as shown
noting the placement of its belt guide (E).
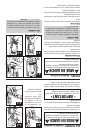
4.14 Grasp agitator firmly and fit it into position by first
sliding end opposite the belt into the rectangular slot (F)
on side of cleaner. Pull other side of agitator (G) into
place.
Turn agitator making sure belt is not pinched between
agitator and agitator shield.
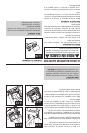
4.15 Reposition bottom plate and 4 Phillips head screws.
Tighten screws securely.
4.12
B
4.13
C
D
4.14
G
4.15
What to Buy
Use only genuine HOOVER
®
Belt with your vacuum.
When purchasing a new Belt, ask for HOOVER
®
Part
No. 38528-033.
THE AGITATOR BRUSHROLL: How to Replace
When to Replace
When agitator brushes are worn, the agitator should be
replaced.
To check condition of brushes, disconnect cleaner from
electrical outlet.
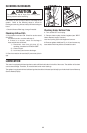
4.16 Move edge of a card across bottom plate while turn-
ing agitator. To maintain cleaning effectiveness, replace
agitator if brushes do not touch card.
How to Replace
Remove bottom plate, belt and agitator following direc-
tions in “BELT: How to Replace” section beginning with
Fig. 4-10. Discard old agitator.
Continue following the directions in “BELT: How to
Replace” section to reposition belt, new agitator and
bottom plate.
4.16
What to Buy
Your cleaner requires either a 13’ or 15” agitator.
When purchasing a new agitator, ask for one of the
following:
13” - HOOVER part N
15” - HOOVER part
CAUTION
! !
To reduce the risk of injury from moving parts,
unplug vacuum before servicing.