


Installation and Use
69-2108EFS—01 8
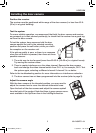
Receiver operation
When the call button is pressed on the door camera, the receiver chimes (provided
the volume switch is not set to 0) and the camera image is displayed for about thirty
seconds. If the caller presses the call button again, then the display time will extend
to another 30 seconds. Video transmission
is limited to 30 seconds to conserve cam-
era battery life and is not adjustable.
When the batteries need recharging, a
camera image is no longer shown – the
chime alone sounds (unless the battery
level is too low for sound).
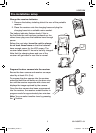
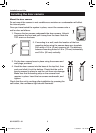
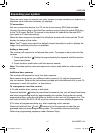
Charging base
Like a portable phone, keep the receiver topped up on the charging base for reliable
operation. Depending on use, the receiver should oper-
ate for several days off the charging base. The charg-
ing base can be used on a flat surface or mounted to a
wall using the supplied screws and wall plugs. Before
mounting in place, check that the receiver can pick up
a good signal at the intended position.
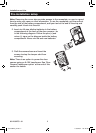
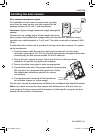
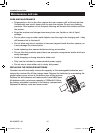
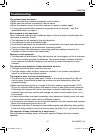
Installing the receiver
MIC VOLUME [FOR
FUTURE USE]
DISPLAY BRIGHTNESS
CHIME VOLUME
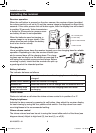
Battery indicator
The indicator behaves as follows:
Remains on when the receiver is on the charging base and is fully
charged.
Blinks once a second when the receiver is charging.
Remains off when the receiver is off the charger and the batteries are OK.
Blinks slowly once
every ten seconds
when the receiver is off the charging base and needs
recharging.
Chime flasher
Flashes to indicate a call when the chime volume control is in position 0 or 2*.
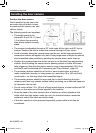
Display brightness
Activate the door camera by pressing its call button, then adjust the receiver display
for best viewing by using the four position slide switch. One step down from maxi-
mum brightness is the recommended setting.
Chime volume control
The chime volume level can be set to using the lowest slide switch of the three (see
diagram above). Adjust to high level (2), low level (1), or off (0).
69-2108EFS_A.indd 8 11/30/2007 1:51:48 PM