


9 69-0580—2
Checkout
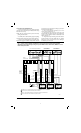
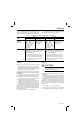
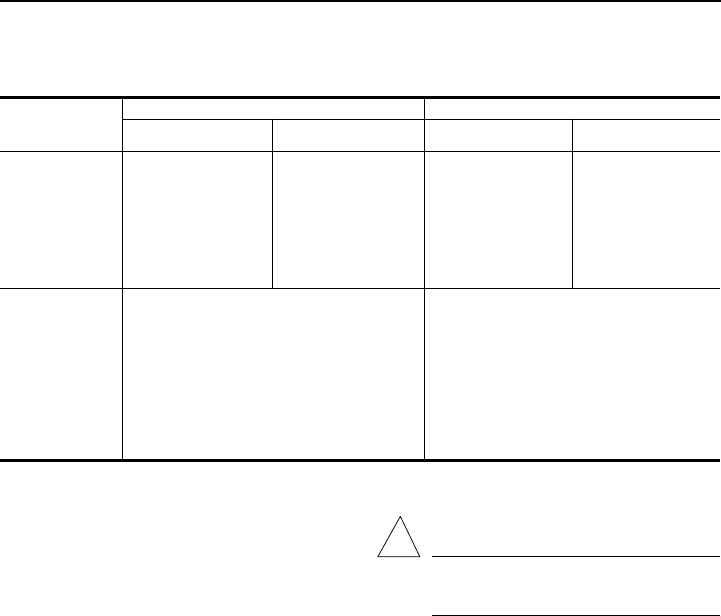
TABLE 5—SYSTEM SET-UP FOR THERMOSTAT CHECKOUT.
Heating Cooling
Control Zones Other Zones Other
Panel Zone 1 Than Zone 1 Zone 1 Than Zone 1
Mini-zone Set thermostat Move the heating set Set thermostat Move the cooling set
MABS II system switch to point lever 10° F system switch to point lever 10° F
MABS II-L HEAT; set fan switch [6° C] below room COOL; set fan [6° C] above room
to AUTO. Move the temperature. switch to AUTO. temperature.
heating set point Move the cooling
lever 10° F [6° C] set point lever 10° F
below room [6° C] above room
temperature. temperature.
MABS XX On all zone thermostats, set the system On all zone thermostats, set the system
switch to HEAT; set the fan switch to AUTO. switch to COOL; set the fan switch to AUTO.
Move the heating set point lever 10° F [6° C] Move the cooling set point lever 10° F [6° C]
below room temperature. above room temperature.
NOTE: The control panel provides a three- NOTE: The control panel provides a three-
minute time delay when 24V is applied to minute time delay when 24V is applied to
the control panel and at the end of each the control panel and at the end of each
equipment cycle. The high-speed fan runs equipment cycle. The high-speed fan runs
during this time delay. during this time delay.
HEATING
NOTE: If a plenum fan control is used in the heating
system, there will be a short delay on a call for heat to
allow the furnace to heat the plenum. The fan starts
immediately in electric heat systems. Allow 30 seconds
for the damper to open or close completely.
Make sure all zone thermostats are set as instructed in
the Heating column in Table 5. Check each zone thermo-
stat as follows:
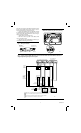
1. If thermostat has a fan switch, set it to ON. See
Fig. 13. After 30 seconds, place your hand in front of an
air register in that zone to check for air flow at the register.
2. Reset fan switch, if provided, to AUTO. After 30 sec-
onds, make sure air flow at register has stopped.
3. Move heating set point lever on zone thermostat
10° F [6° C] above room temperature to call for heat.
4. After 30 seconds (longer, if necessary, for time delay
on plenum fan control), check for warm air at the register.
5. Move heating set point lever on the zone thermostat
10° F [6° C] below room temperature to end a call for heat.
After 30 seconds (longer, if necessary, for time delay on
plenum fan control or control panel), check that air flow at
the register has stopped.
6. Repeat steps 1-5 for each zone thermostat.
COOLING
CAUTION
Do not operate cooling equipment if outdoor
temperature is below 50° F [10° C]. Refer to
manufacturer recommendations.
Make sure all zone thermostats are set as instructed in
the Cooling column in Table 5. Check each zone thermo-
stat as follows:
1. Move cooling set point lever on the zone thermostat
10° F [6° C] below room temperature to call for cooling.
2. After 30 seconds, place your hand in front of an air
register in that zone to check for cool air at the register.
3. Move the cooling set point lever on the zone thermo-
stat 10° F [6° C] above room temperature to end the call for
cooling. After 30 seconds (longer, if necessary, for time
delay on control panel), check that air flow at the register
has stopped.
4. Repeat steps 1-3 for each zone thermostat.
When system checkout is complete, return all thermo-
stats to the desired settings for normal system operation.
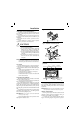
!
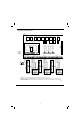
Before beginning checkout of thermostat operation,
set switches on the control panel for the desired system
operation. See instructions provided with the control panel.
To set up the system for thermostat checkout, adjust
each thermostat settings as shown in Table 5.