


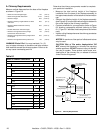

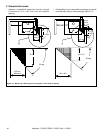
33
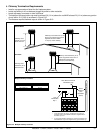
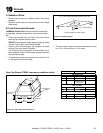
Slope Downward
(1/4 in. per foot
minimum)
Turn-down
Drip Edge
Chase
2 in. (51 mm) Collar
on Chase Top
.018 (26 ga) min.
Galvanized
Chase Top
Figure 9.3 Chase Top Construction
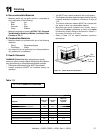
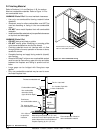
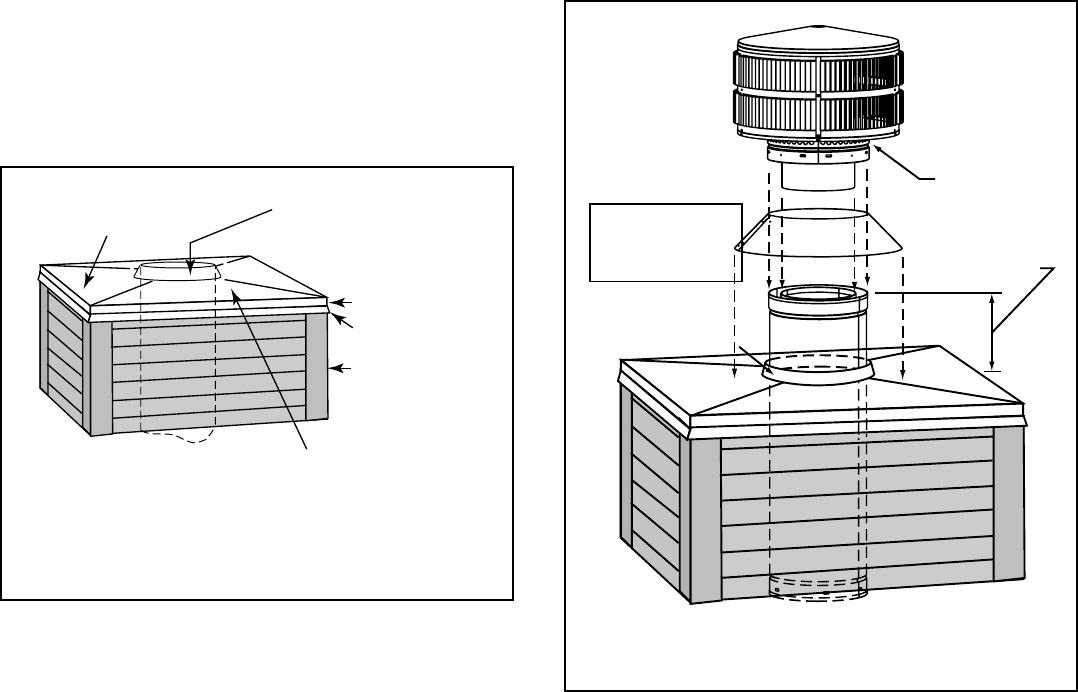
B. Install Fireplace & Chimney
Install as per Sections 7 and 8.
D. Install Termination Cap
Install the chimney sections up through the chase enclo-
sure.
• Refer to termination cap instructions.
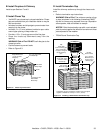
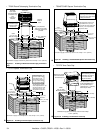
WARNING! Risk of Fire! The minimum overlap of cap
to pipe (as shown in the following illustrations) MUST
be met or chimney may separate from cap. Separation
allows sparks, heat and embers to escape.
NOTICE: Paint the termination cap with a rust-resistant
paint to protect against the effects of corrosion on those
parts exposed to the weather.
Heatilator • CL36D, CR36D • 12538 • Rev V • 05/09
C. Install Chase Top
• You MUST use a chase top in a chase installation. Chase
tops are available from your Heatilator dealer or may be
fi eld constructed.
• Include a turndown and drip edge to prevent water from
seeping into the chase.
• Include a 2 in. (51 mm) soldered, welded or spun collar
around pipe opening to keep water out.
• Provide a 1/8 in. (3 mm) gap around the fl ue pipe.
• Slope the chase top downward away from the
opening.
WARNING! Risk of Fire! DO NOT caulk the pipe to the
chase top collar.
• Caulk all seams to prevent leaks.
• Refer to Figure 9.3.
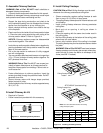
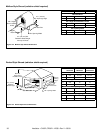
Storm
Collar
Chimney
Pipe
Chase Top
Termination
Cap
Chase
6 in. (153 mm)
Minimum top of
chase to top of
chimney pipe
Collar
2 in. (51 mm)
Minimum Height
Do NOT
block air holes
Caulk gaps between
storm collar & pipe,
and storm collar
& chase top.
Termination cap pipe and chimney section must be snapped
together to maintain an overlap of 1-1/2 in. (38 mm).
Slip
storm collar
around chimney pipe
before termination
cap pipe is snapped
into the chimney
pipe.
Figure 9.4 Installing a TR344 Round Termination Cap
• TR344 Round Termination Cap