


Page 26
Heat & Glo • NorthStar EPA Fireplace • 480-1081C
September 1, 2008
September 1, 2008
September 1, 2008
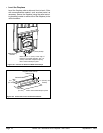
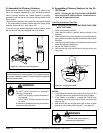
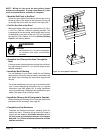
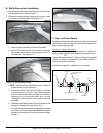
Figure 26.1 Ceiling/Attic Construction
Fire Risk
• Mustmaintain2in.(51mm)airclearance
to insulation and other combustible
materials.
WARNING
• Mark the Exit Point of the Roof
Locate the point where the chimney will exit the roof by
plumbing down to the center of the chimney. Drive a nail
up through the roof to mark the center. See Figure 26.1.
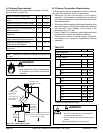
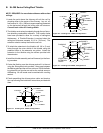
• Cut Out the Hole in the Roof
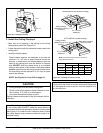
Measuretoeithersideofthenailandmarkthe14-1/2in.
x14-1/2in.(368mmx368mm)openingrequired.This
is measured on the horizontal; actual length may be larg-
er depending on the pitch of the roof. Cut out and frame
the opening. See Chapter 25 of the Uniform Building
Code for roof framing details.
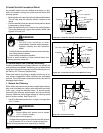
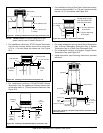
• Assemble the Chimney Sections Through the
Roof
Continue to add chimney sections through the roof open-
ing, maintaining at least a 2 in. (51 mm) air space to com-
bustible materials.
• Install the Roof Flashing
Ifaroofashingistobeused,installtheroofashing
appropriate to the roof pitch and install a termination cap
and storm collar following the instructions shipped with
the cap.
For chase installations you can use a round termination
cap, a round telescoping termination cap or a square
termination cap (See pages 62). A chase installation
must use a chase top. Chase tops are available from your
dealer. See page 14 for building a chase.
• Install the Chimney Air Kit (required in Canada):
When installing the chimney air kit, follow the instructions
provided with this accessory. See page 22.
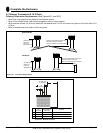
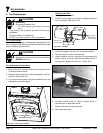
• Completion of the Enclosure
Complete thereplace enclosure,allowingspacefor
outside air ducts. Electrical wiring should not come in
contactwiththereplace.A minimum clearance of 1 in.
(25 mm) must be maintained between the replace
back and 1 in. (25 mm) minimum clearances to sides
and the enclosure.
NOTE: Wiring for fans must be done before framed
enclosure is completed. If using a Heat Zone kit, it also
must be installed before enclosure is complete.