


Page 24
7014-083E
September 1, 2008
R
CB1200-I Pellet Insert
I. Optional Log Set Placement Instructions
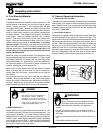
CAUTION
Logs are FRAGILE. Use extreme care when handling or
cleaning logs.
NOTE:
Due to the abrasive nature of a pellet appliance fire, the
logs are not covered under warranty. Any placement vari-
ation other than shown here can cause excessive heat
and shall void the appliance warranty.
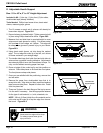
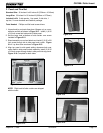
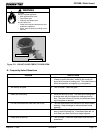
1. Place the front log in first as shown in Figure 24.1
charred area surrounding firepot.
2. Set the left and right logs onto the front log, placing
the holes in the base of the left and right logs over the
locating pins in the front log. See Figure 24.2. Ensure
that the charred ends are facing the firepot.
LOCATING PINS
Charred Areas in the Bac
Top Log
Right
Top Log, Left
Front Log
Figure 24.1
Figure 24.2
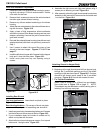
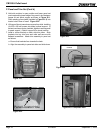
1. A 12 volt AC thermostat is required to operate this pellet
appliance. You may use the included wall mount thermo-
stat or purchase an optional programmable thermostat
or remote control. The included thermostat is equipped
with an adjustable heat anticipator. The current rating is
.05 amps. The anticipator needs to be adjusted to the
lowest setting available.
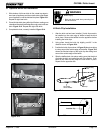
2. When mounting a thermostat on a wall, be sure to follow
your thermostat installation instructions carefully.
NOTE: Thermostat must be mounted level for accu-
rate readings. The thermostat should be mounted on
an inside wall and not in direct line with the appliance
convection air. Remove any packaging from inside
the thermostat before using.
NOTE: If the thermostat is located too close to the
appliance, you may need to set the temperature
setting slightly higher to maintain the desired tem-
perature in your home.
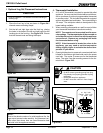
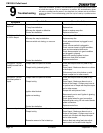
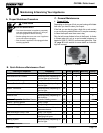
3. Open right side plane to access a 4 screw terminal block
located on the bottom right hand side next to the power
cord inlet. The center 2 screws are for the thermostat
wires. The outer 2 are the mounting screws for the ter-
minal block. Figure 24.3.
J. Thermostat Installation
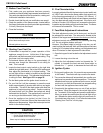
Shock hazard.
• Do NOT remove grounding prong from plug.
• Plug directly into properly grounded 3 prong
receptacle.
• Route cord away from appliance.
•
Do NOT route cord under or in front of appli-
ance.
CAUTION
er inal lock
Center Scre s for
er ostat ires
Po er Outlet
Figure 24.3