


SIDE DOOR GASKET REPLACEMENT PROCEDURES:
1. To replace the side door gasket, open the door and support it so
the hinge plate supports no weight. Remove the three allen
head bolts and lift the plate out of the way.
a. Do not remove the door! The side door uses torsion
springs to ease closing. Removing the door could
cause unexpected spring tension release.
2. Pull off the old rope gasket. Carefully remove any old gasket
material and adhesive with a small screwdriver, or small cold
chisel and a hammer. Clean all gasket channels with a small
wire brush if necessary.
3. Apply a small amount of waterglass (sodium silicate), or a 1/8
inch bead of an approved gasket adhesive into the bottom of
the entire gasket groove.
4. Start at the center of the hinge side of the door and push the
new gasket into place uniformly without stretching or
compressing the gasket material. Pinch the gasket into place as
necessary.
5. Once the gasket is installed, re-install the hinge plate and close
the door immediately to fully seat the gasket in the channel and
ensure complete adhesion. Waterglass will dry quickly, and
does not require heat to cure. Other adhesives may need heat to
cure – so follow the product manufacturer’s instructions.
LATCH ADJUSTMENT PROCEDURES:
(Latch Kit #90-73010)
1. Test gasket seal quality with small latch adjustments first. Too
much pressure makes the door difficult to open and close and
prematurely wears the gasket.
2. Loosen the setscrew and rotate the handle assembly to increase
or decrease spring pressure.
GLASS
Do not operate the stove with a broken door glass. Do not
abuse the front door by striking or slamming. When
necessary, clean the glass with commercial stove glass
cleaners, which are available from your local dealer. Never
attempt to clean the glass while the fire is burning or while
the glass is hot. Remove deposits by following the
instructions provided with the cleaner. To clean heavier,
stubborn deposits, remove the door from the stove (See door
removal procedures on page 20). Lay the door face down on
a clean, padded workbench or table with the handle hanging
over an edge, apply the cleaner to the glass and allow it to
soak for a few minutes to allow the cleaner to penetrate any
heavy deposits. Wipe the cleaner off with a soft cloth, or
black & white newsprint.
Important: scratching or etching the glass will
weaken the integrity of the glass. Do not use a razor
blade, steel wool, or any other abrasive material to
clean the glass. Use a cleaner specifically
manufactured for woodstoves only.
The front door glass is a 5mm ceramic, shock-resistant glass,
made specifically for use in woodstoves. Do not use any
replacement glass other than the ceramic glass manufactured
and supplied for use by HearthStone in this woodstove.
Replacement glass is available through your local dealer.
HearthStone Quality Home Heating Products, Inc ® Equinox Model 8000
21
Replace the door glass immediately if broken or chipped.
Contact your local dealer for replacement glass. The glass kit
includes instructions and everything needed for the repair. If
you replace the glass yourself, wear work gloves and safety
glasses.
Required Glass Kit: Part Number: 90-58205 (5mm Ceramic
Glass, gasket, and clips).
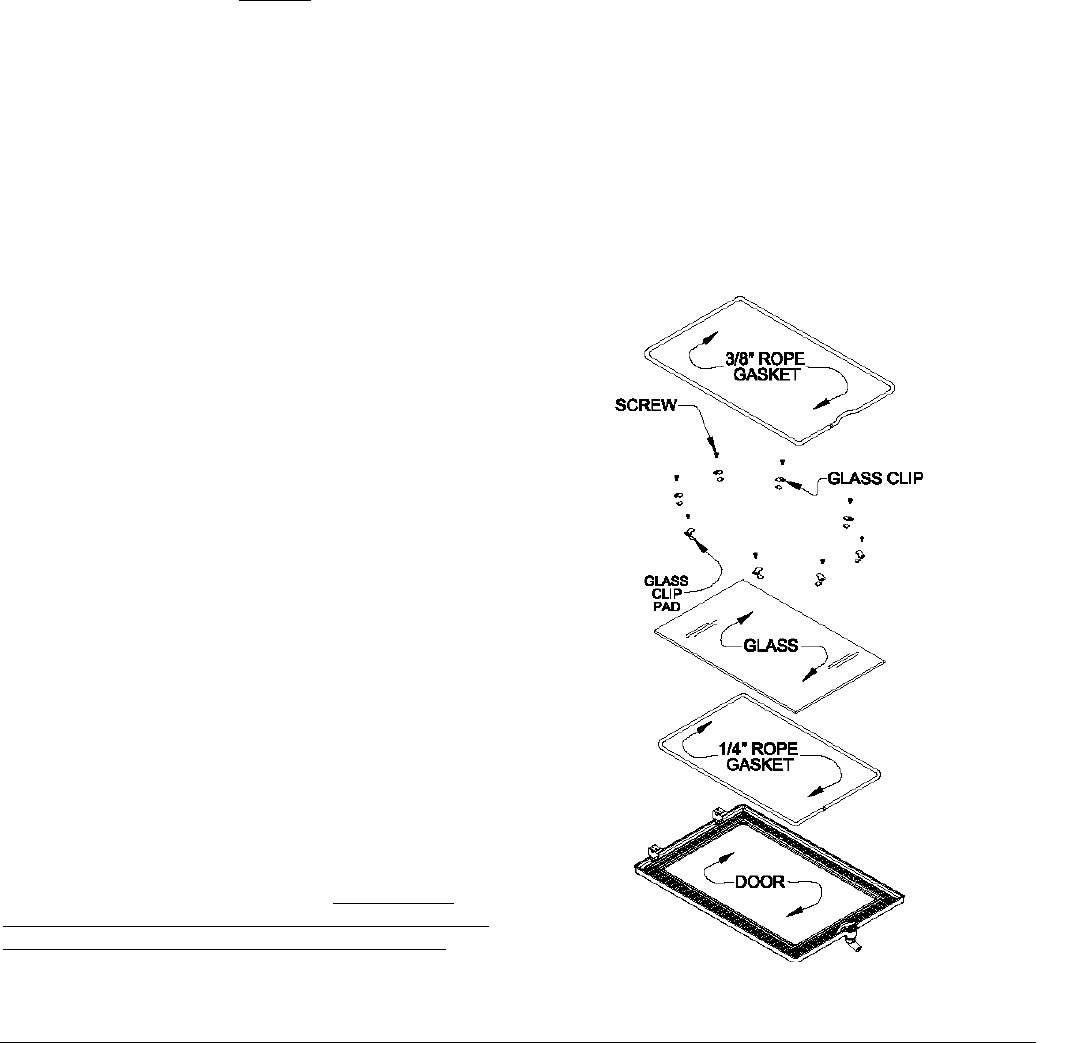
GLASS REPLACEMENT PROCEDURES:
1. Follow the instructions included with the replacement glass kit.
2. Remove the door (see door removal procedure on page 20).
3. Remove the screws from the glass retainer clips (use
penetrating oil if necessary) – remove the clips (8) and lift off
the glass. Set aside the clips for reinstallation.
4. Carefully lift the damaged glass out of the door and discard.
5. Remove any remaining glass and old gasket material.
6. Clean the screw holes and place a small amount of anti-seize
compound in each one.
7. Install the ¼ inch rope gasket – peel off the adhesive backing,
and press the gasket uniformly into the gasket channel.
8. Place the new glass onto the door.
9. Important! Center the glass and ensure that the edges of the
glass are parallel with the edges of the opening.
10. Check glass position again (centered, and parallel), then screw
the glass retainer clips back on the door.
11. Apply a light film of anti-seize lubricant on the door’s hinge
pins and bushings if needed.
12. Install the door.
13. After five or six fires, check the glass clip screws, and
retighten if necessary.
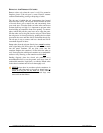
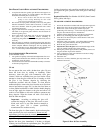
Figure 8: Door & Glass Assembly