


1
0
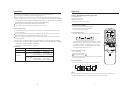
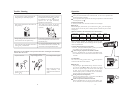
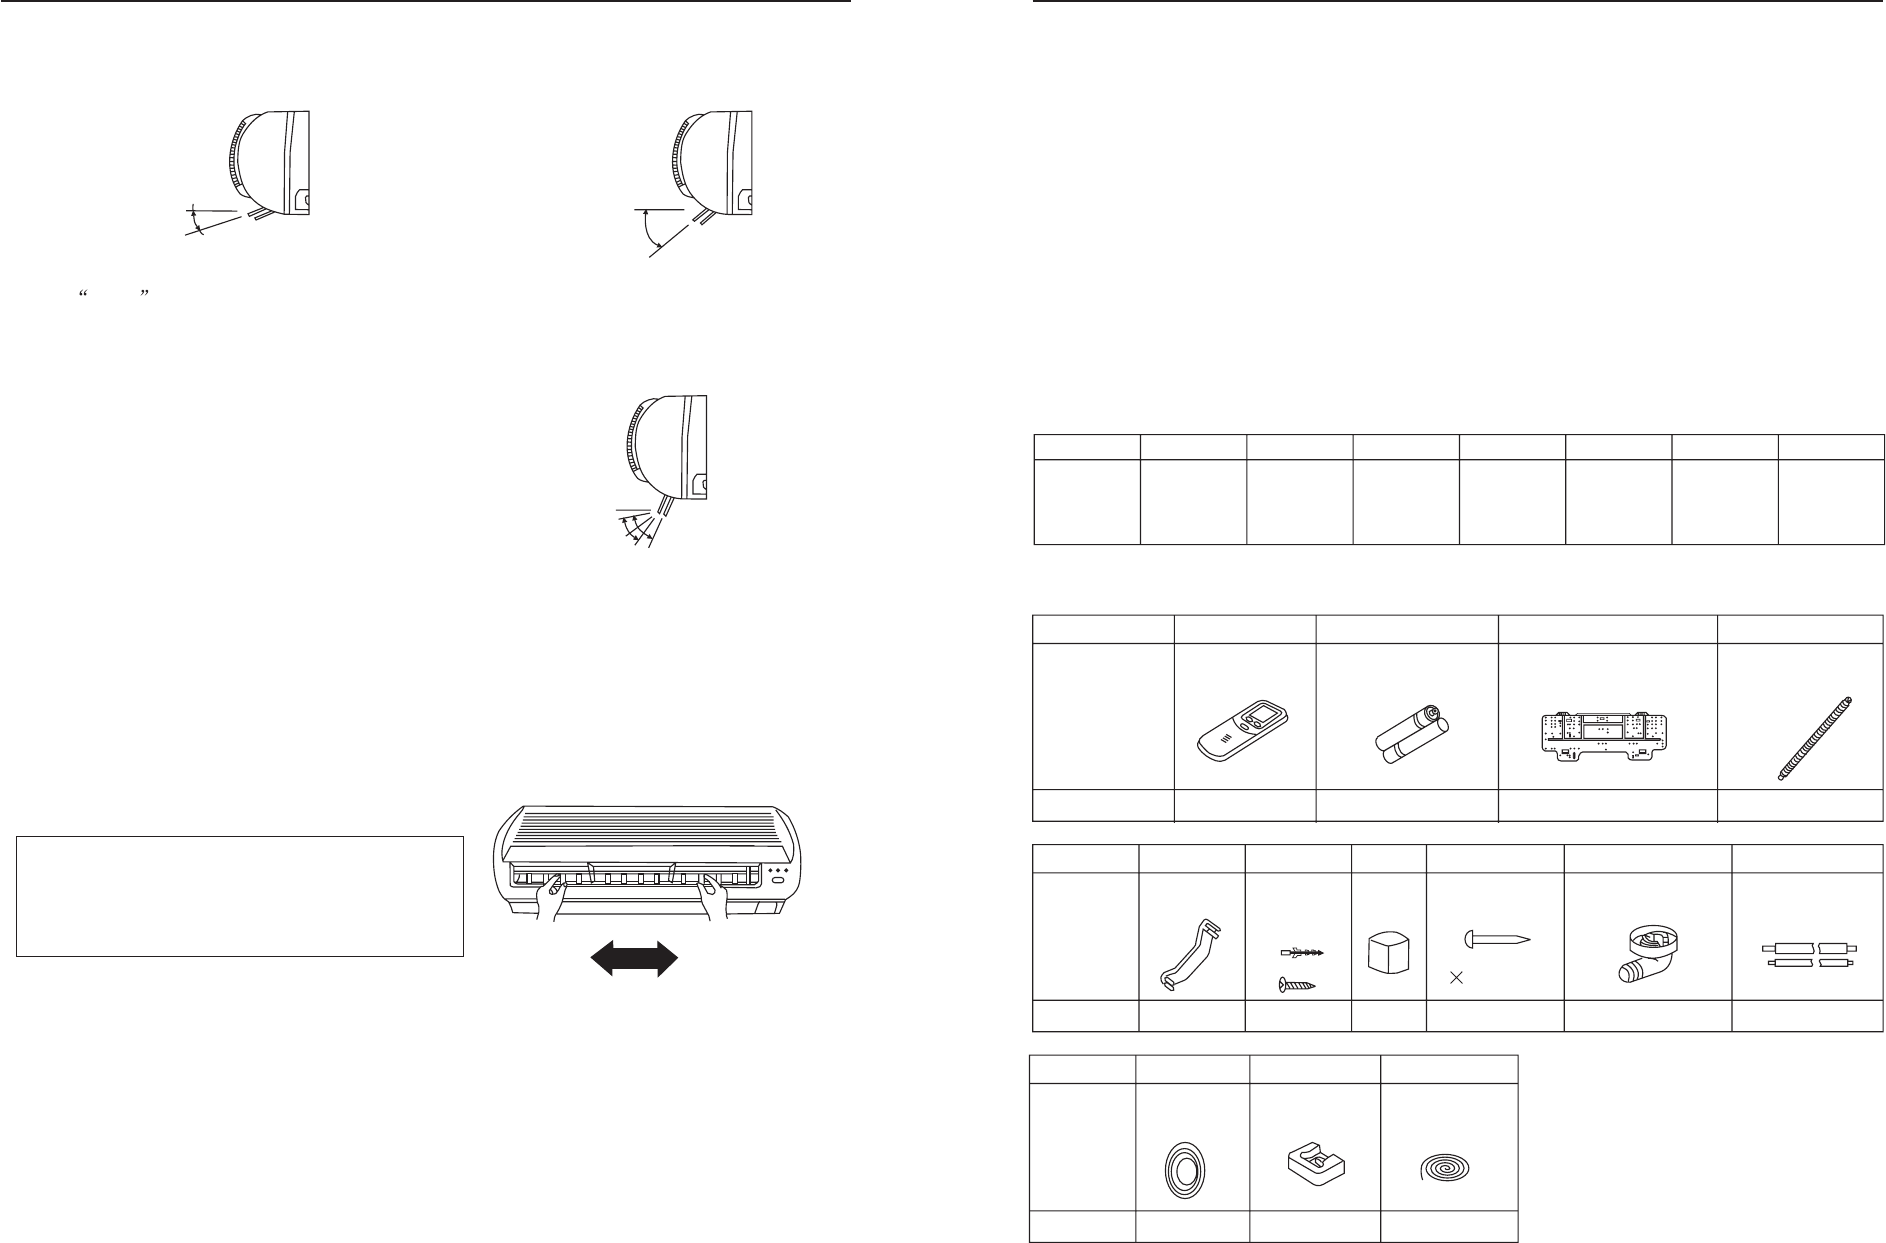
Cooling Mode
Approx.10
o
10
o
Heating Mode
Approx.60
o
Horizontal
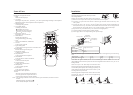
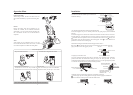
5. Adjustment of Air Flow Direction
After selecting the mode, swing louver will automatically be opened to the position as the drawing
indicates:
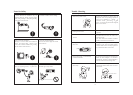
Up and Down Adjustment (with remote controller)
Press swing button once , the swing louver will swing automatically within the range as
indicated in the drawing; press the button again, the swing louver will stop at the current position.
The remote controller will remember the current swing position, and each time when you turn
on the air conditioner, the swing louver will automatically stop at the position set previously.
Notes:
When the humidity is very high, if all the horizontal
louvers are turned left or right, the
outlet would leak water.
6. Turn off
Press ON/OFF button to turn off the unit; all the displays disappear from LCD and all the lamps
on indoor unit go out. And the swing louvers will all be closed automatically.
Notes: After turning off, the unit must not be restarted until 3 minutes later to protect the system.
Hints:
As cold air flows downward in COOL mode, adjusting air flow horizontally will be much more
helpful for a better air circulation.
As warm air flows upward in HEAT mode, adjusting air flow downward will be much more helpful
for a better air circulation.
Be careful not to catch cold when cold air blows downward.
Notes:
When cooling or dehumidifying, do not let the swing louver be downward for long time,
otherwise the outlet would be dew and leak water. Even if the louver is downward for long
time, after one hour, it will be automatically moved to the position which is 10 to
horizontal position. Don't turn the louver manually, otherwise it would work abnormally. If
the swing louver works abnormally, turn off the unit, then turn on again, adjust it with the
remote controller.
o
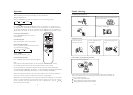
Left and Right Adjustment(manual)
As the drawing below, turn the vertical louver to adjust the left and right air flow direction.
Operat
i
on
Approx.
Cooling approx.45
0
Heating approx.60
0
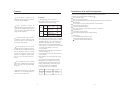
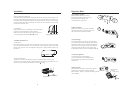
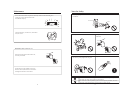
Installation Tools
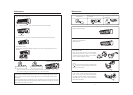
Self-contained Accessories
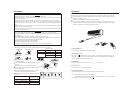
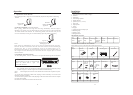
Accessories Delivered with Your Air Conditioner
Please check if your unit is delivered with the following accessories.
No. A B C D E F G
Name of
Parts
No.
No.
No.
Qty
Qty
Qty
1
5
11
6
12
78
13
910
1
1
1
18
1
116
4
1
2
2
3
Shape
Shape
Shape
Remote
controller
Pipe clip
Piping Hole
Cover
Expansion
Screw &
Bushing
Rubber
Cushion
Putty Cement Steel
Nail
450
Connection
Wire
Drain Elbow Connection
Pipe
Batteries Mounting plate
Non-
adhesive
Tape
Adhesive
Tape
Connecting
Hose
Heat
Insulation
Material
Gypsum
Powder
Drain Hose Pipe Clip
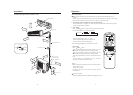
1. Screw Driver (flat head, wabbler, triangle)
2. Steel Saw
3. 60mm Drill
4. Inner Hexagon Spanner
5. Shifting Spanner
6. Spanner (14,17,19, 27 mm)
7. Pipe Cutter
8. Pipe Expander
9. Knives
10. Clippers
11. Leakage Checker or Soap Liquid
12. Measuring Tape
13. Scraper or File
14. Refrigeration Oil
2
3
1
4
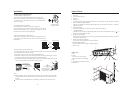
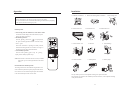
Drain Hose
Installat
i
on