


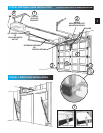
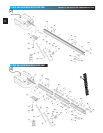
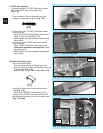
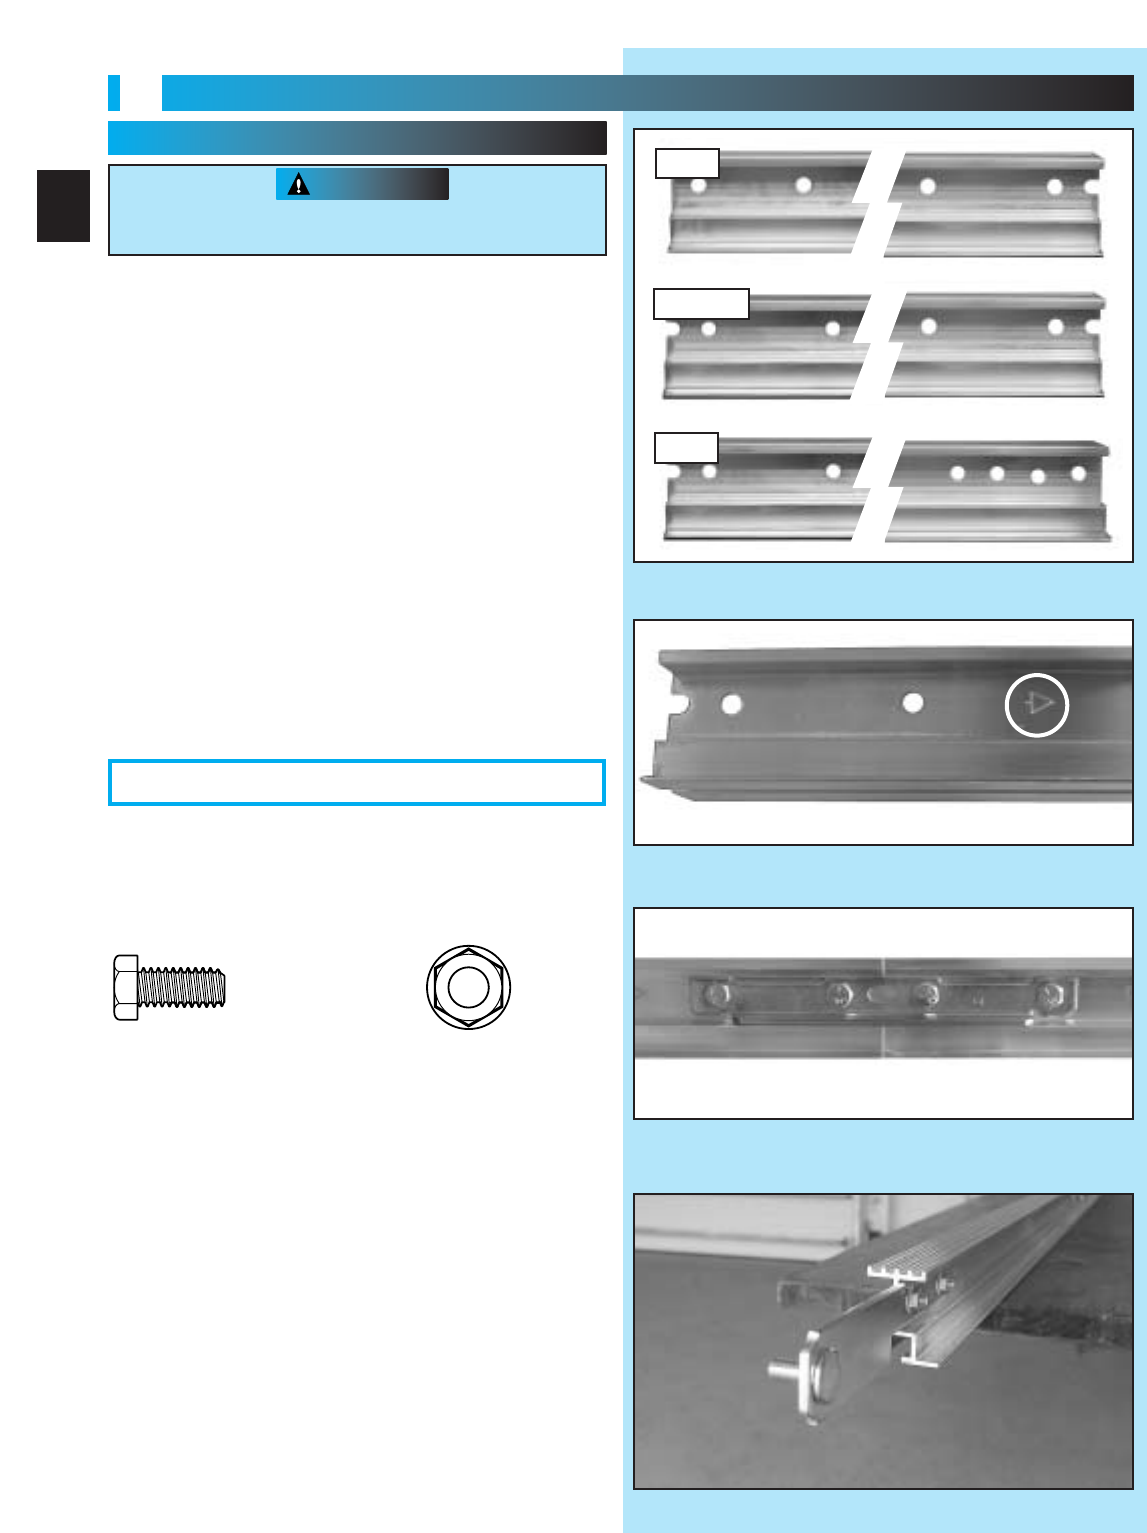
FIG. 1-4 Attach rail strap.
8
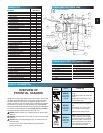
OPERATOR ASSEMBLY
FOR HELP-1.800.354.3643 OR GENIECOMPANY.COM
1
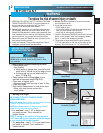
NOTE: For 1-piece rail—skip to step 4.
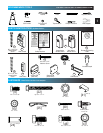
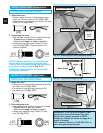
1. Identify the rail sections (Fig. 1-1).
• First rail section (attaches to power head).
– 2 holes each end.
– Half-circle notch 1 end.
– Motor end has no notch.
• Middle rail section.
–
2 holes & half-circle notch each end.
• End rail section (attaches to door).
– Has 4 holes on door end.
NOTE: Rail assemblies are for 7 foot 6 inch high
door. An extension kit for an 8 foot high door is
available.
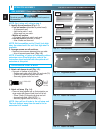
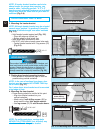
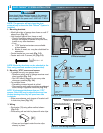
2. Arrange arrows on rail sections.
• Sections have arrows stamped into one side.
–
Aim all arrows toward door. (Fig. 1-2)
NOTE:
If installing a 3-piece rail assembly with an
extension on an 8 foot high door, refer to the
instruction sheet included with the optional rail
extension at this point.
OPEN BLUE PARTS BAG
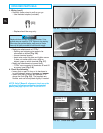
3. Attach rail clamps to rail (Fig. 1-3).
• Use pair of clamps at both joints.
– Fasten each pair with 4 bolts (9) and nuts (10).
– Check rail sections aligned and level.
– Securely tighten bolts and nuts.
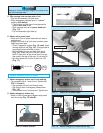
4.
Attach rail strap (Fig. 1-4).
• Place rail strap against rail so that projection on
strap mates with second hole from end of rail.
–
Place 2 bolts (9) through rail strap and rail.
–
Ignore fourth hole. (See NOTE)
–
Securely tighten bolts and nuts (10).
NOTE:
Your rail has 4 holes in the rail strap end.
The hole furthest away from the end is for an
extension kit if needed.
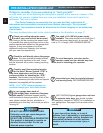
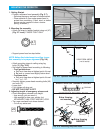
Drive chain can slide out of rails. Do not run until operator is
fully assembled.
CAUTION
FIG. 1-1 Rail sections.
FIG. 1-2 Alignment arrows.
FIG. 1-3 Attach rail clamps.
[
10
]
[
9
]
RAIL ASSEMBLY: Use a clean, flat surface.
First
Middle
End
1/4"-20
1/4"-20 x 5/8"