


4
USER INSTRUCTIONS
1. GENERAL
1.1 A competent person must carry out installation and
servicing.
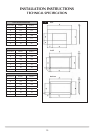
1.2 In all correspondence, please quote the appliance type and
serial number, which can be found on the data badge
located on a plate inside the controls compartment
1.3 Do not place curtains above the fire:
You must have 300mm (1’) clearance between the fire and
any curtains at either side.
1.4 If any cracks appear in the glass panel do not use the
appliance until the panel has been replaced.
1.5 In the unlikely event the appliance is receiving interference
from other electronic devices, the handset/Control box can
be re-programmed. Please consult your dealer if you think
this may be the case.
1.6 This product is guaranteed for 2 years from the date of
installation, as set out in the terms and conditions of sale
between Gazco and your local Gazco dealer. Please consult
with your local Gazco dealer if you have any questions. In
all correspondence always quote the Model Number and
Serial Number.
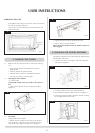
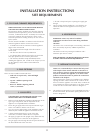
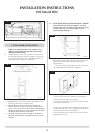
2. LIGHTING THE STUDIO
There are two ways of lighting the Studio:
2A - THERMOSTATIC and TIMER REMOTE CONTROL
1
AR1883
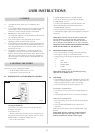
Turning the Studio On
Your remote can control the gas fire from pilot ignition
through to shut down.
To turn the fire on:
The pilot and main burner ignite and the remote is now in
remote automatically maintains that temperature
set periods
NOTE: Wh E N O p E r a T i N g T h E fi rE iN TE m p O r Ti m E r m O d E ,
T h E p i l O T r E m a i N s liT a N d T h E f ir E T h E N au TO maT ic al ly
sWiTchEs O N aT p r O g r a m m E d T i m E s TO b r iN g T h E r O O m TO
T h E sET TE mp Era Tu rE W h E T h E r O r N O T y O u ar E iN T h E r OO m .
NEVER LEAVE ANY COMBUSTIBLE MATERIALS WITHIN 1
METRE OF THE FRONT OF THE APPLIANCE.
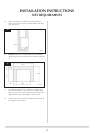
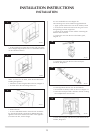
2.1 SWITCHING BETWEEN MODES
are:
DAY
and back to MAN
NOTE: MAN mode can also be reached by pressing
either the UP or DOWN arrow
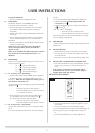
2.2 MAN MODE
button to light the appliance. You hear a click as the fire
begins the ignition process , (up to 30 seconds)
stage
one stage
minimum
At the lowest point the fire goes to ‘standby mode’ (only
pilot lit)
NOTE: While pressing a button a symbol indicating
transmission appears on the display. The receiver
confirms transmission with an acoustic signal.