


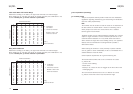
UK/IRL
29
UK/IRL
28
UK/IRLUK/IRL
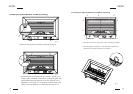
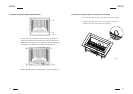
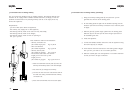
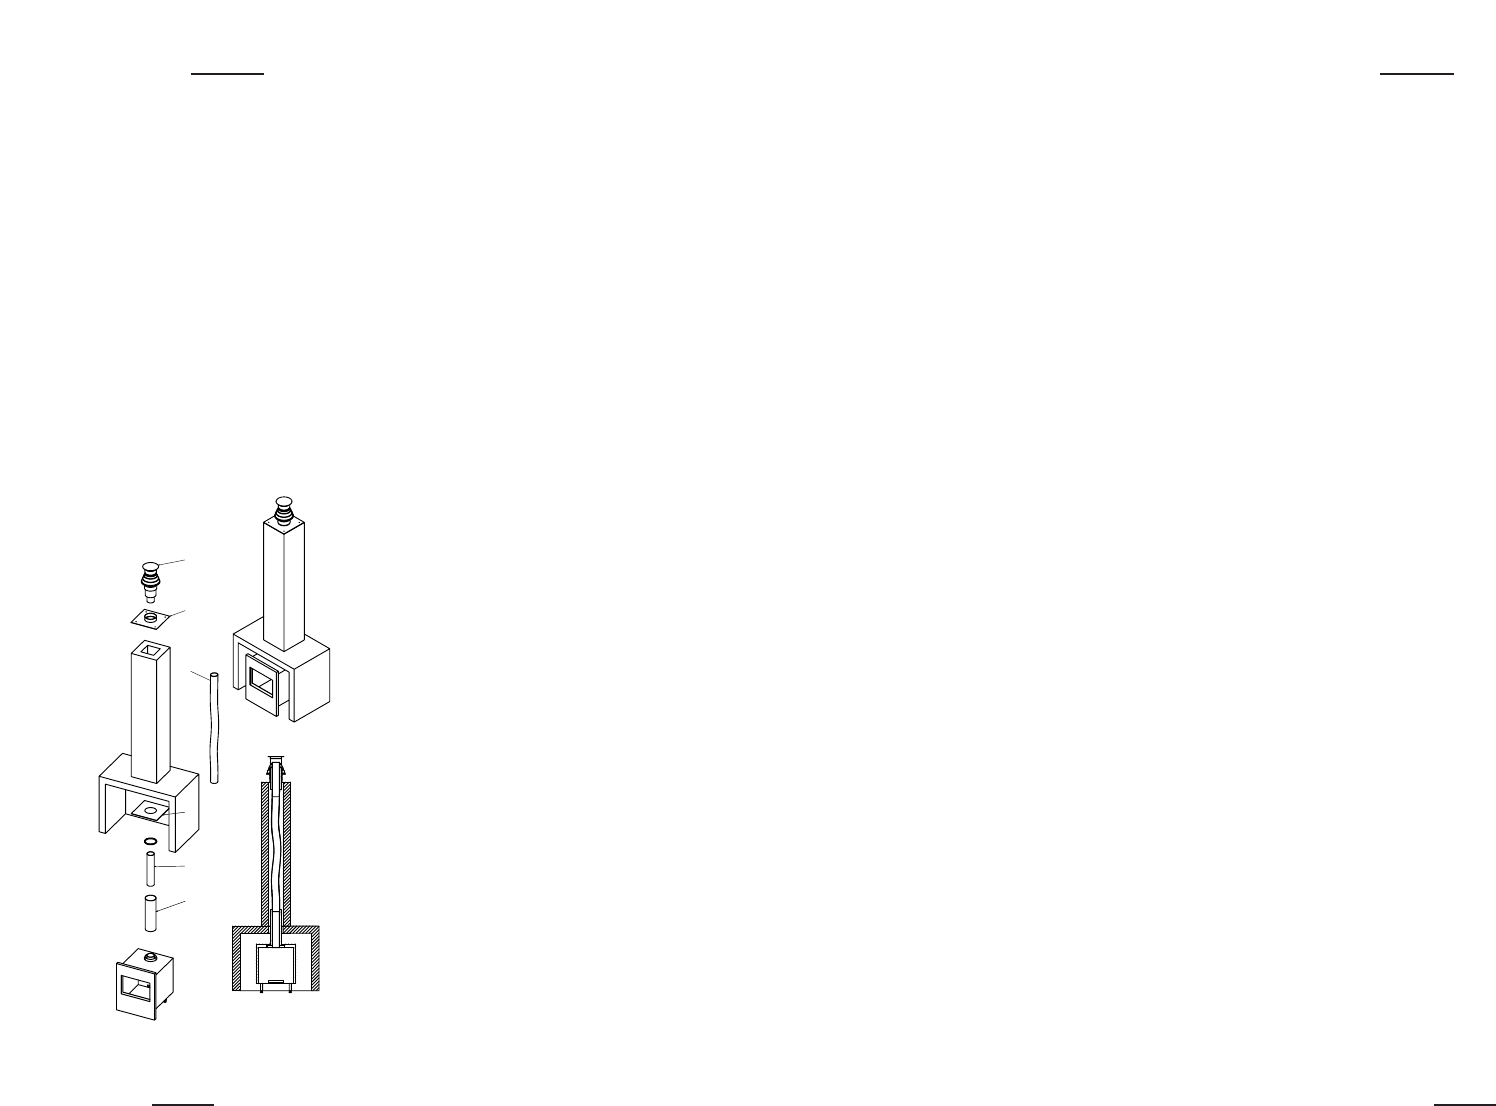
5.2 Connection onto an existing chimney (continuing)
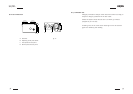
5. Fixing the chimney sealing plate (D) and place the 150 mm
grommet into the hole of the sealing plate.
6. Fix the sealing plate air tight into the builders opening (use the
isolation rope from the chimney connection set to make the plate
air tight).
7. Slide the pipe (E) 150mm length 500mm into the sealing plate.
Slide this pipe so far that you will have enough space later on
for assembling the liner.
8. Install the appliance.
9. Connect the flexible stainless steel liner onto the appliance using
the 100mm pipe (F) as adapter.
10. If the distance from the flue outlet to the sealing plate is bigger
then 300 mm, you have to use a concentric pipe first.
11. Slide the outside pipe onto the appliance or concentric extension
so that you have a air tight connection.
UK/IRLUK/IRL
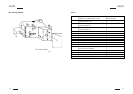
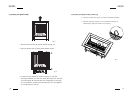
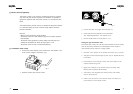
5.2 Connection onto an existing chimney
You can connect the appliance onto an existing chimney. The existing chimney then
functions as air supply, where a flexible stainless steel liner (to BS715) of 100 mm
performs the flue function. Any existing chimney used as an air supply must only
service this appliance.
Requirements:
- 300 mm of free space above the appliance;
- The chimney only supply’s air to this appliance;
- The existing chimney needs to be clean and very well swept;
- The existing chimney needs to be airtight;
- The existing chimney needs to have an opening of
min. 150 x 150 mm.
Parts needed for this kind of installation:
- Chimney connection set
part number A9225000 Fig 20 part D
- Short roof terminal
part number A9266100 Fig 19 part B
- Chimney closure plate
part number A 9240000 Fig 19 part A
- Two stainless steel tubes one 100 mm -
length 500 mm and one 150 mm -
length 500 mm
part number A 9273900 Fig 19 part E and F
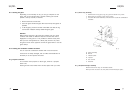
1. Place the aluminium closure plate (A) onto the
chimney. Permanently attach and make airtight.
2. Pull the liner (C) through the chimney.
3. Connect the liner onto the roof terminal and fix
this with the clamp provided with the chimney
connection set.
4. Place the roof terminal onto the closure plate.
F
E
D
C
B
A
fig. 20