


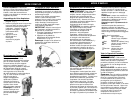
Suggested Pile Height Setting:
You may need to raise or lower the
height of the vacuum depending on the
surface being vacuumed, such as
scatter rugs and longer pile carpets.
Suggested settings are:
Highest accessories
High shag carpet, long pile,
plush scatter rugs
Med medium to long pile
Low short to medium pile,
bare floors
Floor very low pile, bare floors
Emptying the Dust Cup
(Container)
WARNING: Always unplug the
power cord from the electrical outlet
before removing the dust cup
(container), filter or performing
maintenance or trouble shooting
checks.
CAUTION: Never allow the amount of
debris in the dust cup to exceed the
MAX line on the side of the dust cup.
Note: For best results, clean your dust
cup, filters and pre-motor filter frame
regularly. When suction appears
reduced, it may be due to a dirty dust
cup, dust cup screen, pre-motor filter or
pre-motor filter frame. We recommend
washing the pre-motor filter and pre-
motor filter frame once every three (3)
months and replacing the pre-motor
filter once every year or as needed.
IMPORTANT:
• DO NOT use the vacuum without
the dust cup, dust cup screen, filter
or pre-motor filter frame in place.
• DO NOT use detergents to wash
the dust cup, dust cup screen, filter
or pre-motor filter frame.
• DO NOT wash the dust cup, dust
cup screen, filter or pre-motor filter
frame in the dishwasher.
• Ensure that all parts are
COMPLETELY dry before replacing
into the main body. Allow the
pre-motor filter and pre-motor filter
frame to air dry for 24 hours.
• DO NOT DRY ANY PARTS IN THE
DRYER.
Note:DO NOTpress down on the
power nozzle while turning the knob.
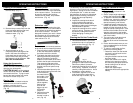
This upright vacuum can be used on
multiple types of carpeting, bare floors or
upholstery with accessories. Place the
vacuum in the upright position and use
the highest setting when using the
accessories. Doing this will help prevent
possible floor damage as the beater
brush will continue to brush the same
area of the floor while you are using the
accessories. Set the height adjustment
knob to the lowest setting for maximum
cleaning. If the vacuum is too difficult to
push, turn the knob to the next highest
setting. The beater brush must reach the
carpet for effective cleaning.
Note: When changing the height of the
power nozzle, it will only be noticeable
when the handle is released.
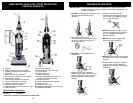
Carpet Height Adjustment
WARNING: To avoid injury, keep
loose clothing, hair, fingers and all
other body parts away from any
moving part (such as the beater brush).
Make sure the vacuum is turned off
and unplugged before adjusting the
carpet height adjustment knob.
ATTENTION: Special care is
required when vacuuming certain types
of carpet or floor covering. Always
check the carpet or floor covering
manufacturer’s recommended cleaning
instructions before vacuuming.
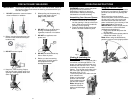
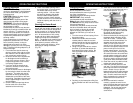
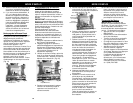
On the front of the power nozzle there
is a carpet height adjustment knob that
raises and lowers the motorized power
nozzle to match the type of carpet or
floor surface. (Fig. 4)
OPERATING INSTRUCTIONS
Fig. 4
5
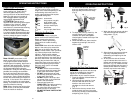
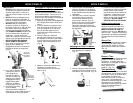
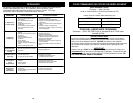
Fig. 5
Dust Cup
Release
Button
Fig. 8Fig. 7
Fig. 6
Trapdoor
Release
Button
OPERATING INSTRUCTIONS
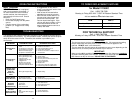
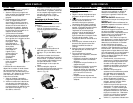
Cleaning the Dust Cup Screen and
Dust Cup
Keep the dust cup screen and dust cup
free of dirt and debris by cleaning it
regularly or as needed for peak
performance of your vacuum cleaner.
1. Press the trapdoor release button to
open the trapdoor.
2. Hold the dust cup container in one
hand and with the other turn the
handle or the cover counter
clockwise to unlock and remove.
(Fig. 7)
3. Remove the dust cup screen from
inside the dust cup cover by turning
the dust cup screen counterclockwise
and pulling it out. (Fig. 8)
5. Allow the dust cup screen and dust
cup to dry completely before re-
assembling and replacing into the
main body.
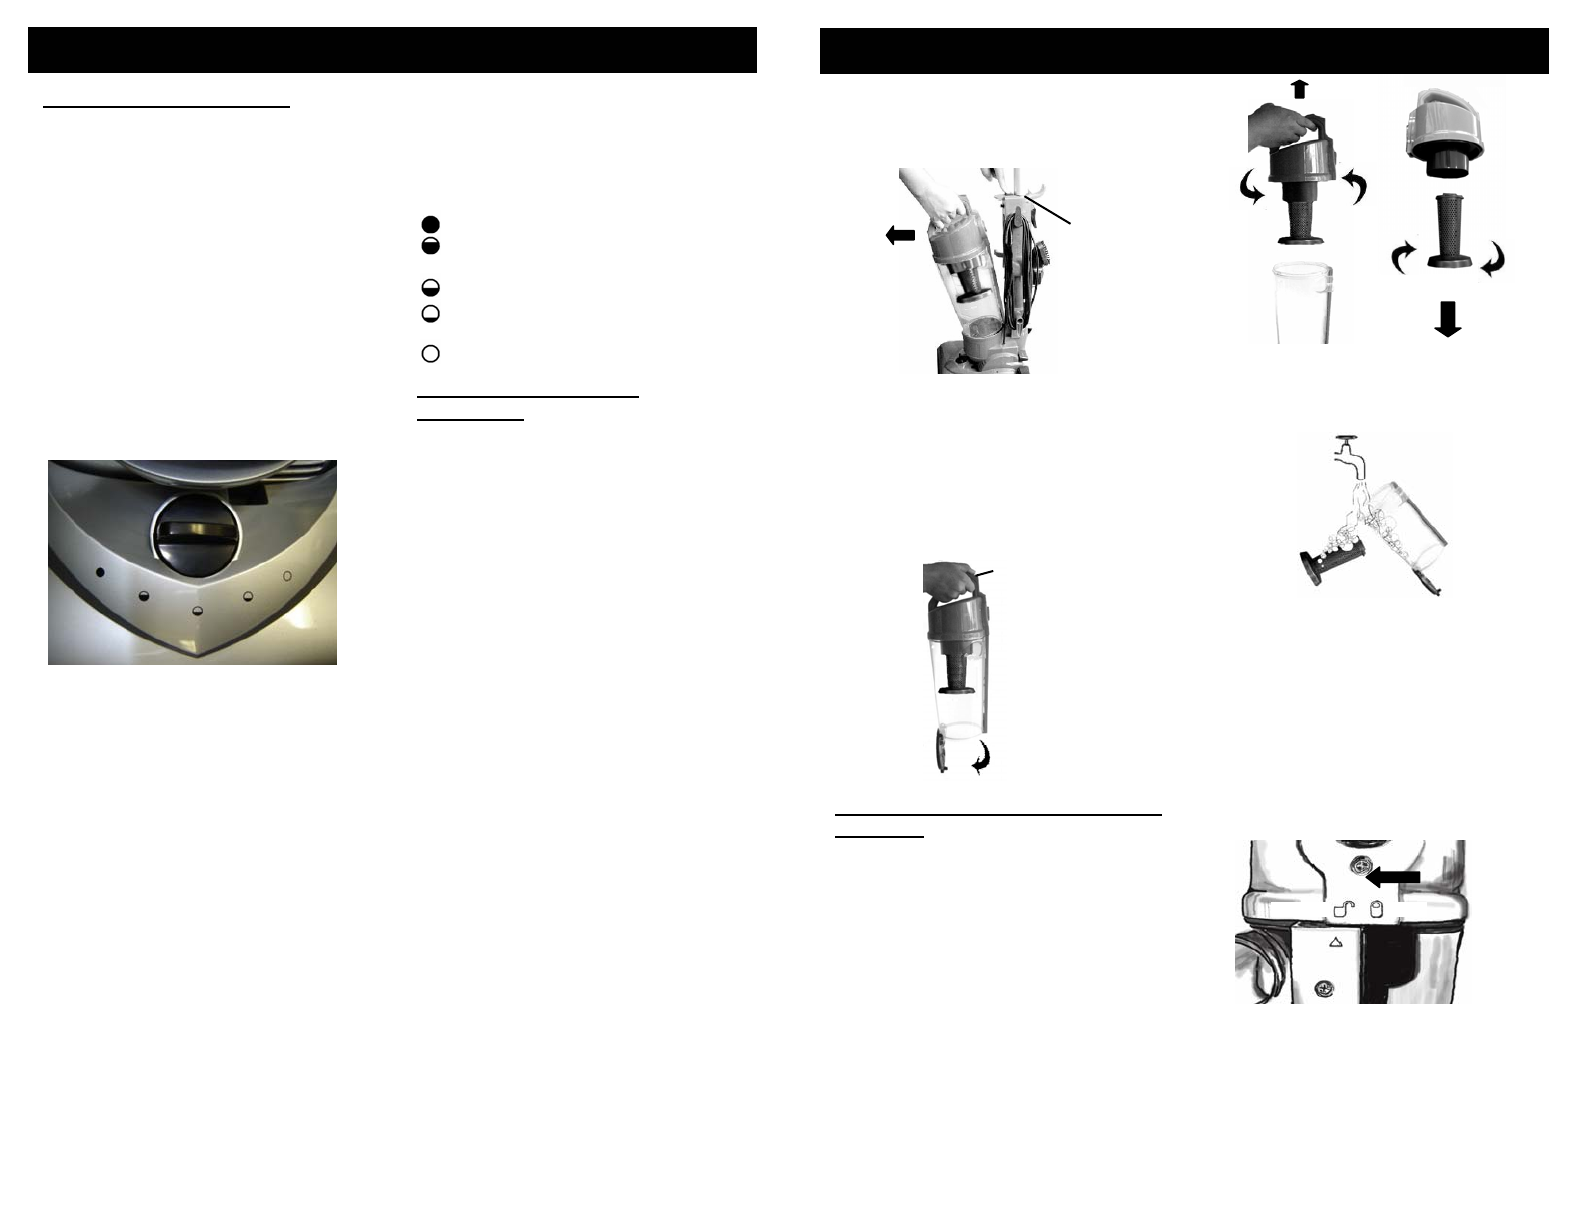
6. An arrow on the side of the dust
cup will indicate when the cover is
locked and unlocked when you turn
the cover. (Fig. 10) Make sure that
the arrow indicates that the cover is
locked position before re-installing
the dust cup into the main body.
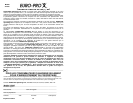
Fig. 9
6
Fig. 10
lockedunlocked
4. Wash the dust cup screen and dust
cup under the tap with lukewarm
soapy water. (Fig. 9)
2. To empty the dust cup, hold it by the
carrying handle over a garbage
container and press the trapdoor
release button located at the top of the
handle. (Fig. 6)
3. Shake the debris out, then close the
trapdoor by pressing it shut until it
clicks to lock.
1. To remove the dust cup, press the
dust cup release button and pull the
dust cup away from the main body.
(Fig. 5)