


www.enviromaster.com
7
CAC Cassette Evaporator
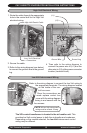
CAC CASSETTE CHASSIS POSITIONING AND INSTALLATION
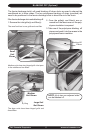
Ceiling opening:
• (
In existing construction) Remove enough
ceiling panels to provide clearance space
for mounting unit to ceiling joists.
• Before beginning the installation, inspect
the unit location, test the strength of the
ceiling joists to insure they will support
the weight of the unit.
• Determine mounting method:
- On wooden beams use threaded
rods, washers, and nuts to suspend
support brackets.
- With metal structures, secure thread-
ed rods on an existing angle or install
a new support angle.
- On newly built concrete slabs secure
threaded rods with inserts and em
-
bedded bolts.
- For previously built concrete slabs install
hanging bolts with an expansion anchor.
- Follow local building codes for required
safety cables, braces, etc.
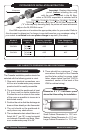
A
A
B
Cabinet A B
Small 19½” 23”
Medium 29⅝” 31½”
Large 29⅝” 43
11
⁄
16
”
A template for ceiling cut-out and rod posi-
tions can be found with the Cassette unit.
An opening in the false ceiling will have to
be cut to the following sizes:
Small cabinet 23¼” x 23¼”
Medium cabinet 33⅞” x 33⅞”
Large cabinet 46 x 33⅞”
NOTE: Make sure the ceiling grid is
supported separately from the Cas-
sette. The ceiling must not be sup
-
ported by any part of the Cassette
unit, fascia or any associated wiring
or pipe work.
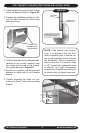
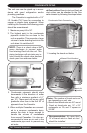
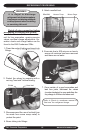
Figure #2
1. Use the template (provided) to cut the
ceiling opening and determining the
rod positions.
2.000 X 45° TYP
Rod
Positions
1.500 TYP
Rod
Positions
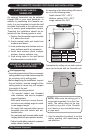
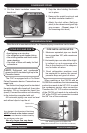
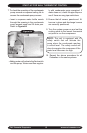
MOUNTING THE CAC CASSETTE
CEILING EVAPORATOR
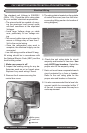
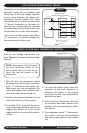
ELECTROMECHANICAL
THERMOSTAT
An optional thermostat can be obtained
through EMI or your local distributor. In
addition to positioning the Cassette cor
-
rectly, it is very important to locate the wall
mounted thermostat in the optimum posi
-
tion to ensure good temperature control.
Therefore the installation should be se-
lected with the following points in mind:
1. Position the thermostat approximately
5 ft. above floor level.
2. Avoid external walls and drafts from
windows and doors.
3. Avoid positioning near shelves and cur
-
tains as these restrict air movement.
4. Avoid heat sources (direct sunlight,
heaters, dimmer switches, etc.)
5. Seal wiring holes in the wall behind
the thermostat to avoid drafts.