


www.enviromaster.com
11
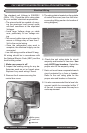
CAC Cassette Evaporator
Assembly Instructions
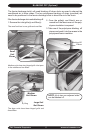
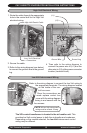
2. Ensure the white fi r tree fasteners
holding the fascia polystyrene are
pushed fi rmly in
(they may have
loosened in
transit).
(they may have
loosened in
transit).
CAC CASSETTE EVAPORATOR FASCIA INSTALLATION INSTRUCTIONS
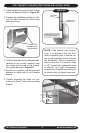
3. Lift the fascia onto the chassis mount-
ing bolts. Align the key hole brackets
with the mounting bolts and slide the
fascia forward to lock into position.
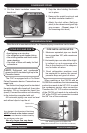
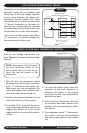
To complete the installation adjust the
lou-
ver position to 30° from plumb, this is recom-
mended for
“optimum”
system per-
formance.
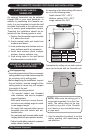
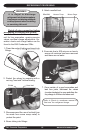
1. To install the four fascia mounting bolts:
a) Remove the bolts and wash-
ers from the supplied kit bag.
b) Put washers onto the bolts.
c) Screw the mounting bolt with
washer into the chassis leav-
ing approximately 1” to hang
the fascia.
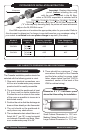
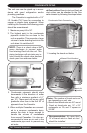
4. On 18-36k units connect the vane motor
plug by plugging it into the socket con-
nection on the chassis.
a) Ensure that the connector is in the
proper orientation.
b) Route the wires in a way that en-
sures they won’t become trapped,
cut, broken or chaffed.
Female vane
motor plug on
chassis
Male vane
motor plug
on fascia
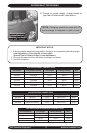
5. The fascia can now be tight-
ened up to the Cassette
chassis. Make sure a
good seal is obtained
between fascia and
chassis, this is neces-
sary to prevent recir-
culation.
Note: Do not over tight-
en the bolts. To do so
may cause damage to
the fascia.
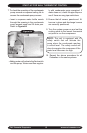
With fi lter(s) in place, the inlet grille(s) can
now be installed onto the fascia.
Note: The fascia only fi ts correctly one
way. Position the fascia so that the
AmericaSeries logo is on the control box
end of the chassis.