


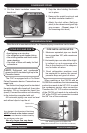


www.enviromaster.comCAC Cassette Evaporator 10
PIPING DO’S AND DON’TS
• Avoid piping on a rainy day.
• Use refrigerant grade copper tubing.
• Use a tubing bender and avoid unnec-
essary bending.
• Cap ends of lines until ready for fi nal
connections.
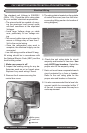
Once the unit is mounted and level the Cassette piping connections can be made.
Any change in the diameter of the tubing
MUST be made at the indoor connec-
tion. Line-set diameter is determined by
the condenser valve size
.
Use of a larger line can harm
the compressor!
When matching a the CAC24 with an
18,000 Btuh condenser, the interconnecting
suction line needs to be 5/8” O.D. to match
the condenser service valve connection.
Therefore the 3/4” O.D. suction connection
of the CAC24 unit needs to be reduced to
5/8” at the CAC24 unit connection to match
the 5/8” line of the condenser.
5/8” bushing goes on suction line
(Only when matched to an 18,000 Btuh condenser)
NOTE: Refrigerant and condensate
pipes should be insulated right up to the
Cassette chassis.
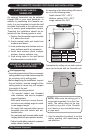
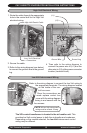
The CAC is equipped with a Flo-Rater/
Piston Expansion device. Connections are
sweat type.
The suction line (large) must be insulated
the entire length with closed cell, foam tube
insulation. Do not insulate the liquid line
(small). Connect the outdoor unit according
to the instructions supplied with unit.
All horizontal piping runs must be level
and without dips to trap the oil.
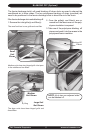
Suction Line
Liquid Line
REFRIGERATION PIPING
PIPE INSTALLATION NOTES
1. Maximum equivalent pipe run should
be no more than 100’, with a maximum
rise of 35’.
2. Horizontal pipe runs should be slight-
ly inclined, so as to encourage oil to
fl ow in the direction of the compres-
sor, for better oil return.
3. Good refrigeration practices must
be employed to ensure the correct
pressure drop and good oil return.
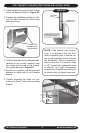
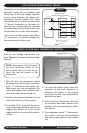
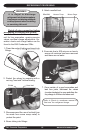
2. Cut the black insulation around the
knock-out.
3. Snip the tabs holding the knock-
out in place.
4. Remove the metal knock-out and
the black insulation behind it.
5. Attach the duct collars (fi eld sup-
plied) to the chassis using self tap-
ping screws.
(Repeat steps 1-5
for remaining duct work.)
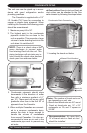
CONDENSATE PIPING