


11
5. Use of the control
board
The microprocessor programmer manages the pressing cycle in all of
its functions. The user can pre-set 9 pressing programs.
The control panel is subdivided into 4 sections:
• PROGRAMMING: allows storage of 9 different work programs
with programmable times and modes.
• EXCLUSION: allows partial or total exclusion of various press-
ing functions.
• MODE: permits choice of various pressing cycle modes
• MANUAL CONTROLS: allows manual function of main press-
ing functions.
When the machine is switched on the control panel shows the last
program used.
It is possible to adjust the brightness of the display: press to
increase, press to decrease.
5.1. PROGRAMMING section - basic fea-
tures
The programming section consists of:
• Program number display: from 1 to 9
• STEAM time display: from 00 to 99 seconds
• MIX / PAUSE time display. The two-figure display is shared by
the two functions MIX (mixed steam + air) and PAUSE (pause
between steam and blowing; used e.g. for touch ups)
• AIR time display: blowing time
• 5 programming buttons.
To program a pressing cycle, do as follows:
1. Press the button PROG ( ) on the panel. A letter “P” ap-
pears in the PROG display and the STEAM time display begins
to flash.
1. Press buttons or to increase or reduce the steam time.
2. Press the PROG. button ( ) to memorize the steam time.
3. The green light MIX and the display below begin to flash: press
or to set a time of mixed steam + air after steaming, if
needed.
4. Press the PROG. button to memorize the mix time
5. The green light PAUSE and the display below begin to flash:
press or to set a pause time between steam and blowing,
if needed (e.g. for touch ups with the iron)
6. Press the PROG. button to memorize the pause time.
7. The AIR indicator starts to flash. Press or to set blowing
time.
8. Press the PROG. button. The display stops to flash. Program-
ming is finished
If you need to change only one of the times, repeat all steps without
modifying the other times.
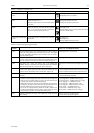
Mix and Pause times can be used or not, depending on the needs.
Table 5.1 shows the possible combinations.
5.2. PROGRAMMING section - advanced
features
The PROGRAMMING sections allows adjustment of several param-
eters. Refer to Table 5.2 for description of the parameters and their
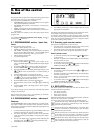
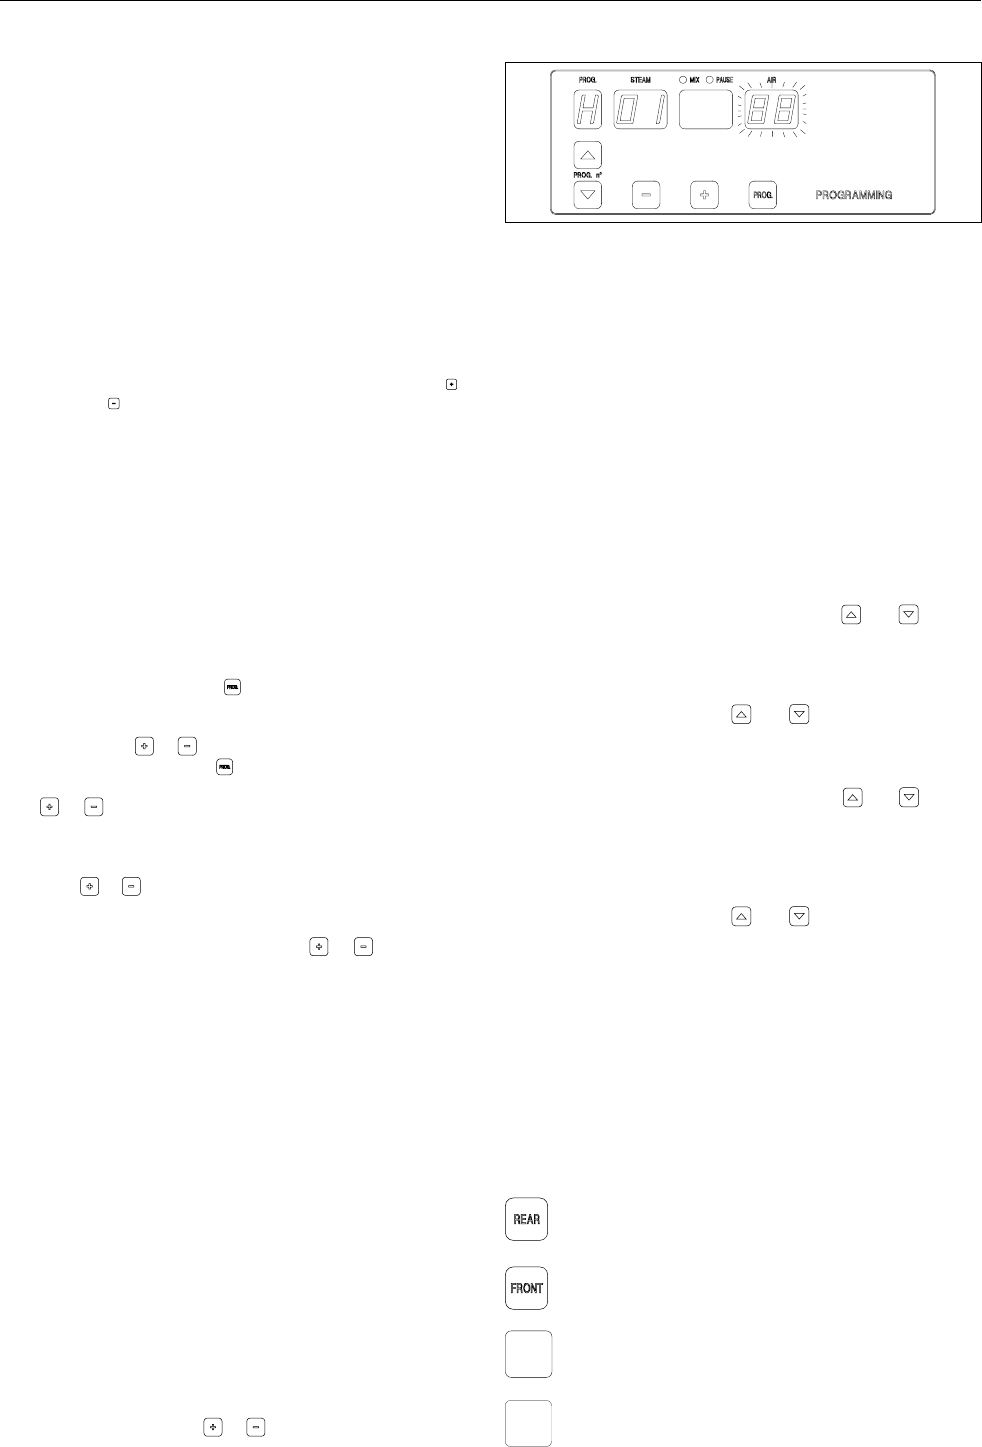
status. Figure 5.3 shows the look of the displays during programming
of advanced parameters.
1. To access advanced programming press the PROG. button until
the letter H appears in the program number display
2. The steam time display shows the number of the parameter
under programming. Press PROG. to step forward to another
parameter
3. The air time display shows a flashing number indicating the
parameter value. Press or to change parameter value
4. Press PROG. to memorize the value
Use of the control board
Figure 5.3 - Displays during advanced parameters programming
5. Press PROG. several times, until the displays return to normal
pressing times visualization.
The settings of the advanced parameters remain stored in the memo-
ry associated to the program in which they were entered.
For example: if the machine is running program number 5 and the
user enters advanced programming and excludes sleeve arms, the
sleeve arms will remain excluded for future use of program number
5, even after switching off the machine.
5.3. Pressing cycle counter meters
The machine is equipped with two cycle counters:
• The total counter counts all the pressing cycles carried out by
the machine in its work life and cannot be reset.
• The partial counter can be reset and can be utilized, for exam-
ple, to count the number of garments processed in one day.
Partial counter meter
• To access the counters press push buttons and together
for two seconds.
• The letter “C” appears on the PROG display. The other displays
show the number of cycles.
• To reset the counter press “PROG”.
• To exit meter mode, press and together till the displays
STEAM, MIX, PAUSE, AIR show pressing times.
Total counter meter
• To access the counters press push buttons and together
for two seconds.
• The letter “C” appears on the PROG display. The other displays
show the number of cycles.
• Press + to view the total cycles counter meter. The total cycles
counter cannot be reset.
• To exit meter mode, press and together till the displays
STEAM, MIX, PAUSE, AIR show pressing times.
The machine can work while the counter is visualized.
5.4. EXCLUSION section
This section consists of 4 buttons with red LED. The buttons allow
exclusion of the following functions:
• rear clamp movement
• front clamp movement
• sleeve arms movement
• collar clamp movement
Pushing the button relative to the function effects exclusion. When the
LED is on, the relative function is excluded.
Exclusions remain stored in the memory of the selected program.
Excludes the rear clamp. When the light is on the clamp does
not close. If the button is pushed during a cycle, the clamp
opens but the cycle continues.
Excludes the front clamp. When the light is on the clamp does
not close. If the button is pushed during a cycle, the clamp
opens but the cycle continues.
!2-3
Excludes the sleeve arms and cuff clamps. When the light is
on the sleeve arms do not operate. If the button is pushed
during a cycle, the cuff clamps open but the cycle continues.
#/,,!2
#,!-0
Excludes the collar clamp. When the light is on the collar clamp
does not operate. If the button is pushed during a cycle, the
collar clamp opens but the cycle continues.
F4VA1-ed3605
F4VA1