


13
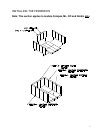
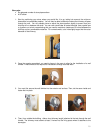
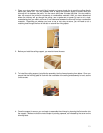
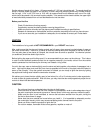
1- Place your stove where you would like it located and use a plumb line to mark the ceiling directly
above your stove flue. You will probably have to adjust this position slightly to ensure that your
chimney will run between the joists. You can use a stud finder to locate the joists. You also need to
take into account the minimum clearances to combustible materials. After you have determined
where the chimney will go through the ceiling, use a spoke saw or power jig saw to cut a hole,
remembering that you need a minimum 2-inch clearance between the chimney and any combustible
materials. Depending on whether you have a one or two story structure, you will need to cut a
matching hole through the floor of the attic or second floor living space.
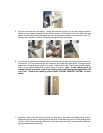
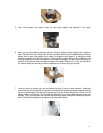
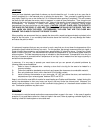
2- Before you install the ceiling support, you need to frame the area.
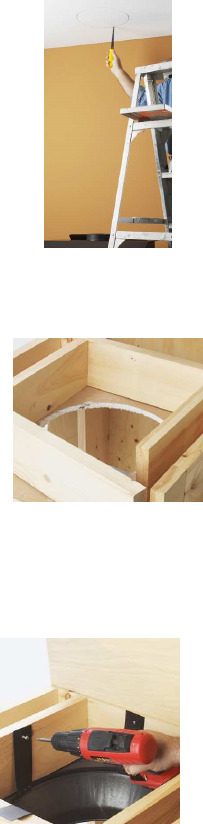
3- To install the ceiling support, just slide the assembly into the framed opening from below. Once you
ensure that the finishing plate is flush with the underside of the ceiling and assembly is level, secure
it with screws.
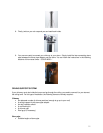
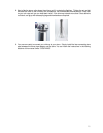
4- Once the support is secure, you can begin to assemble the chimney by lowering the first section into
the support. Make sure that the male coupler is pointing upwards, as indicated by the arrow on the
chimney label.