The cables from the battery (in the central electri-
cal unit) must be protected with a fuse.
The water purifier MUST be connected via the
pump in order for the purifier to work correctly.
Wiring
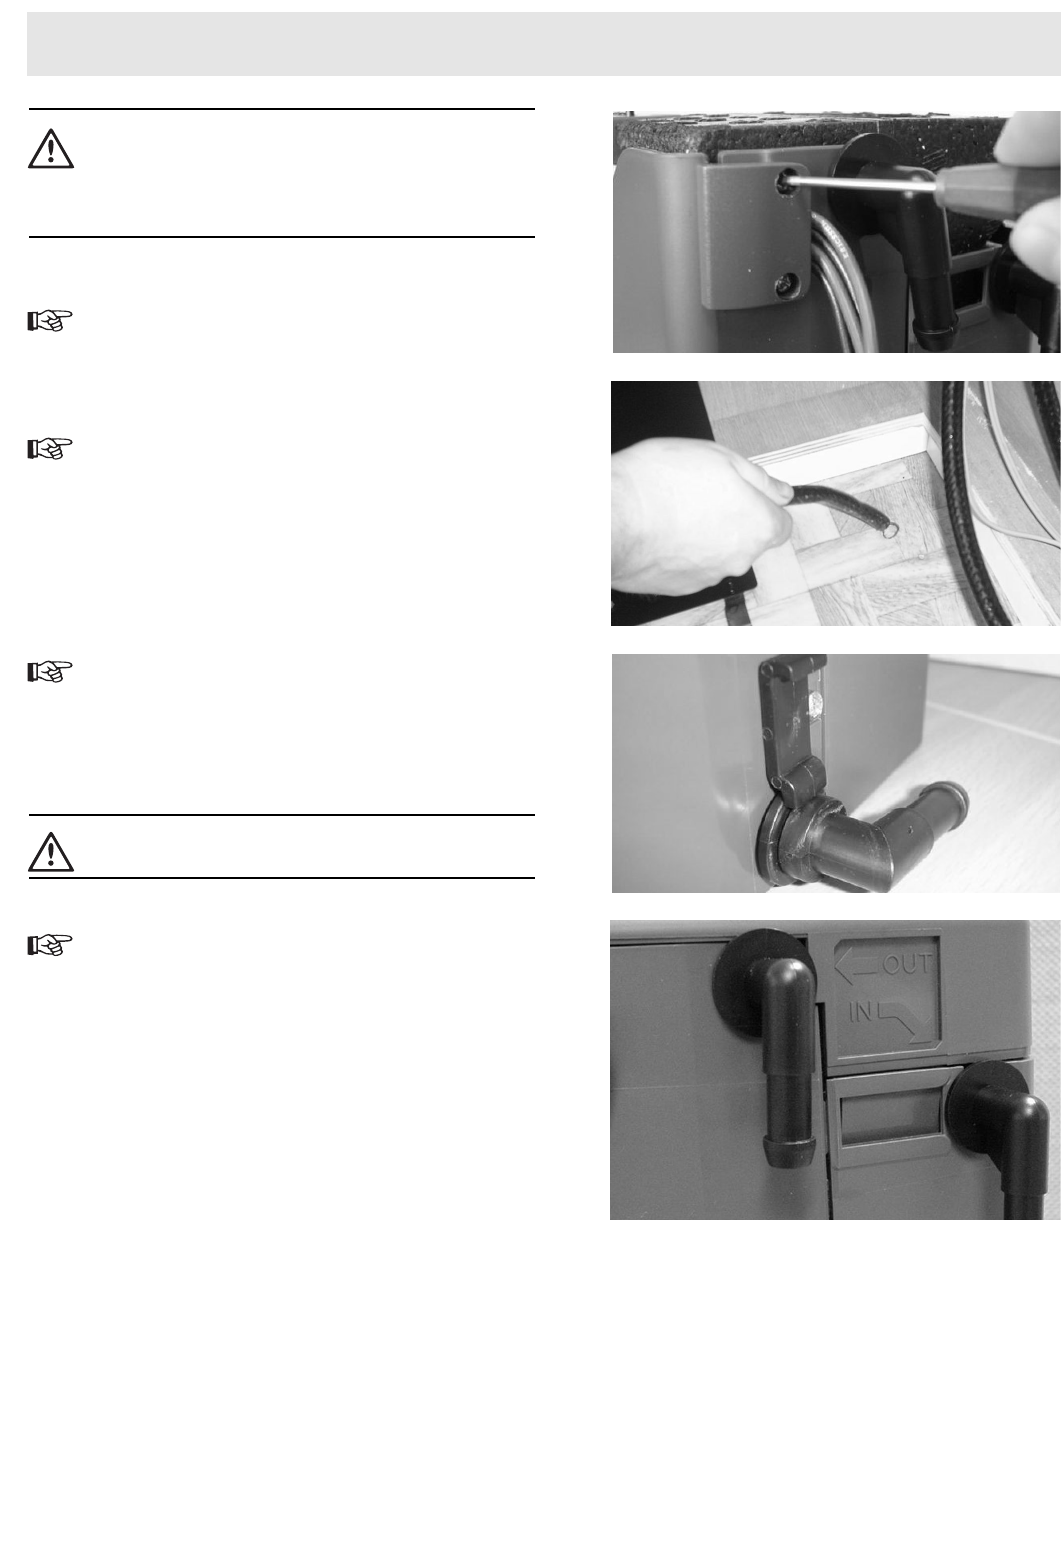
1. Route the wiring beside the insulation and out at the
rear of the product. Screw the tension reliever into
place. See fig. F.
Drain connection
1. Lead out the drain hose throw the hole in the floor,
see fig. G.
2. Connect the hose to the drain valve and install the hose
clip around the hose. Check that the drain valve is
pressed in and locked (catch pressed down). See fig. H.
Water connections
The water purifier must be connected to the cold-water pipe. To
make maintenance easier, install a shut off valve on the inlet hose.
1. Install a shut off valve on the inlet hose. Leave the
valve closed.
2. Connect feed water (from the tank) to the inlet (right)
connection on the water purifier, see fig. I (A).
3. Connect the pure water (left connection) from the
water purifier to the drinking water tap, see fig. I (B).
Install the hose clip.
Make sure the hoses are connected in accordance
with the above instructions.
Install the water purifier
1. Hook the bracket into the top of the water purifier.
Push in the bottom of the water purifier. See fig. J.
2. Refit the top cover on the purifier.
3. Open the shut off valve and switch on the power sup-
ply to the water purifier with the safety switch in the
central electrical unit.
17
INSTALLATION
F
G
H
I
(B)
(A)


