


14
101969
INSTALLING
Continued
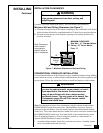
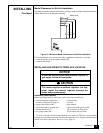
2. Install gas piping to fireplace location. This installation includes an approved
flexible gas line (if allowed by local codes) after the manual shutoff valve. The
flexible gas line must be the last item installed on the gas piping. See Installing
Gas Piping to Fireplace Location, page 15.
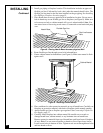
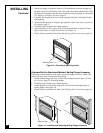
3. Carefully set fireplace in front of rough opening with back of fireplace inside
wall opening.
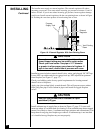
4. Attach flexible gas line to fireplace gas regulator. See Connecting Fireplace to
Gas Supply, page 17.
5. Carefully insert fireplace into rough opening.
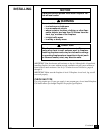
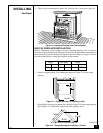
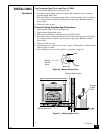
6. Attach fireplace to floor using wood screws through holes in bottom of base.
Open lower louver to locate screw holes (see Figure 13).
7. Check all gas connections for leaks. See Checking Gas Connections, page 18.
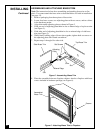
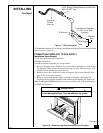
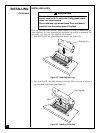
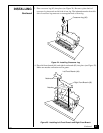
Figure 14 - Installing and Attaching Nailing Flange Accessory
Nailing Flange
Figure 13 - Floor/Hearth Mounting Holes
Mounting Holes
Alternate Built-In Attachment Method: Nailing Flange Accessory
If desiring to attach heater to wall studs, use nailing flange accessory.
Note:
You
cannot use brass trim if using the nailing flange.
1. Attach nailing flange accessory to each side of fireplace (see Figure 14). See
Accessories, page 33, for nailing flange.
2. Carefully insert fireplace into rough opening.
3. Attach fireplace to wall studs using nails or wood screws through holes in
nailing flange (see Figure 14).
4. Check all gas connections for leaks. See Checking Gas Connections, page 18.