


- 7 - For more information, visit www.desatech.com
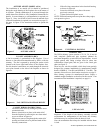
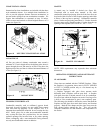
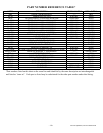
FLASHING INSTALLATION (V6F-8DM or V12F-8DM)
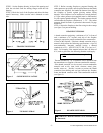
Determine the flashing to be used with the roof opening chart.
Slide flashing over pipe until base is flat against roof. Replace
as many shingles as needed to cover exposed area and flashing
base. Secure in position by nailing through shingles (see
figure 15).
DO NOT NAIL THROUGH FLASHING CONE.
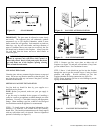
INSTALLING FLASHING ON A METAL ROOF
When installing the flashing on a metal roof, it is required that
putty tape be used between the flashing and the roof. The
flashing must be secured to the roof using #8 x ¾” screws and
then sealed with roof coating to prevent leakage through the
screw holes. A roof coating must also be applied around the
perimeter of the flashing to provide a proper seal.
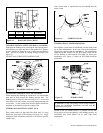
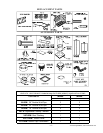
STORM COLLAR INSTALLATION (SC1)
Place storm collar over pipe and slide down until it is snug
against the open edge of the flashing (see figure 16). Apply
waterproof caulk around the perimeter of the collar to provide
a proper seal.
Note: Storm collar is required but can be installed after the
home is sited.
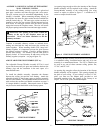
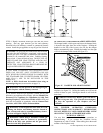
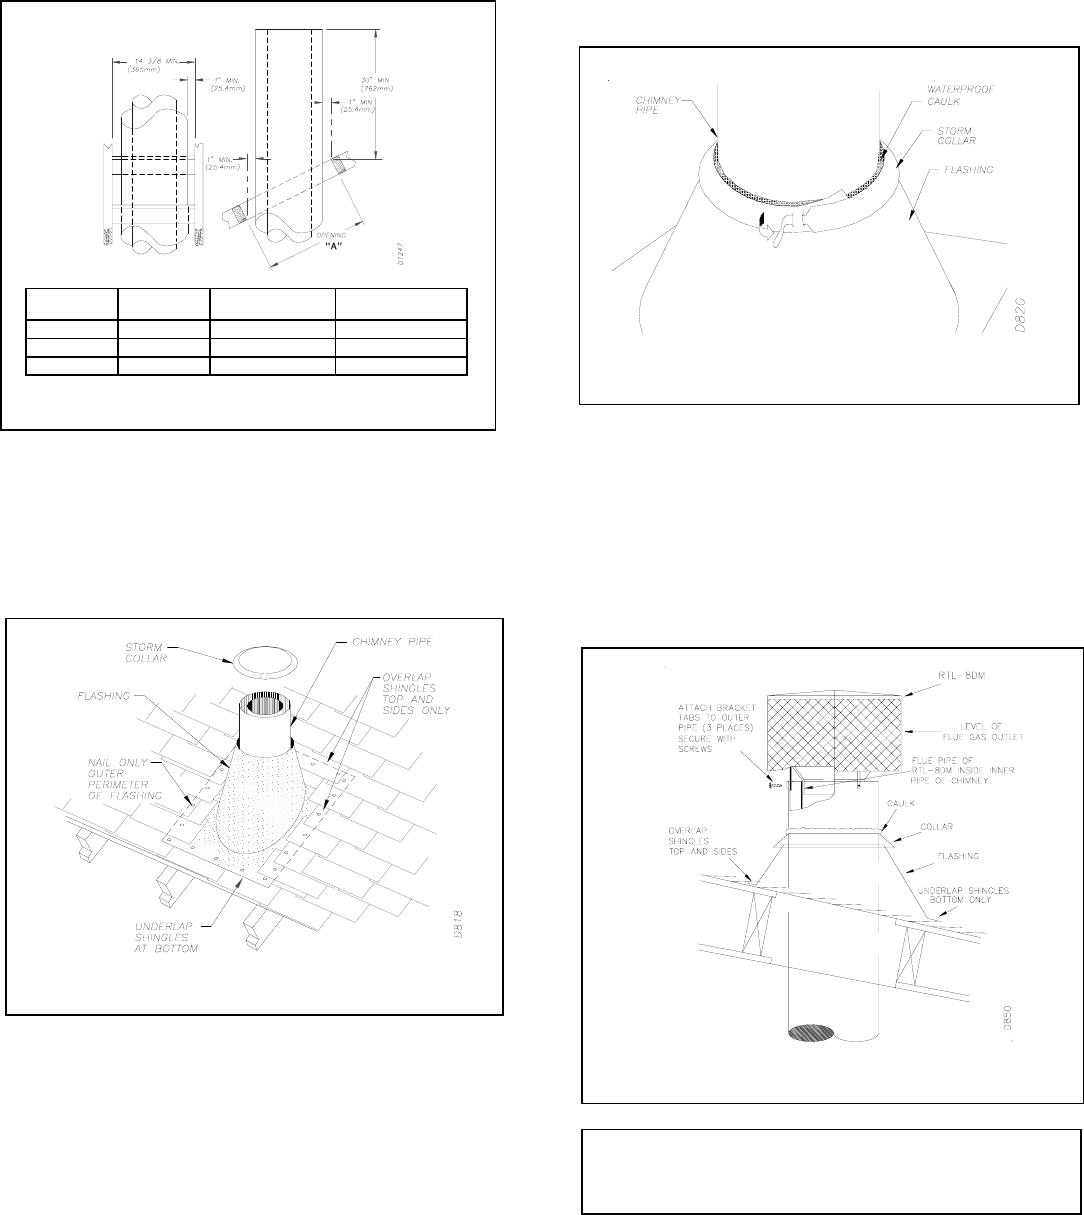
TERMINATIONS / SPARK ARRESTOR
The fireplace system must be terminated with the listed round
top or chase terminations. In any case, refer to the installation
instructions supplied with the termination. The terminations
approved for this fireplace are the RTL-8DM, which can be
use for flashing or chase and the ETL-8DM, for chase style
termination only. Figure 17 shows an RTL-8DM round top
termination.
NOTE: In the rare instance there is a problem with the side
driven rain or wind or the chimney is not drafting properly, an
ADS-8DM Anti Draft Shield can be used with round
terminations.
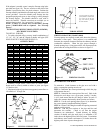
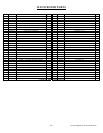
Figure 14 ROOF OPENING CHART
PITCH SLOPE OPENING "A" MAX USE FLASHING
(degrees) (inches) MODEL NO.
FLAT 0 15 V6F-8DM
0 - 6/12 26.6 16 - 1/8 V6F-8DM
6/12 - 12/12 45.0 20 - 3/8 V12F-8DM
Figure 15 FLASHING INSTALLATION
Figure 16 STORM COLLAR
Figure 17 TERMINATION
CAUTION: Do not seal openings on the rooftop flashing.
Follow the installation instructions provided with the
termination bein
g
used.