


4 5
Installation
Tools: Small & Large Phillips Screwdrivers; Small Standard Screwdriver.
Set Up:
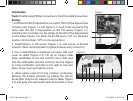
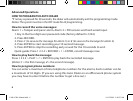
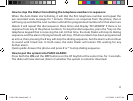
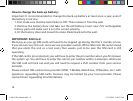
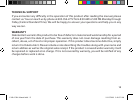
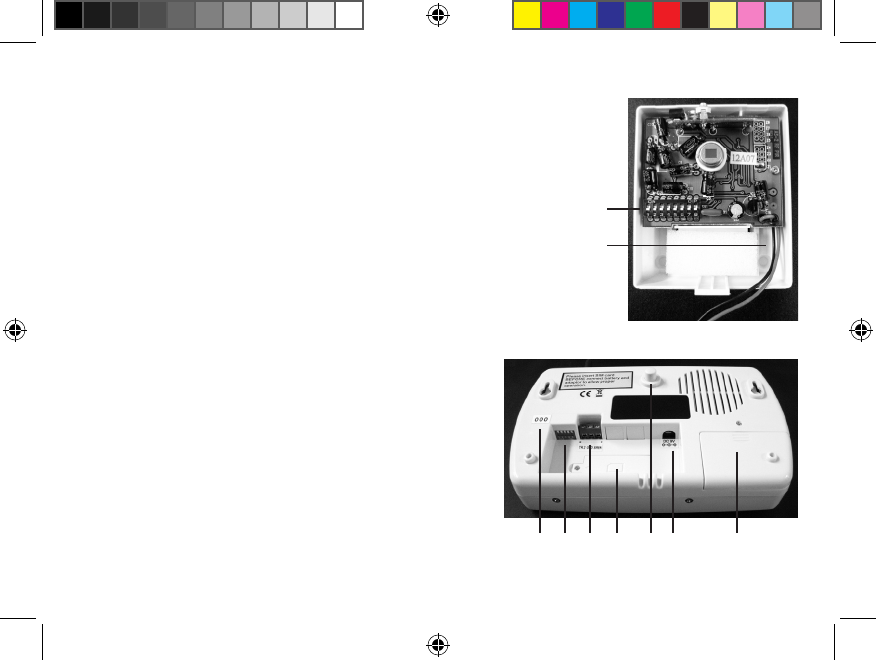
1. Set PIR and CAD-05 dipswitches to match. The rst ve dipswitches
on both units (Figure 1-1 and Figure 2-1) need to be set exactly the
same with the last 3 dipswitches on the PIR sensor (Figure 1-1)
matching the 3 numbers on the sticker to the left of the dipswitches
on the dialer (Figure 2-2). (Note: On the PIR sensor, “o” is in the down
position. On the Dialer, “o” is in the up position.)
2. Install battery in PIR sensor (Figure 1-2) and mount at desired
location. (Note: recommended to replace batteries every 6 months.)
3. Use a small Phillips screwdriver to loosen SIM card
cover on dialer (Figure 2-3). Lift up on hinges. Slide
black cardholder to the left and lift. Insert SIM card
into the cardholder with the notch on the top (Figure
3). Close cardholder and slide to the right to lock into
place. Close cover and tighten screw.
4. (Note: please read all of step 4 before continuing).
Remove the battery insulator by pulling the tab on
the keyfob. Plug the DC adaptor into the dialer (Figure
2-5) and plug into wall outlet. Wait 20 seconds. If your
Figure 1
1
2
Figure 2
2 1 7 3 6 5 4
CAD-05 Kit Manual.indd 4 10/15/2009 9:40:53 AM