INSTALLATION (CONTINUED)
12
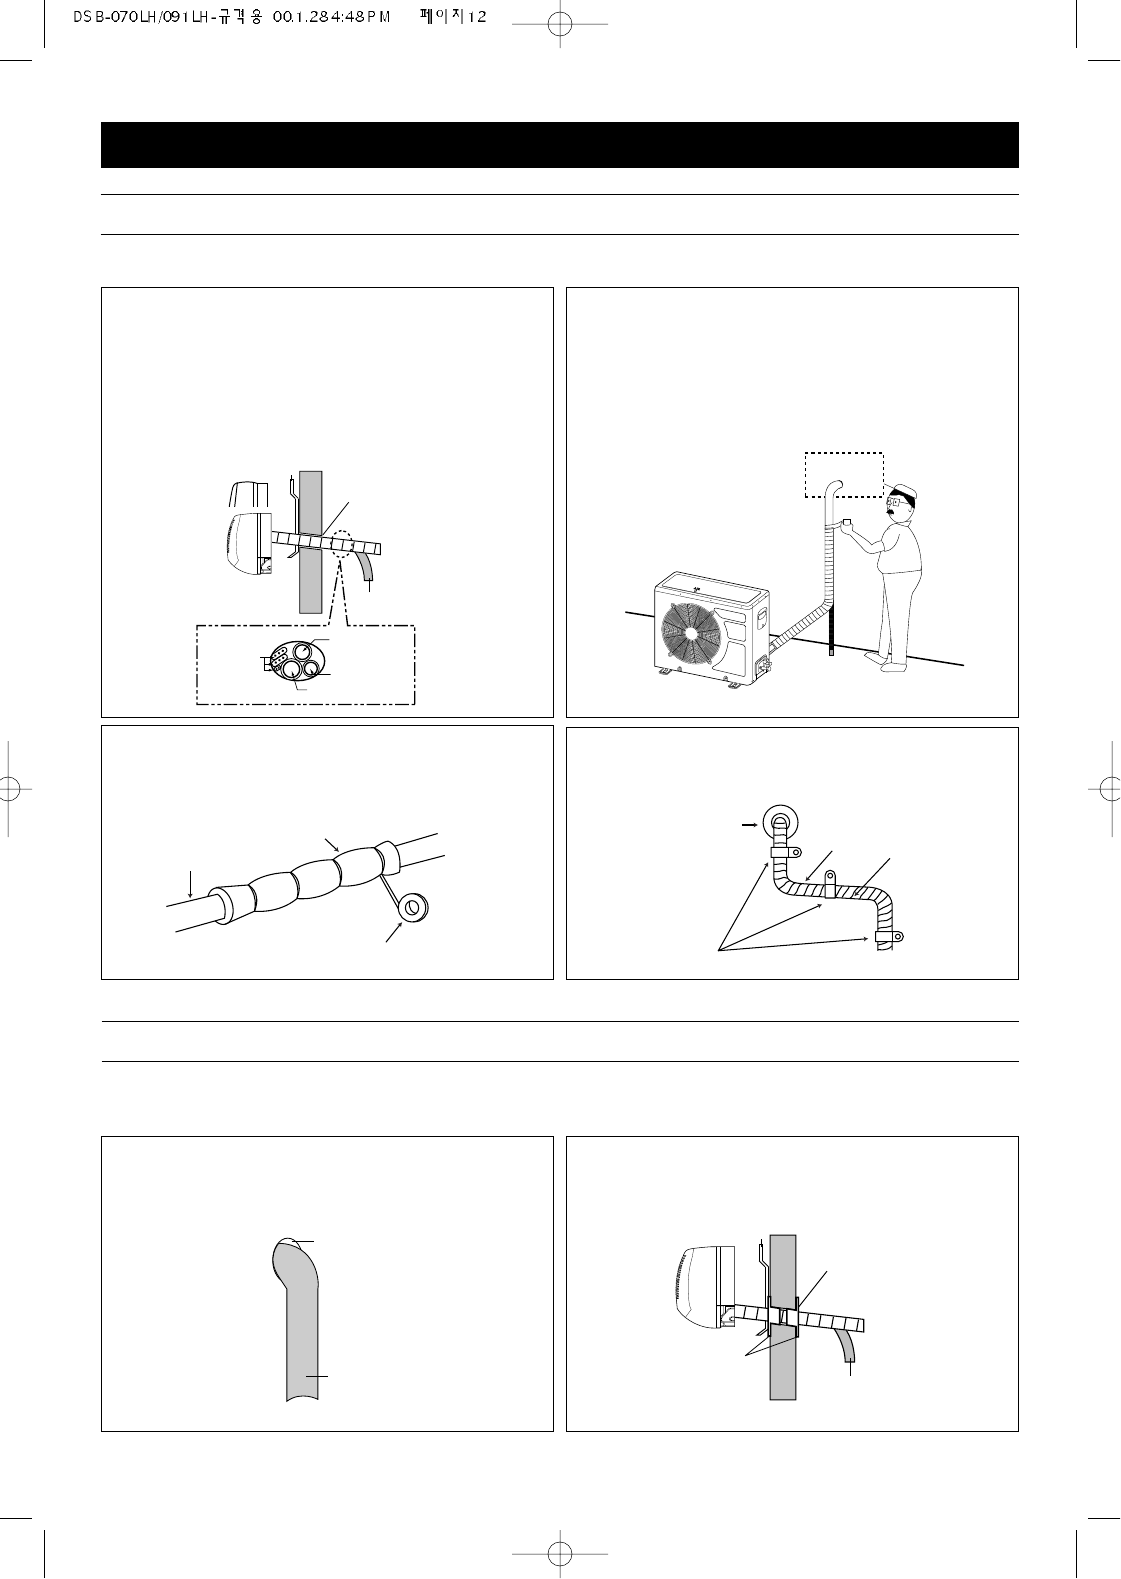
1. Tape the two copper tubes, drain hose (and the
electrical wiring if local codes permit) together with
the supplied tape. Make sure the electrical wiring
does not come in direct contact with the copper
tubing or drain hose. Approximately 1 foot outside
the hole, let the drain hose out and separate from
the copper tubing and wiring.
Wall Bracket
Insert Putty
Drain Hose
1/2" side piping
Connecting
cable
1/4" side piping
Drain Hose
2. Begin wrapping from the point the tubing comes out
of the outdoor unit and continue to the hole in the
wall. Leave no gaps or breaks and cover the entire
length of the tubing. As you wrap, overlap the previ-
ous turn by half the width of the tape.
TAPING UP THE WIRE/TUBES/HOSE
After running the wire, hose and tubing outside, tape them up as shown below to insulate.
3. Wrap the piping joints with the insulator plate and
fasten it with vinyl tape.
pipe
insulator plete
vinyl tape
4. After wrapping the connection pipe with tape, fasten
it to the outside wall with saddles, etc.
Saddle
(Not supplied)
Wall cap
Pipe
Tape
1. Apply the putty to any area on the outside hole that
air or rain can get into.
Apply Putty
Here
Tubing
2. After applying putty, insert the wall Cap at Indoor
side and Outdoor side.
Wall Bracket
Insert Putty
Wall Cap
(For DS-110R)
Drain Hose
APPLYING PUTTY AND INSERTING WALL CAP
After running the wires and tubing outside, putty should be inserted around the opening on the outside to protect against
rain, wind, etc. To apply putty, see below:


