16
WinterWarm Small Insert
2000888
How to Replace Gaskets
Your WinterWarm Small Insert uses rope-type fiber-
glass gaskets to make a tight seal between some parts.
With use, particularly on those parts that move, gaskets
can become brittle and compressed and can begin
to lose their effectiveness. These will need periodic
replacement.
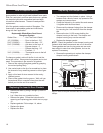
All of the gaskets used are made of fiberglass. The
three sizes of replaceable gasket are listed below,
along with their application.
Replaceable WinterWarm Small Insert
Fiberglass Gaskets
Gasket Size ...................And The Parts It Seals
1/2” (1203564) ...............Door to the front - 5.6’
5/16” (1203591) .............Glass to the door - 5.2’
5/16” (1203588) .............Ash door to the front - 4’
......................................Bypass damper - 2’
......................................Damper housing - 2.5’
......................................Fireback - 3’
3/16” (1203556) .............Thermostat cover to the left
......................................side - 1’
To change a gasket, wait until the fire is out and the
stove has cooled. Wear protective eyewear and a dust
mask. The procedure is the same for all gaskets.
1. Remove the existing fiberglass gasket by grasping
an end and pulling firmly.
2. Use a wire brush or the tip of a screwdriver to clean
the channel of any remaining cement or bits of gas-
ket.
3. Apply a thin bead of stove cement to the newly-
cleaned groove.
4. Place a new gasket into the groove. Wait until you
have placed all but a couple inches from the end
before you trim the end to an exact fit.
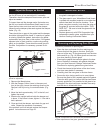
Replacing the Insert’s Door Gaskets
• Remove the door by lifting it straight up from its
hinge pins.
• Lay it face down on a padded surface.
• Remove the glass. Follow the instructions for
removing and replacing glass which start on page
15.
• Replace gaskets. Follow steps 1-4, above.
• Replace the glass.
• Replace the door.
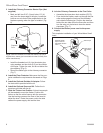
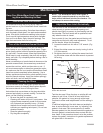
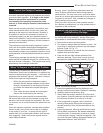
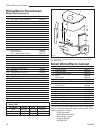
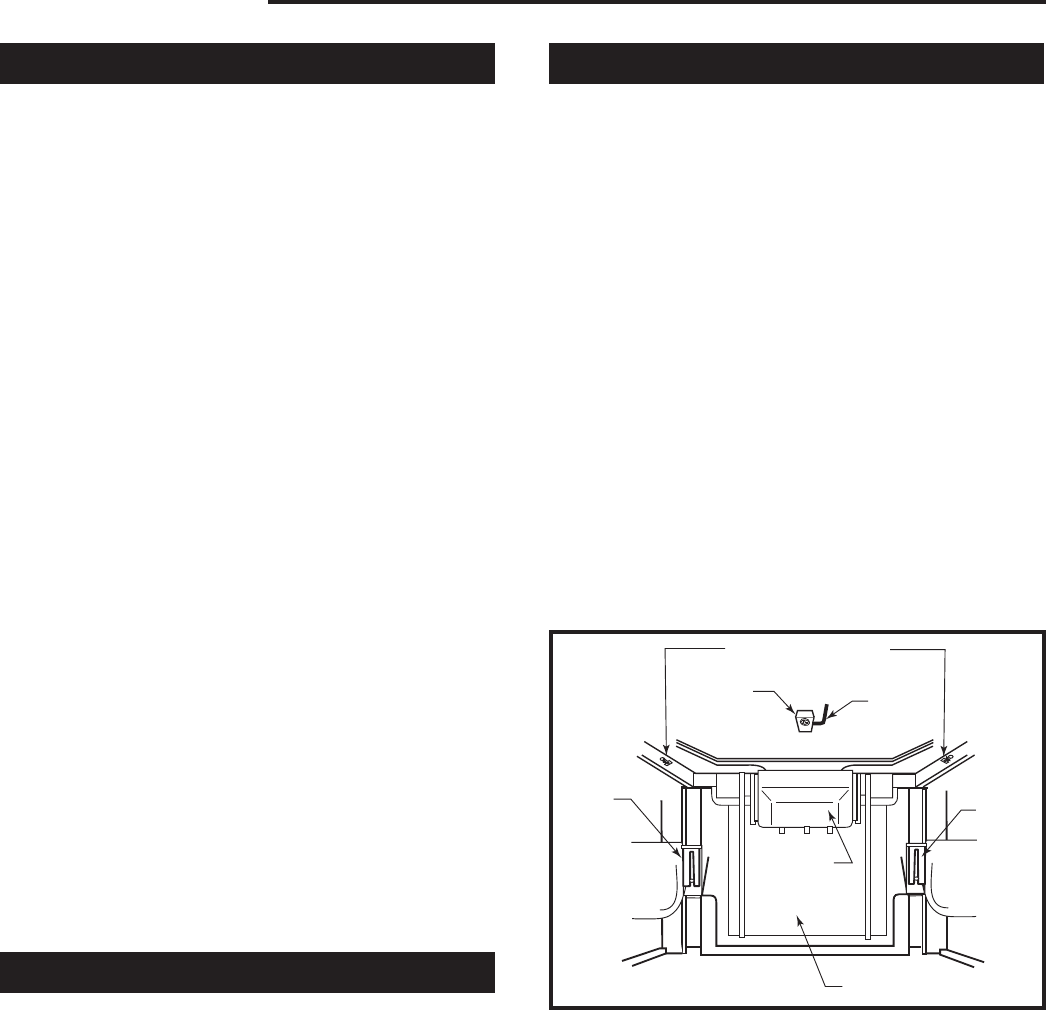
Replacing the Damper Gasket
• Lift and remove the left and right burn plates.
• Two wedges hold the fireback in place. Using a
hammer and a block of wood, tap upward on the
wedges and remove them.
• Grasp the fireback by its vertical ribs and remove
it, together with the throat hood.
• Disconnect the damper linkage from the damper
by removing the hex head bolt from the damper
tab.
• Remove the two 1/4-20 screws holding the
damper housing to the back. The damper and
damper housing may now be removed.
• Replace the damper gasket.
NOTE: Check the gaskets on the damper housing and
fireback while these components are out of the stove.
These gaskets seal non-moving parts and are much
less subject to wear than other gaskets, but can be
replaced if necessary.
• Reverse the procedure to replace the damper,
damper housing and fireback.
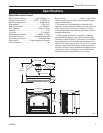
FP1106
WinterWarm
Small Insert
damper access
4/4/01 djt
Damper Housing
and Bolts
Linkage
Damper
Tab and Bolt
Wedge
Wedge
Throat
Hood
Fireback
FP1106
Fig. 17 Remove the parts illustrated above to access the
damper.
Burn
Plate
Burn
Plate