


15
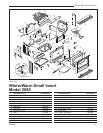
WinterWarm Small Insert
2000888
Adjust the Damper as Needed
Examine your WinterWarm Small Insert’s damper after
the first 50 hours of use and adjust it if necessary.
Thereafter, check the damper at least once a year and
adjust as needed.
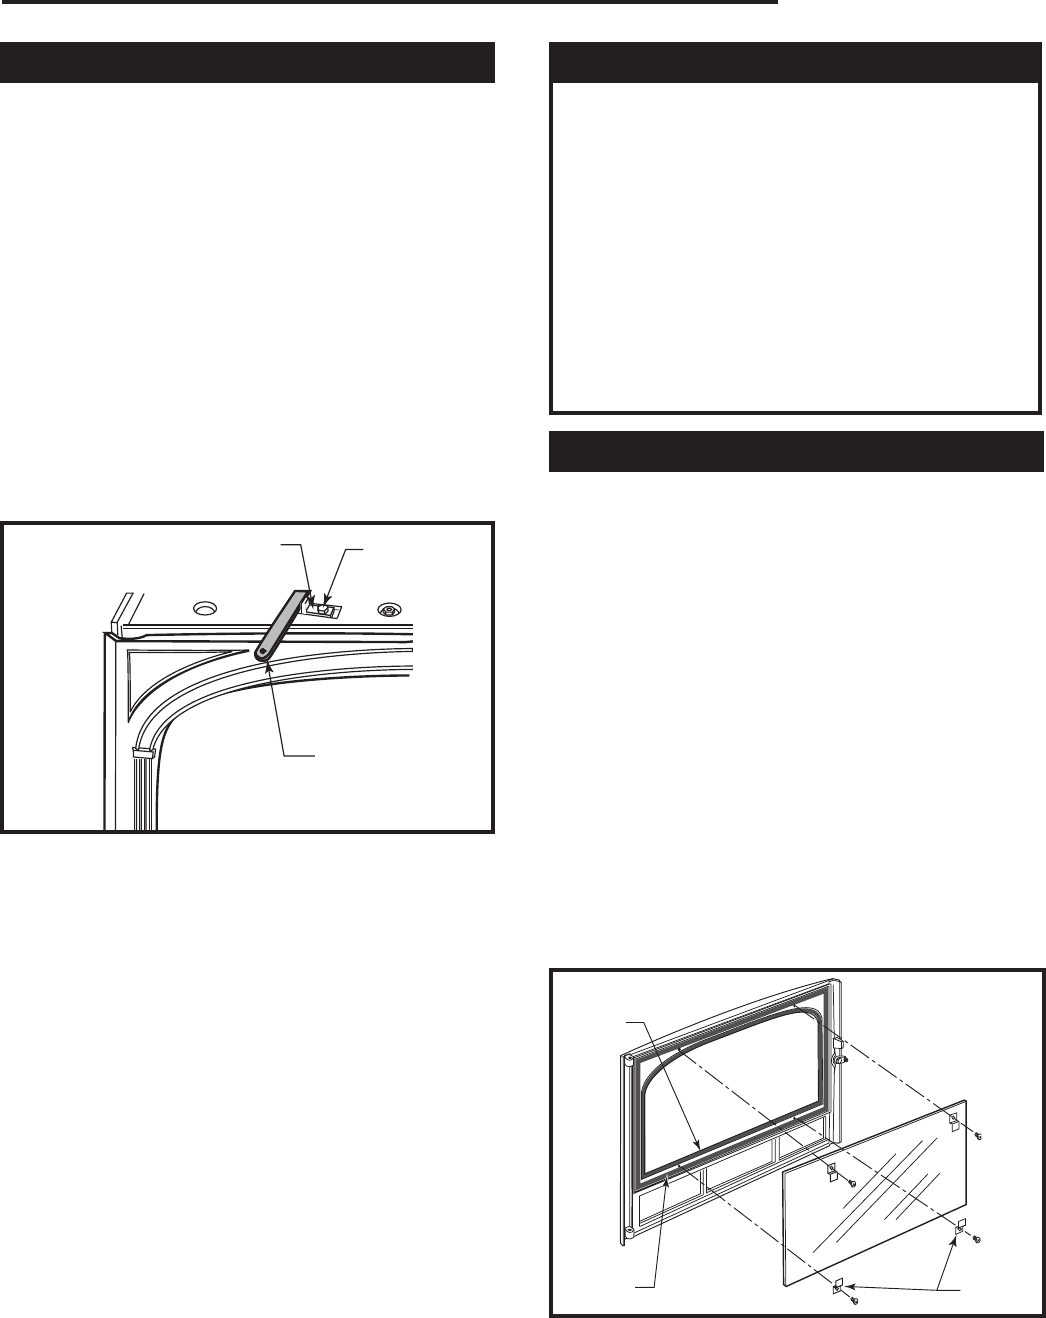
To inspect how well the damper seals, first make sure
the fire is out and the WinterWarm Small Insert is cool.
Open the front door, and close and lock the damper.
Inspect how the damper plate seals against the damper
frame. (Fig. 15)
There should be no gaps in the gasket and the damper
should be tight against the frame. If a section of gasket
is missing, replace the gasket. Instructions for gasket
replacement are given later in this section. If the gasket
appears to be in good condition, continue by pushing
gently on the damper. There should be some give but
no rattle. If adjustment is necessary, proceed as fol-
lows:
FP1104
WWsi
damper adj
4/01
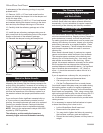
Damper Latch
Latch
Retaining
Screw
Damper Control
Rod
FP1105
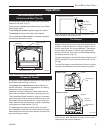
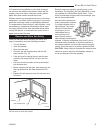
Fig. 15 With the mantel removed, the damper latch is ex-
posed for adjustment.
1. Remove the Mantel piece.
2. With the Damper Control Lever in the open posi
-
tion (to the right), loosen the retaining screw on the
Damper Latch by turning it counterclockwise. (Fig.
15
3. Move the latch approximately 1/16” to the left, and
tighten the screw.
4. Examine the upright tab that holds the damper rod
in place. If the screw is loose, tighten it. If the tab is
bent, replace it.
5. Close and lock the damper, and check for gap and
rattle. Repeat the procedure if necessary.
If the problem is still not solved, replace the damper
gasket. Instructions are on Page 16.
IMPORTANT NOTES
• Do not operate the WinterWarm Small Insert if
the glass is damaged or broken.
• The glass used in your WinterWarm Small Insert
is coated with a special material on one side that
reflects heat back into the fire chamber. To re-
place new glass correctly, look along the edge of
the glass for a printed notice that reads, “THIS
SIDE OUT”. Be sure to install the glass with the
notice side out.
• Replace glass only with CFM Corporation high
temperature ceramic glass, available from your
Vermont Castings’ Authorized Dealer.
Removing and Replacing Door Glass
Follow this procedure to replace glass.
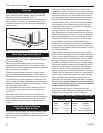
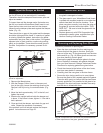
• Open the door and loosen the four retaining clip
screws that hold the glass to the door. Swing the
clips out of the way. Tilt the glass away from the door
frame and lift up. (Fig. 16) Wear gloves and use cau-
tion when handling broken glass.
• Examine the gasket that seals the glass to the door
frame. Replace if necessary with gasket obtained
from your local Vermont Castings’ Authorized Dealer.
Directions for replacing gaskets are given below.
• Check the channel at the bottom of the door frame,
and clear away debris if necessary.
• Carefully place the new glass in the door frame.
• Secure the clips, being careful not to over-tighten.
Be sure the glass is firmly seated against the gasket.
Close the door gently to confirm the clips have been
properly positioned. It is possible for the glass to be
damaged if the clips have been installed incorrectly
and the door is closed with force.
FP1105
WinterWarm
glass install
4/01
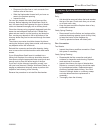
Gasket
Door
Gasket
Retainer
Clips
Fig. 16 Components fo the front door may be disassembled
to allow replacement of the glass, gaskets or both.