


21
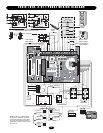
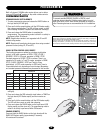
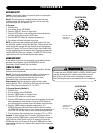
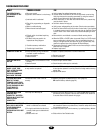
Operation will vary
depending on
wiring type
SELECTOR DIAL
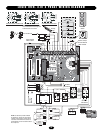
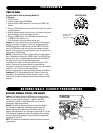
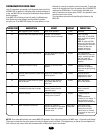
Operation will vary
depending on
wiring type
SELECTOR DIAL
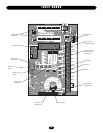
PROGRAMMING
OPEN MID STOP
Feature: The mid stop feature is to open the door to a preset point
prior to the fully open position.
Benefit: The door opens to a midpoint between open and close
reducing heating and cooling costs. The door will not cycle fully,
providing longer door and operator life.
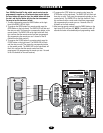
To Program:
1. Close the door.
2. Turn selector dial to "PROGRAM".
3. Press the "MID SET" button on logic board.
4. Press the OPEN button, wait until the door reaches the desired
mid stop height, then press the STOP button.
5. Press the MID SET button to complete programming.
6. Turn selector dial back to desired wiring type.
NOTE: A momentary open command will open the door fully from
the "Mid Stop" position. Once at the "Mid Stop," Photo eyes and other
safety devices will not open the door beyond the mid stop position,
except in E2 mode. The Timer to Close will work from the Mid Stop.
To clear the Mid Stop set the selector dial to Program and press and
hold the MID SET button for 5 seconds. The MID SET LED will flash
rapidly and turn off once the Mid Stop has been cleared.
DOWN MID STOP
A new feature is the down mid stop which can be enabled with the
purchase of the red/green light kit (RDGRNCARD). See kit
instructions of how to enable this new feature.
TIMER TO CLOSE
Feature: Timer automatically closes door after preset time. All safety
devices must be unobstructed.
Benefit: The door will automatically close after pre set amount of
time. Great for apartment buildings, fire stations and other
applications where the end user wants the door to close
automatically after a specified amount of time.
Requirements: Must have at least one of the following safety
devices attached: CPS-L, CPS-LN4 or CPS3 card with valid safety
device. Wiring type must be set to TS, T or FSTS.
To Program Manually (Method 1):
1. Close the door.
2. Turn the selector dial to PROGRAM.
3. Press the TIMER button on the logic board.
4. Press the STOP button to clear the timer.
5. Press the OPEN button for every 5 seconds the operator should wait
before attempting to close the door. Press the CLOSE button for
every 60 seconds the operator should wait before closing the door.
6. Press the TIMER button to complete programming. The
OPEN/CLOSE button LEDs will flash to confirm the timer setting.
The OPEN LED will flash once for every 5 seconds programmed and
the CLOSE LED will flash once for every 60 seconds programmed.
7. Turn the selector dial to desired timer wiring type (TS ,T or FSTS).
Example: To close the door after 70 seconds. Turn selector dial to
Program, press the TIMER button, press the STOP button to clear the
timer, Press the CLOSE button once for 60 seconds and press the
OPEN button twice for 10 seconds. Press the TIMER button to finish
programming the timer. Turn selector dial to desired Timer wiring type.
(TS, T, FSTS).
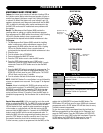
To reduce the risk of SEVERE INJURY or DEATH, ALWAYS install
reversing sensors when the 3-button control station is out of
sight of door or ANY other control (automatic or manual) is
used. Reversing devices are recommended for ALL installations.
WARNING
CAUTION
WARNING
WARNING