


32
Defiant Woodburning Stove
30001693
6. If the element is in good condition and clean, re-in-
stall it in the stove and replace the refractory access
cover.
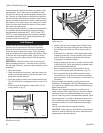
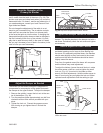
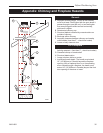
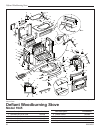
7. Replace the fireback, the five bricks and their clip,
the left and right wedges, and the throat. When you
install the lower fireback, be sure to align the two
slight recesses in its bottom forward edge behind
the mating tabs on the firebox floor. (Fig. 43) When
you install the wedges, be sure to place their rear
vertical edges against the outermost left and right
edges of the lower fireback, to ensure a good seal
between the lower fireback and the stove’s outer
back. Tap them downward to seat them snugly, but
not overly tight.
8. Clean the chimney and chimney connector.
Operate the stove in your usual manner for two weeks,
inspecting the chimney and the chimney connector
frequently during this period.
If creosote does not build up as fast, it is likely that the
performance change was caused by fly ash deposits
on the catalytic element. However, continue the inspec-
tions of the chimney system for a few weeks to ensure
that proper performance continues.
If you continue to find a significant creosote buildup or if
you continue to see excessive smoke from the chimney,
the catalytic element will need to be replaced. Contact
your nearest Vermont Castings’ Authorized Dealer for
information about a replacement element.
NOTE: Use only the replacement catalyst supplied by a
Vermont Castings dealer.
Replace the Stove Gaskets as Needed
Your Defiant uses fiberglass rope gaskets to make
a tight seal between some parts. With use, particu-
larly on moving parts, gaskets can become brittle and
compressed and can begin to lose their effectiveness.
These will need periodic replacement.
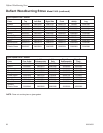
The sizes of replaceable gasket are listed below, along
with their applications.
Gasket Diameter... ...And the Parts it Seals
5/16” The griddle to the stove top
(wire reinforced gasket)
5/16” The damper to the upper fireback; the
front doors to the stove front; and the
doors to each other.
3/8” The ash door to the front of the bottom
panel
3/16” The outer glass panes to the door
If you need to change a gasket, first obtain an appropri-
ate replacement from your Vermont Castings, Autho-
rized Dealer.
Wait until the fire is out and the stove has cooled. Be
sure to follow the standard safety procedure for working
with dusty materials: wear safety goggles and a dust
mask.
The procedure for replacing gaskets is the same,
regardless of the gasket location. Follow these eight
steps:
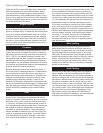
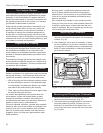
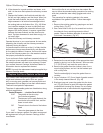
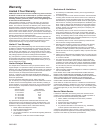
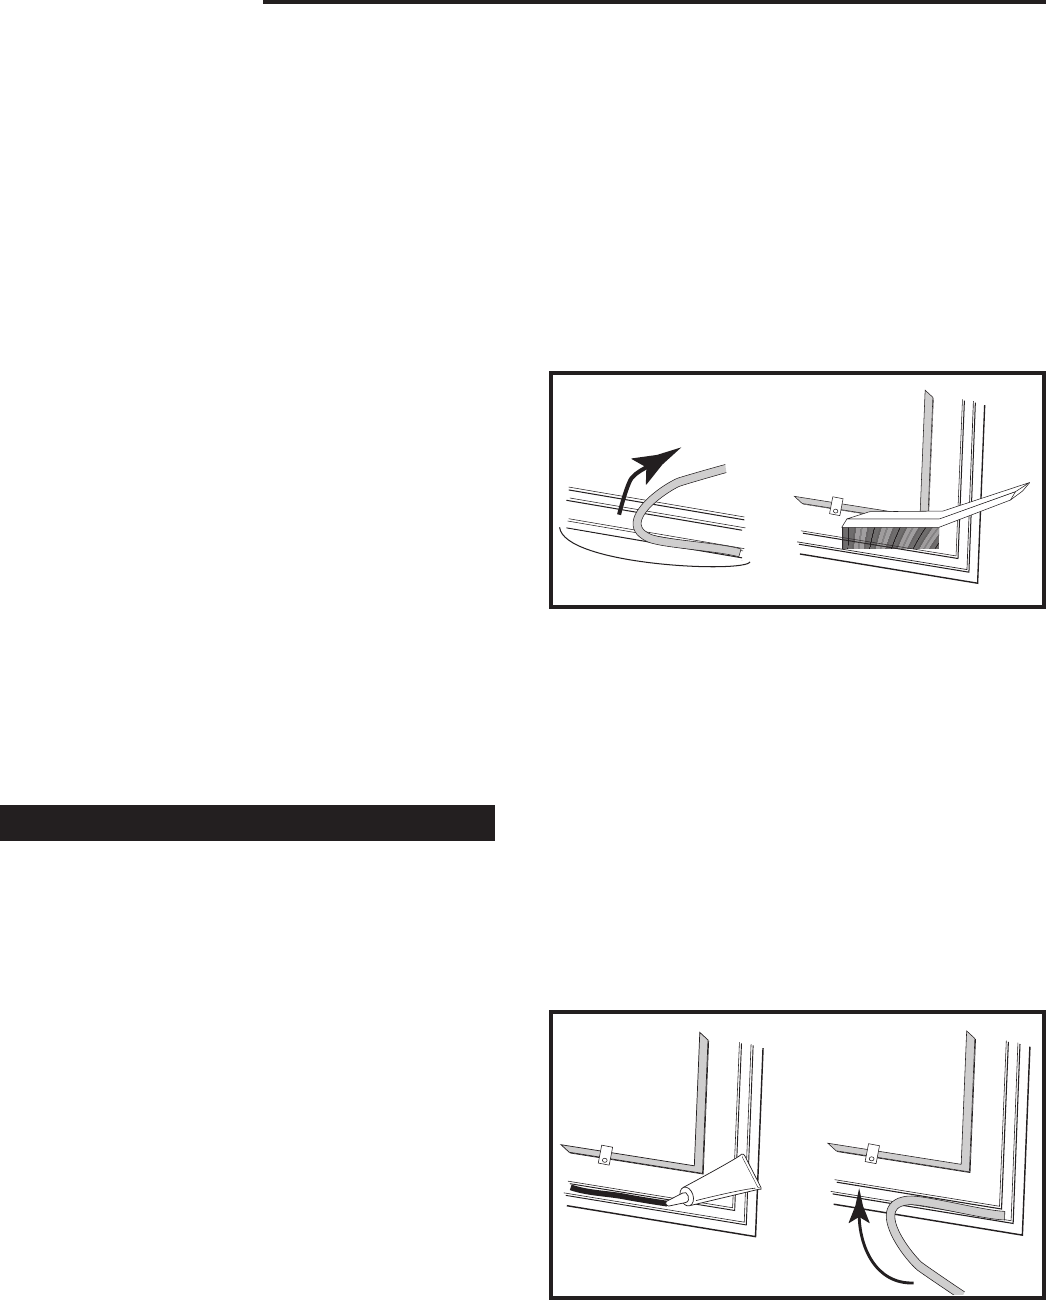
1. Remove the existing gasket by grasping an end and
pulling firmly. (Fig. 47)
2. Use a wire brush or the tip of a screwdriver to clean
the channel of any remaining cement or bits of
gasket. Remove stubborn deposits of cement with a
cold chisel if necessary. (Fig. 47)
ST559
Remove
gasket
11/30/00 djt
Fig. 47 Remove gasket then clean channel with wire brush.
ST560
3. Determine the correct length of the appropriate-sized
gasket by laying it out in the channel. Allow an extra
1-2” (25-50 mm), and mark the spot to be cut.
4. Remove the gasket from the channel, place it on a
wood cutting surface, and cut it at the marked spot
with a utility knife.
Twist the ends slightly to keep the gasket from un-
raveling.
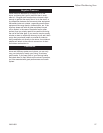
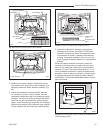
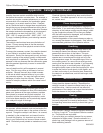
5. Lay an unbroken 1/8” (3 mm) bead of gasket cement
in the newly-cleaned channel. (Fig. 48)
6. Starting at one end, press the gasket into the chan
-
nel. (Fig. 48) Ensure a good joint where the gasket
meets before trimming any excess. Do not overlap
the gasket ends or leave ends with ragged edges.
ST559
Remove
gasket
11/30/00 djt
Cement
Sto
ve Gasket
ST561
Fig. 48 Lay a bead of gasket cement then press gasket in
place.