


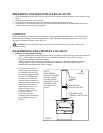
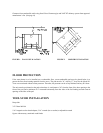


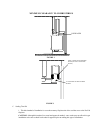
FIGURE 3
DETERMINING THE CHIMNEY LOCATION
1. Suspend a plumb bob from the ceiling above the unit so
that the weight is hanging in the center of the flue exit. (A
small weight on a string will serve as a plumb bob.) Mark
the ceiling where the string is suspended to locate the
center of the chimney hole.
2. After locating the center of the hole, install the ceiling
support box, chimney, flashing, and rain cap.
CAUTION!!! - Refer to chimney manufacturers instructions
for assembly and disassembly of chimney parts. Be sure to
follow chimney instructions for proper clearances to
combustible and proper air spacing required.
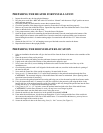
3. Add additional pipe until both of the following are met:
(a) Chimney pipe is 3’ higher than roof at the point where
it penetrates the roof. (See Figure 4.)
(b) Chimney pipe height is at least 2’ higher than any part
of the roof within 10’ of the chimney. (See Figure 5.)
4. Next, install a New Buck Corporation Chimney Connector
to the flue of the heater. (See Figure 4.)
5. Using “Type DVL” double wall chimney connector,
connect the heater to the chimney by following Dura-Vent
installation instructions exactly.
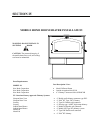
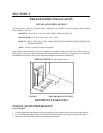
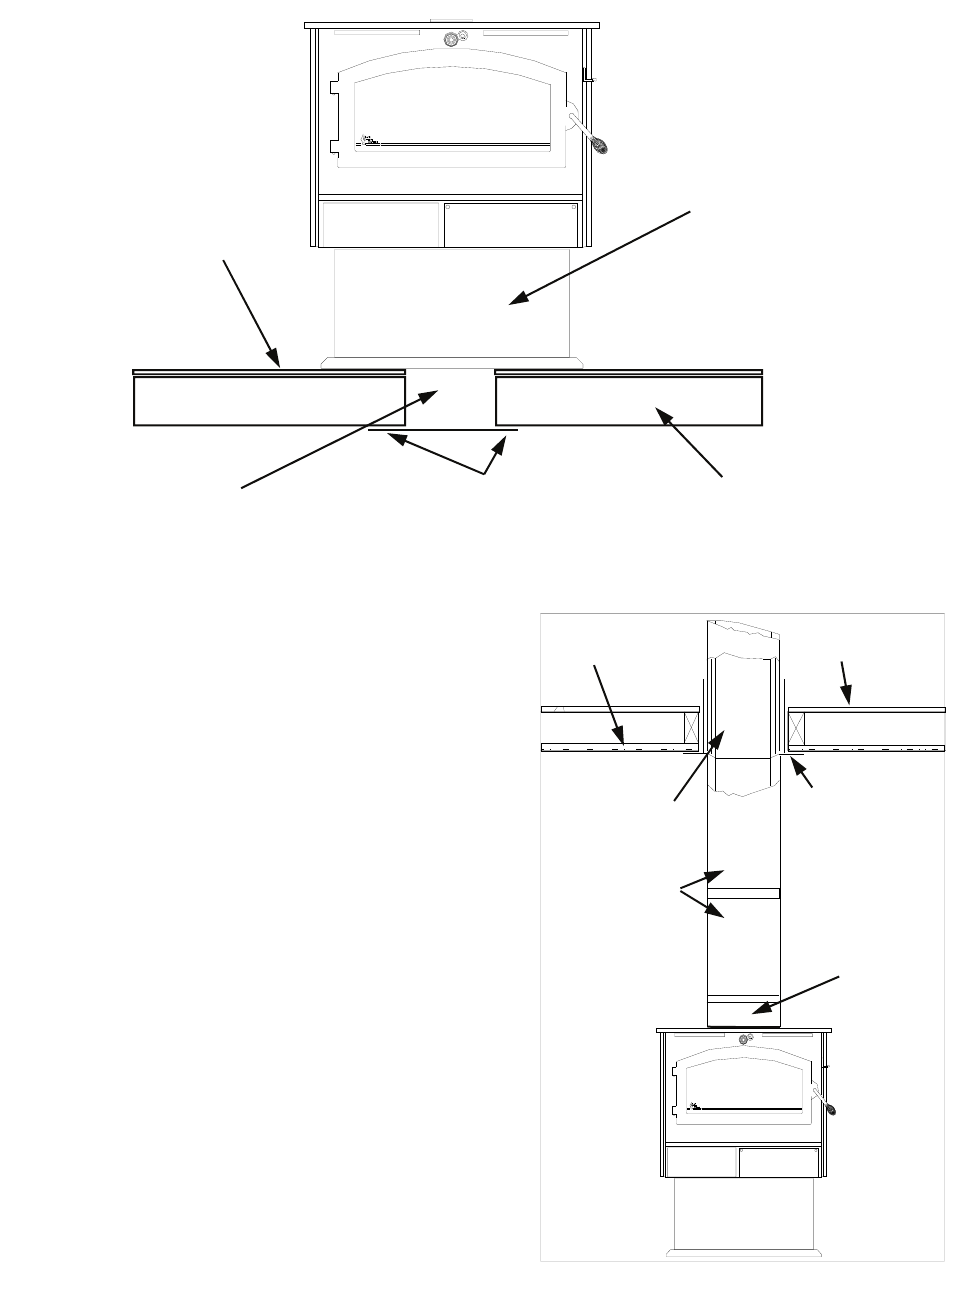
OUTSIDE AIR
PEDESTAL KIT
PROTECTIVE PAD
OUTSIDE AIR DUCT
MOBILE HOME FLOOR
#10 X 1
CEILING
ROOF
SIMPSON DURA-
VENT TYPE “DP”
CHIMNEY
SIMPSON
DURA-VENT
SQUARE SUP-
PORT BOX
SIMPSON DURA-
VENT TYPE “DVL”
DOUBLE WALL
CHIMNEY CONNEC-
TOR
NEW BUCK CORP.
CHIMNEY CONNEC-
TOR
FIGURE 4