


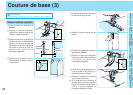

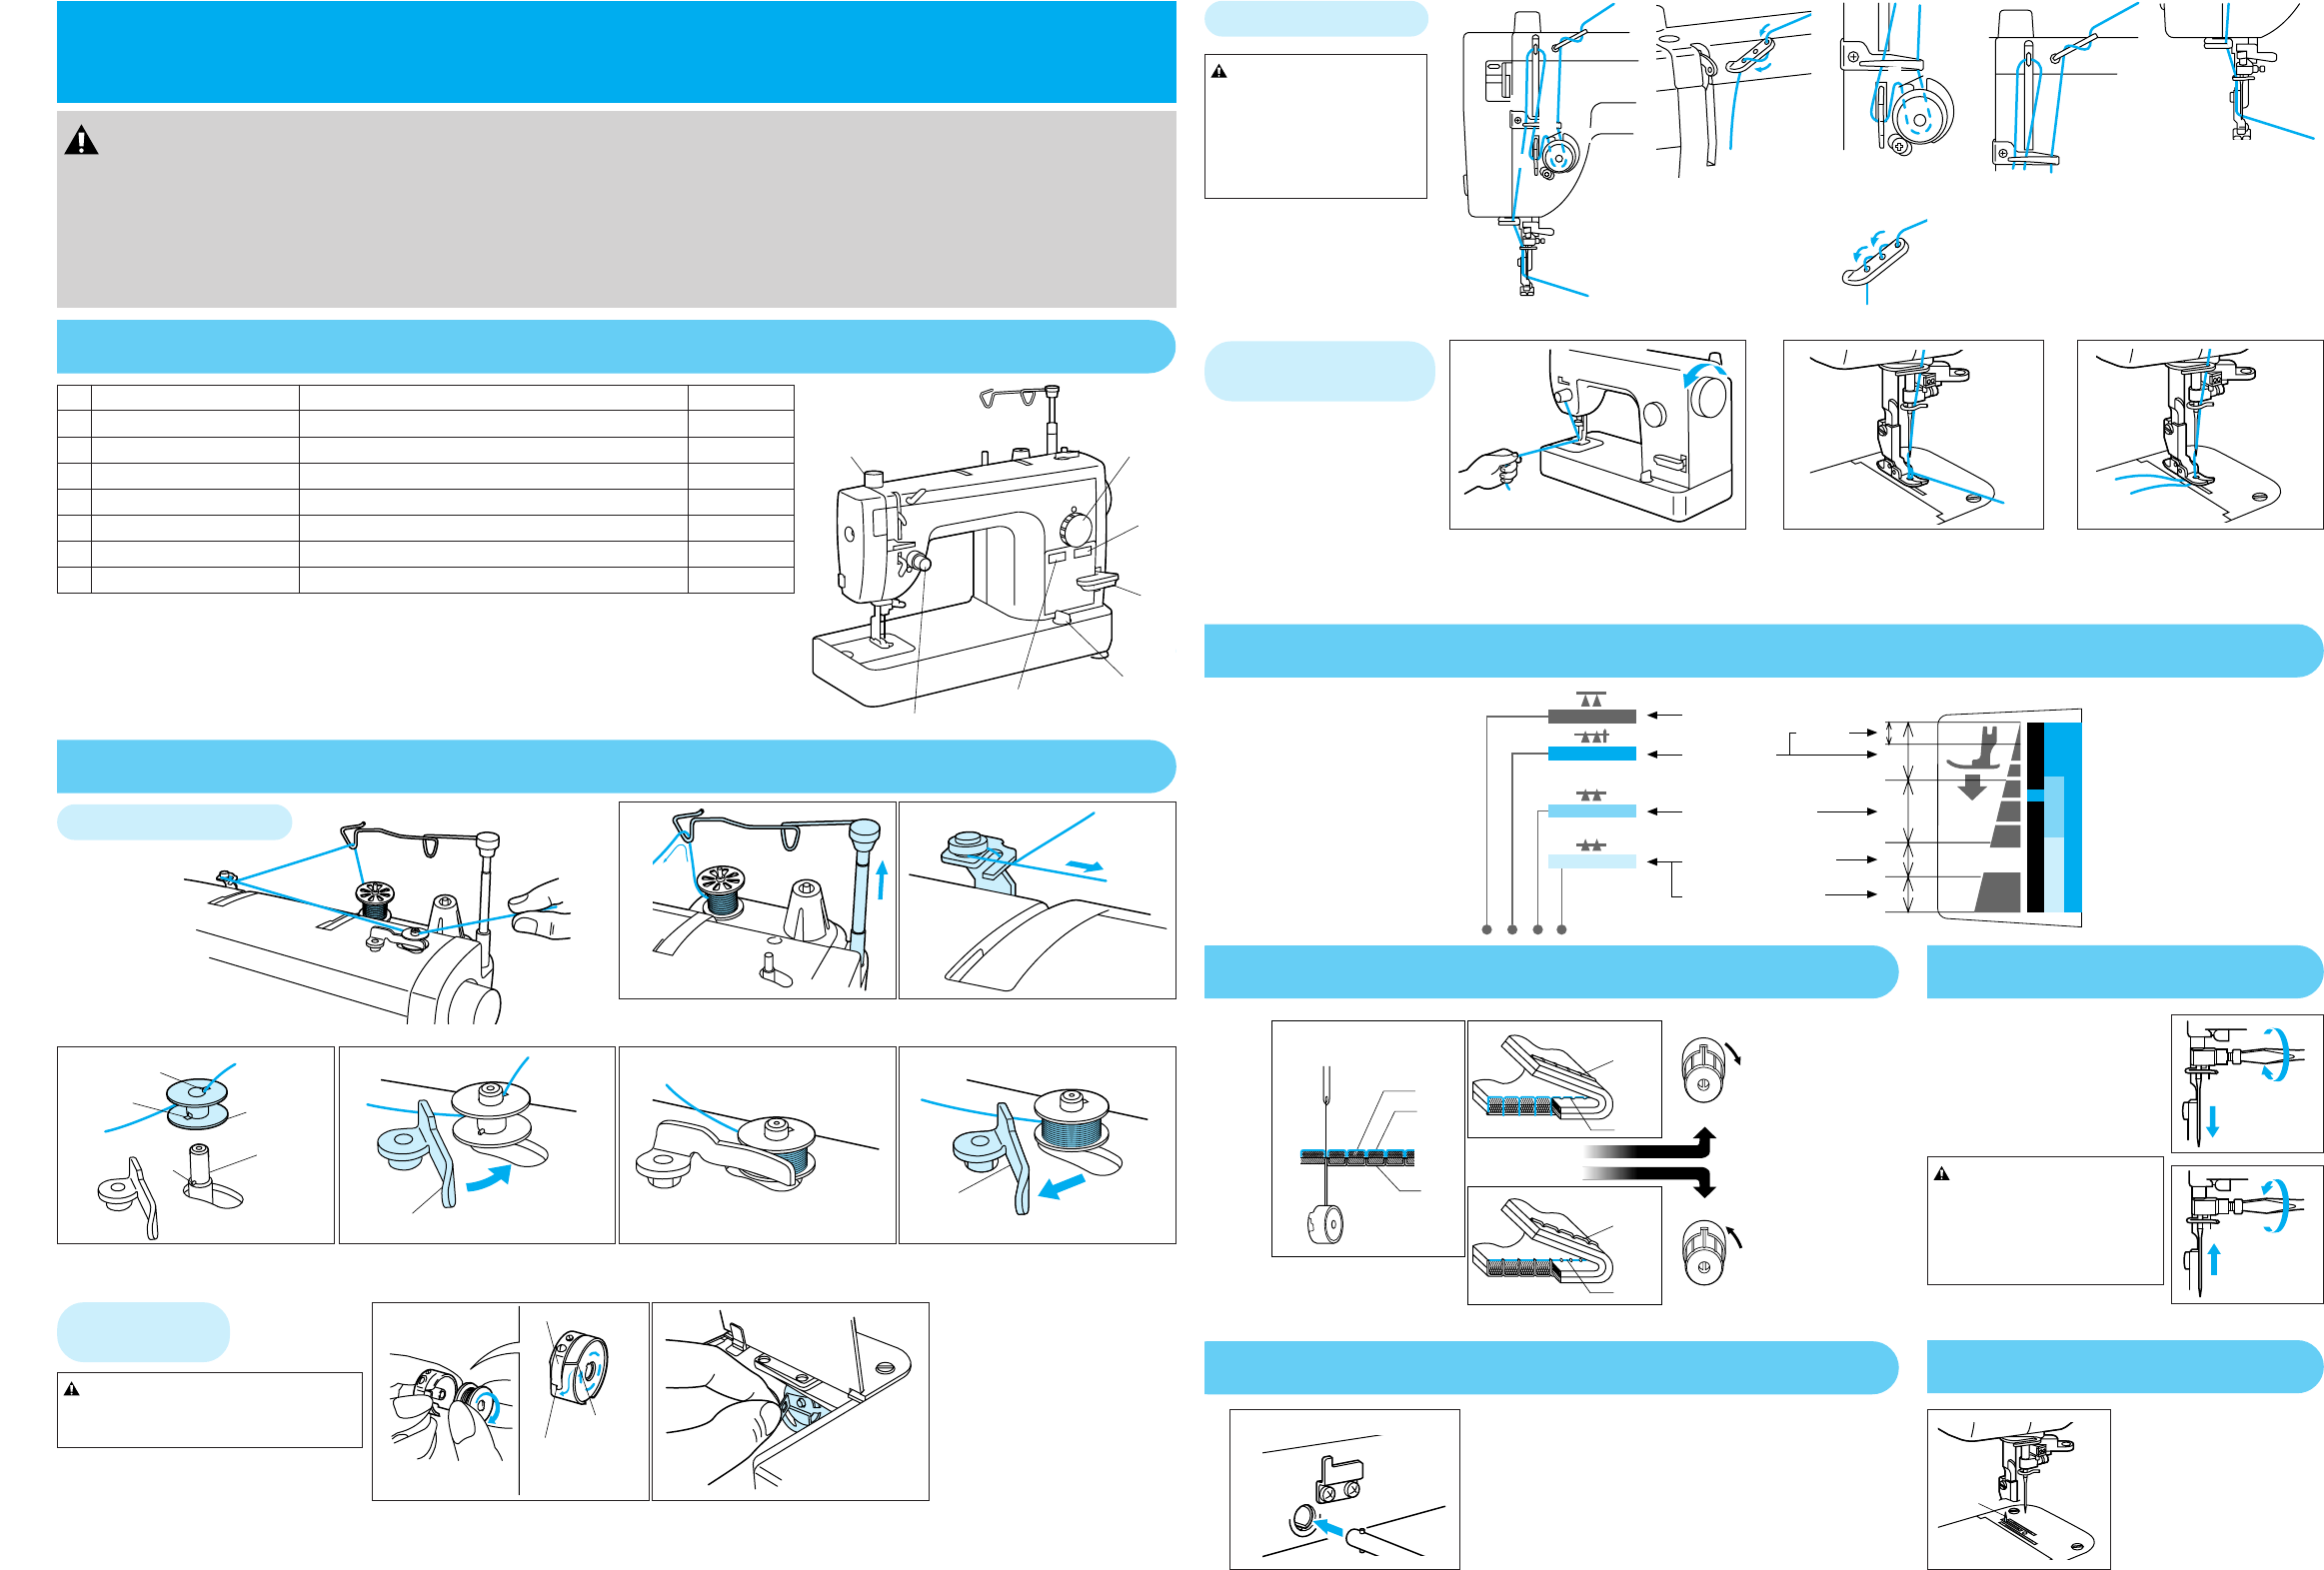
Threading
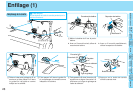
Bobbin Winding
1
2
Bobbins
Bobbin Winder Shaft
Guide
Pin
Thread Notch 1
Thread Notch 2
Bobbin Stop
Bobbin Stop
Lift thread guide bar all the way up, and run thread
through triangular thread guide as shown in drawing.
Run thread through bobbin winding thread guide
as shown in drawing.
Run thread through top thread notch, and align bottom
thread notch with guide pin on bobbin winder shaft.
Press bobbin stop up against empty bobbin and step
on the foot controller for a few seconds.
Stop winding when bobbin is full. Take foot of foot
controller.
Manually move bobbin stop back to original position.
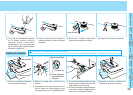
Bobbin
Insertion
Latch Spring
Thread Notch
✽ Bobbin should
be positioned
so it winds to
the left
Put bobbin into the bobbin case.
✽ Run thread through thread notch and under latch
spring, so that a length of about 10 centimeters
is exposed.
Pull the latch lever of the bobbin case out and push
the bobbin case into the shuttle race and release
the latch lever.
✽ If the latch lever is not all the way on the hook, it
may fly off during sewing and cause lower thread
breakage.
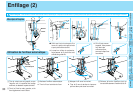
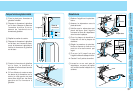
Upper Threading
1
2
6
7
9
0
A
3
4
5
8
1
2
3
5
6
4
7
8
9
0
A
● Make sure thread take-up lever is in
highest position and presser foot is
up.
✽ When using polyester, you should
run the thread through all three holes
of the thread guide.
Note
Please turn power is off before
using automatic needle threader.
Accidentally stepping on the foot
controller during this operation
could cause bodily injury or dam-
age to the machine.
How to Pull Out the
Bobbin Thread
✽ Insert threaded bobbin in sewing machine and then
begin.
1 While gently holding the end of the thread, turn the
hand wheel towards you to raise the needle.
✽ Turn once to pull out the bobbin thread.
2 Pull out the bobbin thread.
3 Pull approximately 15 centimeters of up-
per and bobbin threads out.
✽ Lift foot and run both upper and bobbin
threads under and behind presser foot.
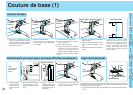
Thread Tension
to reduce
needle thread tension
to increase
needle thread tension
Fabric
Upper
Thread
Lower
Thread
Tension Block
Using the right needle
Upper
Thread
Lower
Thread
Right Side of fabric
Upper
Thread
Lower
Thread
Right Side of fabric
Wrong Side of fabric
Wrong Side of fabric
Using the wrong needle can lead to
such undesirable results as messy
stitches, puckered seams and
thread breakage.
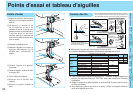
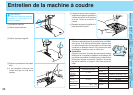
Changing the Needle
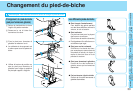
Knee Lift
Pin Feeding Unit
Screwdriver
1 Turn the sewing machine off. Raise
needle to highest position using
hand wheel, and lower presser foot.
2 Loosen screw with screwdriver, and
remove needle.
3 Insert new needle, and tighten
screw. Make sure needle is screwed
in tightly.
Note
Please make sure power is off before
carrying out the following operations.
There is a chance of injury if the ma-
chine accidentally starts running dur-
ing this operation.
Réglage du lerrir de lavage au genou
Using the convenient knee lift enables you to lift the
presser foot easily leaving your hands free to work
with the fabric.
✽ Push the knee control all the way in.
Feed
Pin
The feed pin passes up through all
layers of fabric moving with the feed
dog’s motion to feed all layers of the
fabric evenly.
✽ Feed pin is automatically lowered
when presser foot is raised.
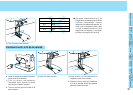
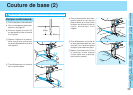
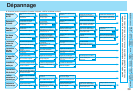
Foot Pressure and Feed Dog Positions
Main Parts and Functions
Part Function Page
1 Pressure Adjustment Dial
To adjust pressure of sewing feet against fabric being sewed. 4
2 Stitch Length Regulator To adjust stitch length. 3
3 Needle Stop Position Button To cancel needle stop position. 5
4 Reverse Stitch Lever To sew in reverse. 3
5 Feed Dog Adjustment Knob To adjust position of feed dogs. 5
6 Thread Cutter Button To trim upper and bottom threads at end of seams. 5
7 Tension Dial To adjust upper thread tension. 3, 11
✽For details, refer to the page indicated above in the Operation Manual.
This sheet only provides a summary of some important features related to
the machine. Please refer to the Operation Manual for detailed information.
1
6
7
2
3
4
5
CAUTION
– Moving parts – To reduce risk of injuri, switch
off before servicing. Replace cover.
N
(Feed Dogs Down)
(Pin Feeding)
Lightweight Fabrics
Mediumweight Fabrics
Heavyweight Fabrics
Velvet
Note
● For use with common 120V household current.
● To prevent machine overheating or potential fire hazards, please do not leave machine running when unattended
or not in use.
✽ Refer to p. 9 of the Operation Manual for instructions on using the
automatic needle threader.