


12
CONTENTS
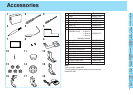
Accessories
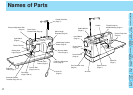
Names of
Parts
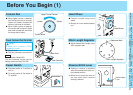
Before You
Begin
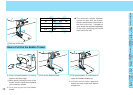
Changing
Needles and
Light Bulb
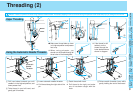
Threading
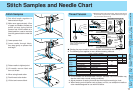
Stitch
Samples and
Needle Chart
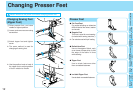
Changing
Presser Feet
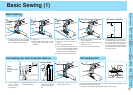
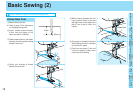
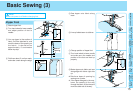
Basic
Sewing
Caring for
Your
Machine
Trouble
Shooting
8
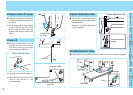
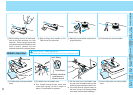
6 While holding the end of the thread,
step on the foot controller for a few
seconds. Once enough thread has
wound itself around the bobbin to hold
itself in place, release the foot
controller and trim the excess thread.
7 Stop winding when bobbin is full.
Take foot of foot controller.
8 Manually move bobbin stop back to
original position.
9 Cut thread and remove bobbin.
Bobbin Insertion
1 Lift slide plate (and open bobbin
door).
2 Put bobbin into the bobbin case.
✽ Run thread through thread notch and
under latch spring, so that a length of
about 10 centimeters is exposed.
3
Pull the latch lever of the bobbin case
out and push the bobbin case into the
shuttle race and release the latch lever.
✽ If the latch lever is not all the way on
the hook, it may fly off during sewing
and cause lower thread breakage.
4 Lower slide plate and close bobbin
door.
CAUTION – Moving parts –
To reduce risk of injury, switch off before servicing. Replace cover.
Bobbin Stop
Slide Plate
Bobbin Door
Latch Spring
Thread Notch
✽ Bobbin should be
positioned so it
winds to the left