10
CONTENTS
Accessories
Names of
Parts
Before You
Begin
Changing
Needles and
Light Bulb
Threading
Stitch
Samples and
Needle Chart
Changing
Presser Feet
Basic
Sewing
Caring for
Your
Machine
Trouble
Shooting
6
Changing Needles and Light Bulb
Note
Please make sure power is off before carrying out
the following operations. There is a chance of
injury if the machine accidentally starts running
during this operation.
Note
HLX5 needles should be uses; however, Schmetz
130/705H may also be used under normal
circumstances.
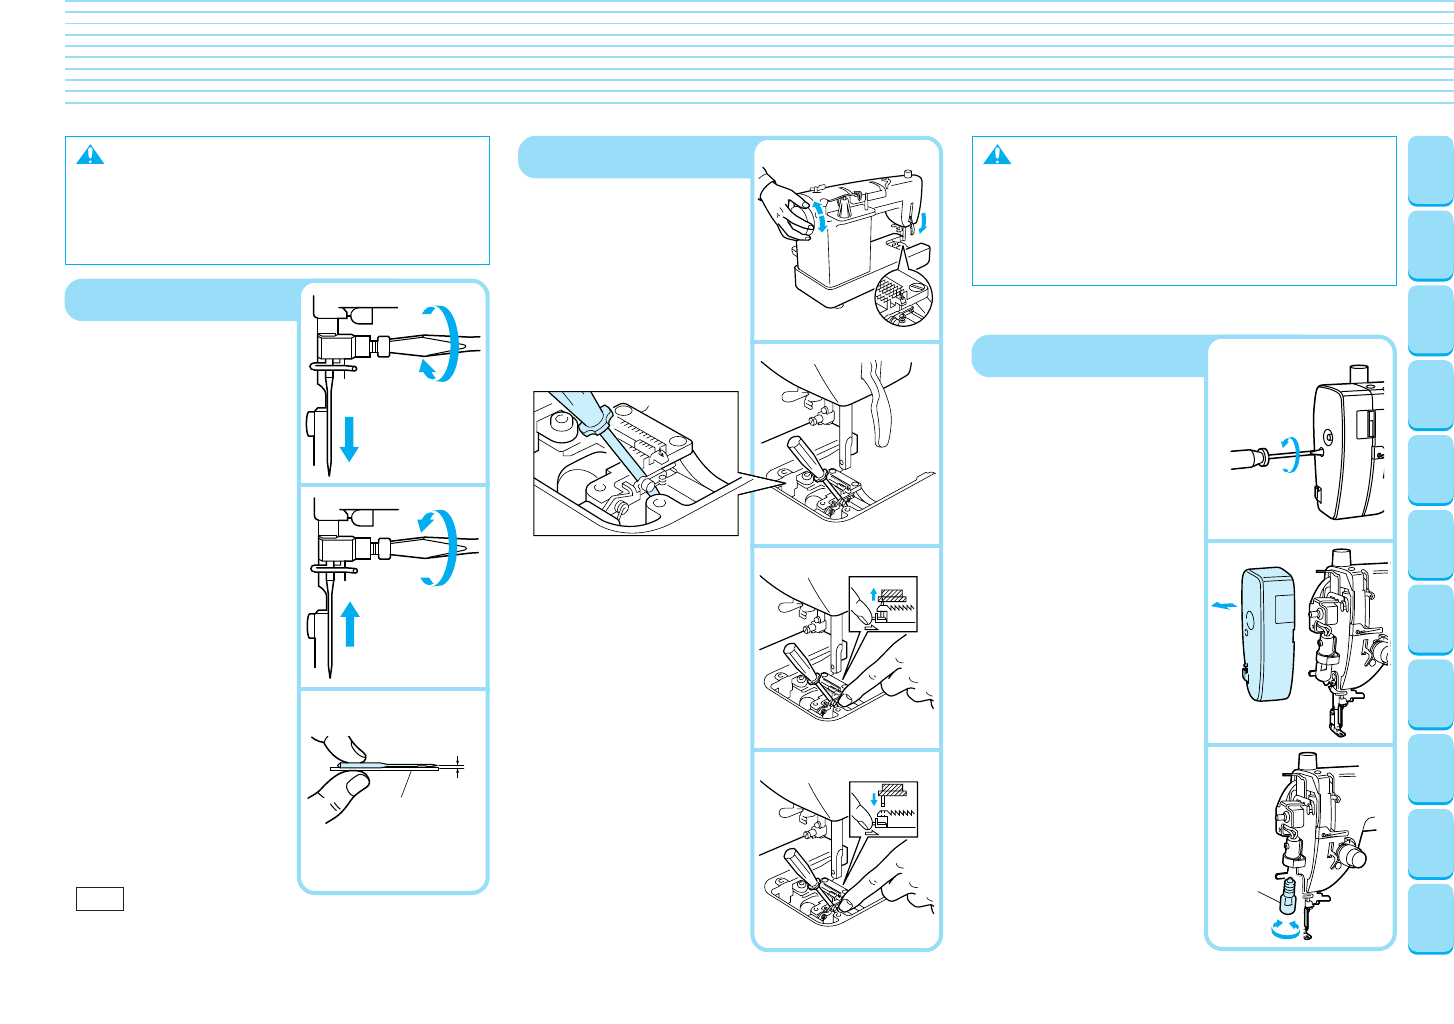
Changing the Needle
1
Turn the sewing machine
off. Raise needle to
highest position using
hand wheel, and lower
presser foot.
2
Loosen screw with screw-
driver, and remove needle.
3 Insert new needle, and
tighten screw. Make
sure needle is screwed
in tightly.
✽ Check needles on a flat
surface to make sure
they're not bent.
Note
Please make sure power is off before carrying out
the following operation. The glass plate over the
light bulb will be hot immediately after using the
machine, so you should wait until the machine has
had a chance to cool down before changing bulbs.
Screwdriver
Changing Light Bulbs
1 Turn off power.
2 Remove screws from
head.
3 Remove head.
4
Unscrew bulb and remove.
5 Screw in new bulb.
Rated 120V 15W
6 Re-attach head and
tighten screw.
Screwdriver
Changing the Feed Pin
1
Set the feed dogs to "velvet"
position. (see Page 5)
2
Remove needle, presser
foot and needle plate.
3 Lower presser foot and
turn hand wheel until feed
pin is in its highest position.
4
Insert small screwdriver
(included) as shown in diagram.
5 While holding spring
with fingertip, lower the
feed pin changer onto
the needle to pick it up.
6 Attach new feed pin to
feed pin changer, lower
and attach while holding
spring with fingertip.
7 Remove screwdriver.
8 Re-attach needle plate,
needle and presser foot.
flat surface
The needle should lay
parallel to a surface.
Lay needle on a
flat surface
(such as the needle
plate or a plate
of glass).
Light
Bulb


