


50
Contents Setting Up
Basic Sewing
Machine
Operation
Utility Stitches Embroidering
Maintenance
Troubleshooting
Error
Messages
Sewing Chart
Patterns
(Programmed
in Machine)
Patterns
(Memory Card)
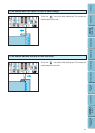
Sewing stretch fabrics ( )
3
5
3
5
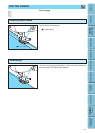
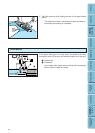
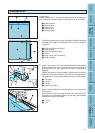
2. Lower the presser foot and start sewing.
* Set the stitch width to match the diameter of the gimp
thread.
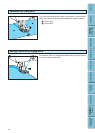
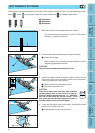
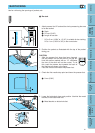
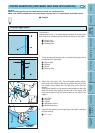
When sewing buttonholes onto stretch fabric, insert a gimp thread
into the buttonhole seam (buttonholes only).
1. Hook the gimp thread onto the end of presser foot “A”, insert it
into the groove at the front of the presser foot and temporarily
tie it there.
1 Upper thread
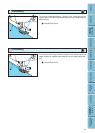
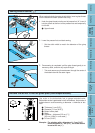
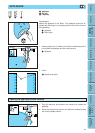
3. Once sewing is completed, pull the gimp thread gently to re-
move any slack, and trim any surplus length.
* Trim and remove any threads sewn through the center of
the buttonhole with the seam ripper.
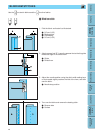
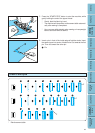
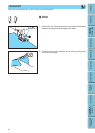
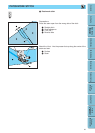
Buttons that do not fit into the guide plate (Odd-shaped buttons)
Use scale on the buttonholer foot to gauge buttonhole size.
Buttonholer scale is graduated in half centimetres. Adjust size of
buttonholes on scale according to diameter + thickness of but-
tons.
1 Thickness [1 cm (3/8”)]
2 Diameter [1.5 cm (9/16”)]
3 Button holder plate
4 Scale
5 Diameter + thickness [2.5 cm (1”)]
[0.5 cm (13/64”) in one scale.]
6 0.5 cm (13/64”)
Example: For a button with a diameter of 1.5 cm (9/16”)
and a thickness of 1 cm (3/8”), the scale should
be set at 2.5 cm (1”)
1
1
2
3
4
5
6