99
Contents Setting Up
Basic Sewing
Machine
Operation
Utility Stitches Embroidering Maintenance
Troubleshooting
Error
Messages
Sewing Chart
Patterns
(Programmed
in Machine)
Patterns
(Memory Card)
CHANGING THE LIGHT BULB
CAUTION
The glass plate over the light bulb will be hot after running the machine. Please wait for it to cool
off before changing the light bulbs so you don't burn yourself.
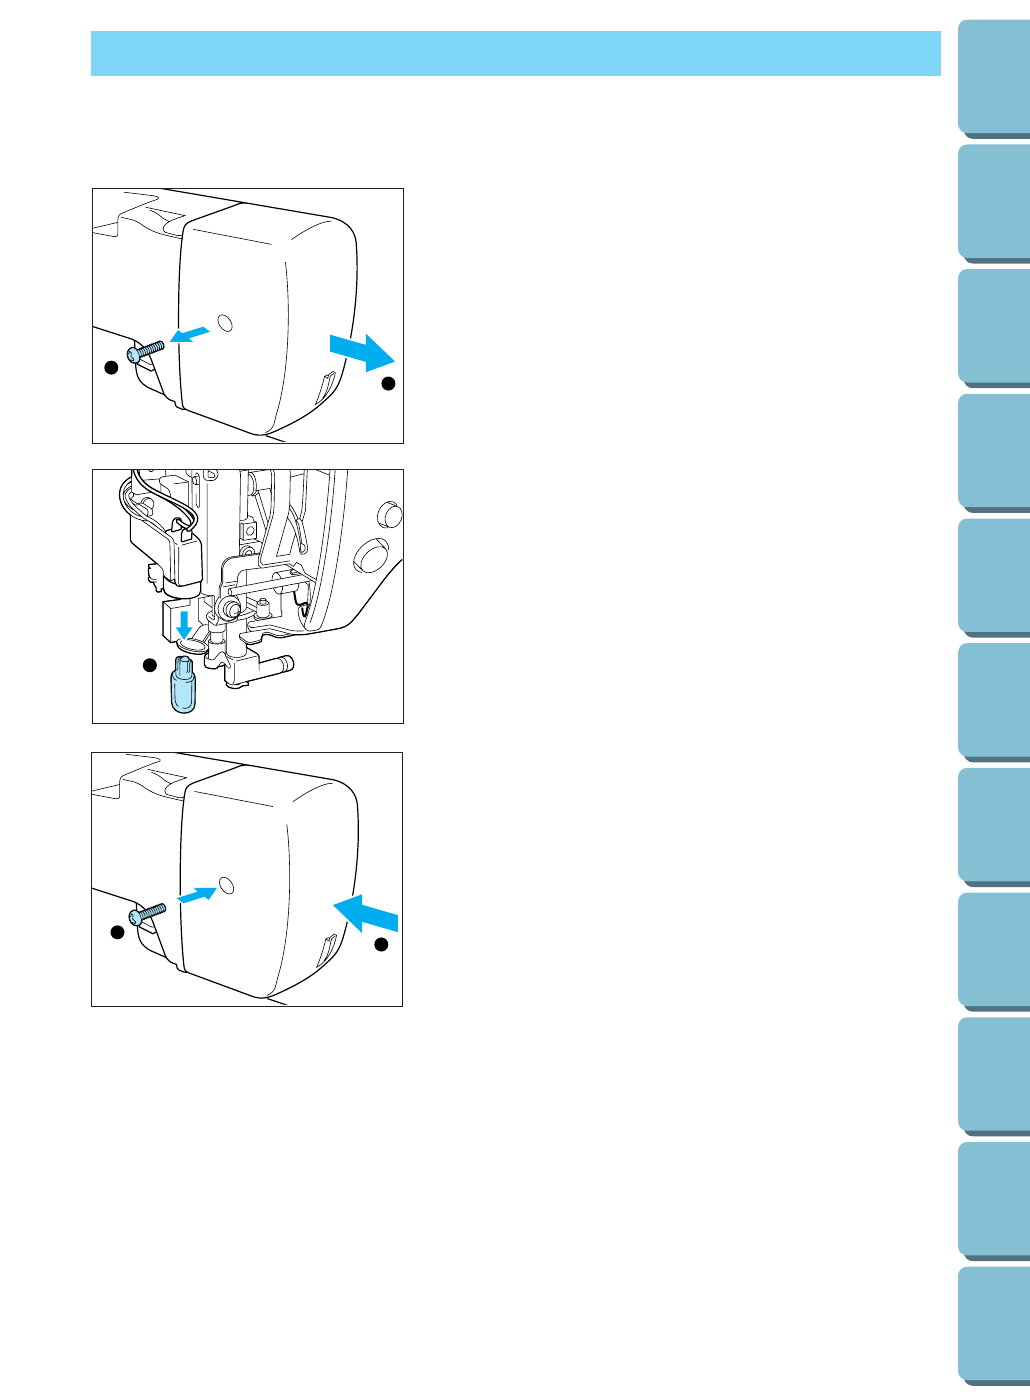
1. Turn the power off.
2. Loosen the screw on the reverse side of sewing head.
Remove the end cap.
1 Screw
2 End cap
3. Replace the snap in the light bulb with a new one.
1 Light bulb
* Light bulbs are available through your dealer. (8V, 2.4 W/
Parts code X50228001)
CAUTION
Do not use Brother 12V 5W light bulbs designed for use with
this machine (part# XA2037001). Do not use other bulbs. Bulbs
can be purchased at a Brother dealer near you.
4. Set the end cap.
5. Tighten the screw.
1 End cap
2 Screw
1
2
1
1
2


