SEWING THE STITCHES
Utility Stitches
Sewing S-37
S
2
■ Piecing Using the 1/4" Quilting Foot
with Guide (optional with some
models)
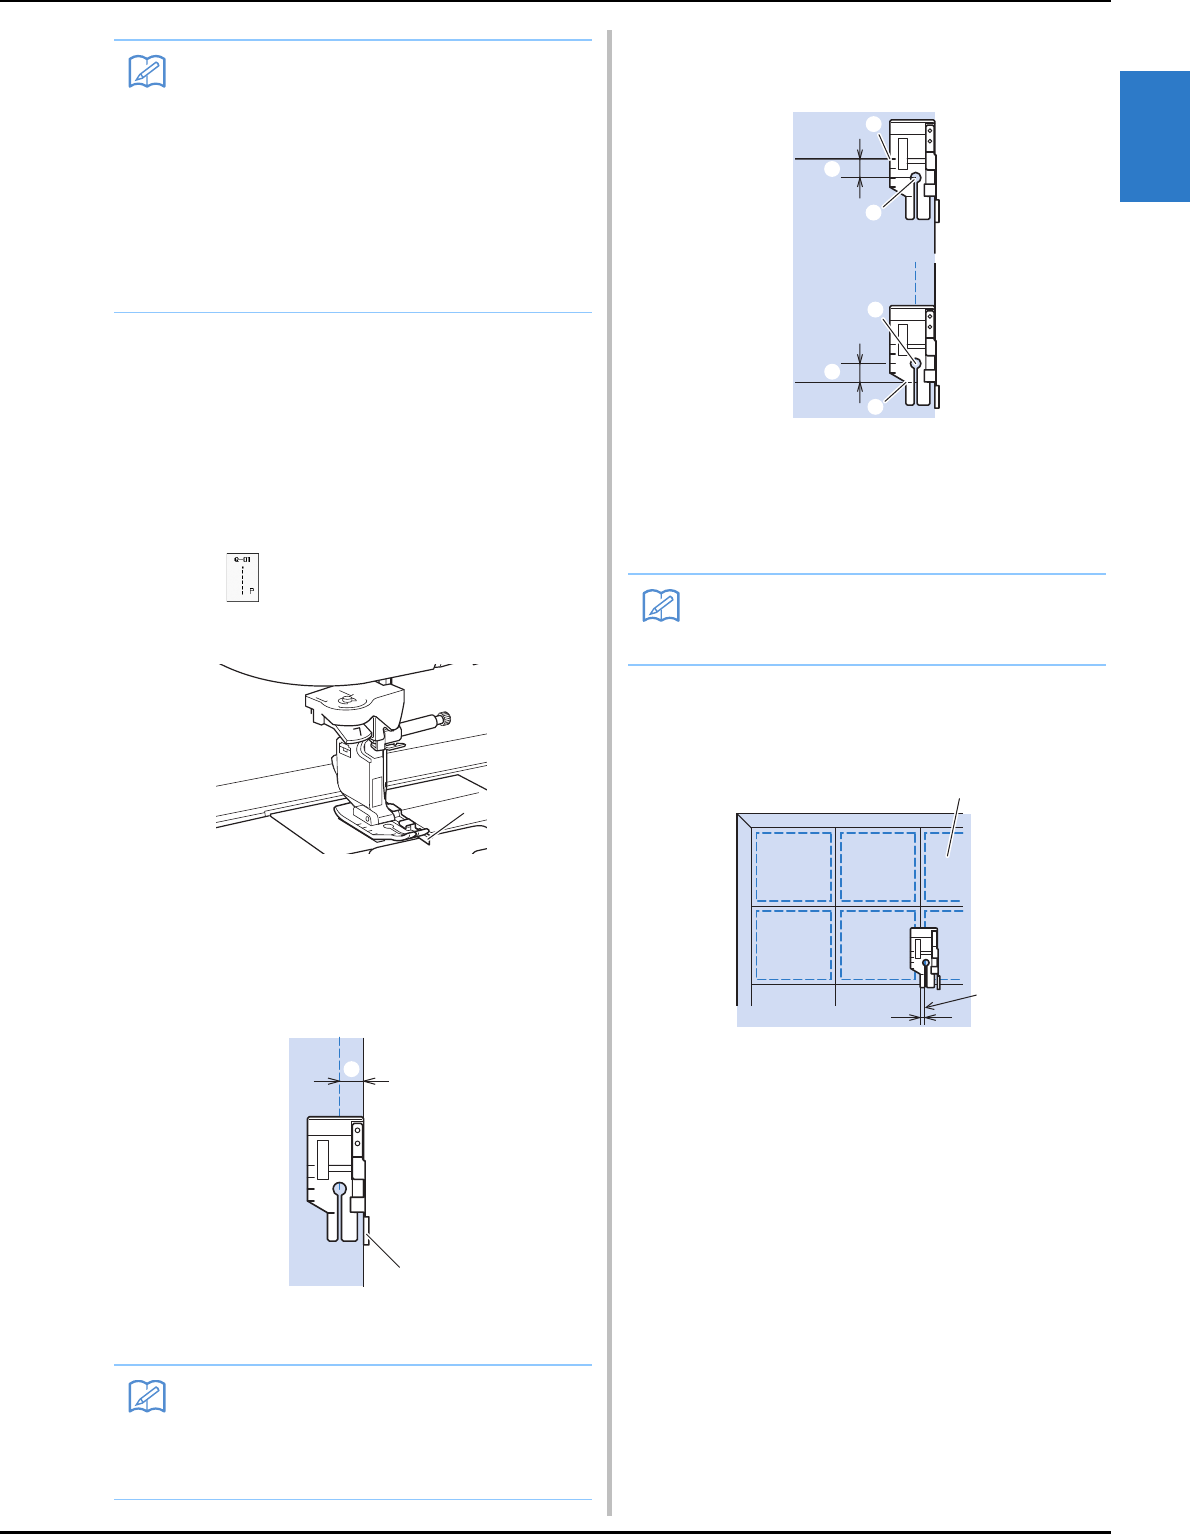
This quilting foot can sew an accurate 1/4 inch or
1/8 inch seam allowance.
It can be used for piecing together a quilt or for
topstitching.
a
Press , and then attach the 1/4” piecing
foot with guide.
a Guide
b
Use the guide and marks on the presser foot
to sew accurate seam allowances.
Piecing a 1/4 inch seam allowance
Sew keeping the edge of the fabrics against the guide.
a Guide
b 1/4 inch
Creating an accurate seam allowance
Use the mark on the foot to begin, end, or pivot 1/4
inch from edge of fabric.
a Align this mark with edge of fabric to begin.
b Beginning of stitching
c End of stitching
d Opposite edge of fabric to end or pivot
e 1/4 inch
Topstitching quilting, 1/8 inch
Sew with the edge of the fabric aligned with the left
side of the presser foot end.
a Surface of fabric
b Seam
c 1/8 inch
Memo
• Using a straight stitch (middle needle
position) makes it easier to sew smoothly
(see page S-24).
• For models equipped with the guideline
marker:
In the case Q-01(center, at width 3.5 mm) is
selected, if the guideline marker is set at
10.0 mm (3.5 mm plus 6.5 mm, close to 1/4
inch), you can sew piecing with referring the
guideline marker.
Memo
• For accurate fabric placement, refer to
“Aligning the Fabric with a Mark on the
Needle Plate or Bobbin Cover (with Mark)”
on page S-26.
a
a
b
Memo
• For details on pivoting, refer to “Pivoting”
on page S-15.
a
e
e
c
d
b
a
b
c


