


D1255RB/D1256RB/D1257RB | Installation Instructions | 3.0 Installation
8 Bosch Security Systems, Inc. | 8/06 | F01U011791B
Warning: Avoid injury. Do not wire the
D1255RB, D1256RB, or D1257RB if
power is applied to the control panel.
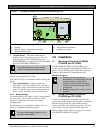
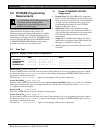
8. Connect the flying leads on the wiring harness
(Figure 10) to the wiring terminals on the control
panel. Refer to Table 2.
Table 2: Keypad or Annunciator Connections
D9412GV2/
D7412GV2
Terminal Function
Keypad
Wire Color Function
32*
POWER + Red 12 VDC
31 DATA BUS A Yellow Data
30 DATA BUS B Green Data
29 COMMON Black Common
* Connect with at least 1.5 m (5 ft.) of 0.8 mm (22 AWG) wire
(4.3 m [14 ft.] of 1.2 mm [18 AWG] wire).
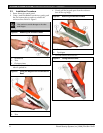
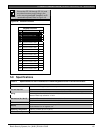
9. Feed the connector end of the wiring harness
through the opening in the back of the enclosure
base (Figure 10).
10. Secure the keypad or annunciator to its mounting
location from inside the enclosure base by inserting
screws through the mounting holes (Figure 10).
Figure 10: Mounting the Enclosure Base
2
3
4
5
1
1
1
1
1 - Mounting hole
2 - Flying leads
3 - Wiring harness
4 - Opening
5 - Connector
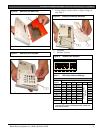
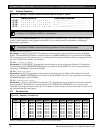
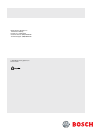
11. Connect the wiring harness to the connector on the
back of the keypad or annunciator (Figure 11).
Figure 11: Wiring Harness Connection to Keypad
or Annunciator
1
1 - Connector
12. Replace the faceplate.
13. Replace the cover. Align and insert the top two
tabs of the cover into the top two tab slots on the
front of the keypad.
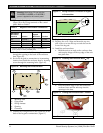
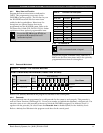
14. Install the enclosure base:
a. Hold the unit at an angle to the enclosure base
and snap the hinges on the top edge of the unit
into place first.
Figure 12: Installing the Enclosure Base − Top
1 - Hinges
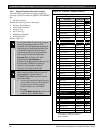
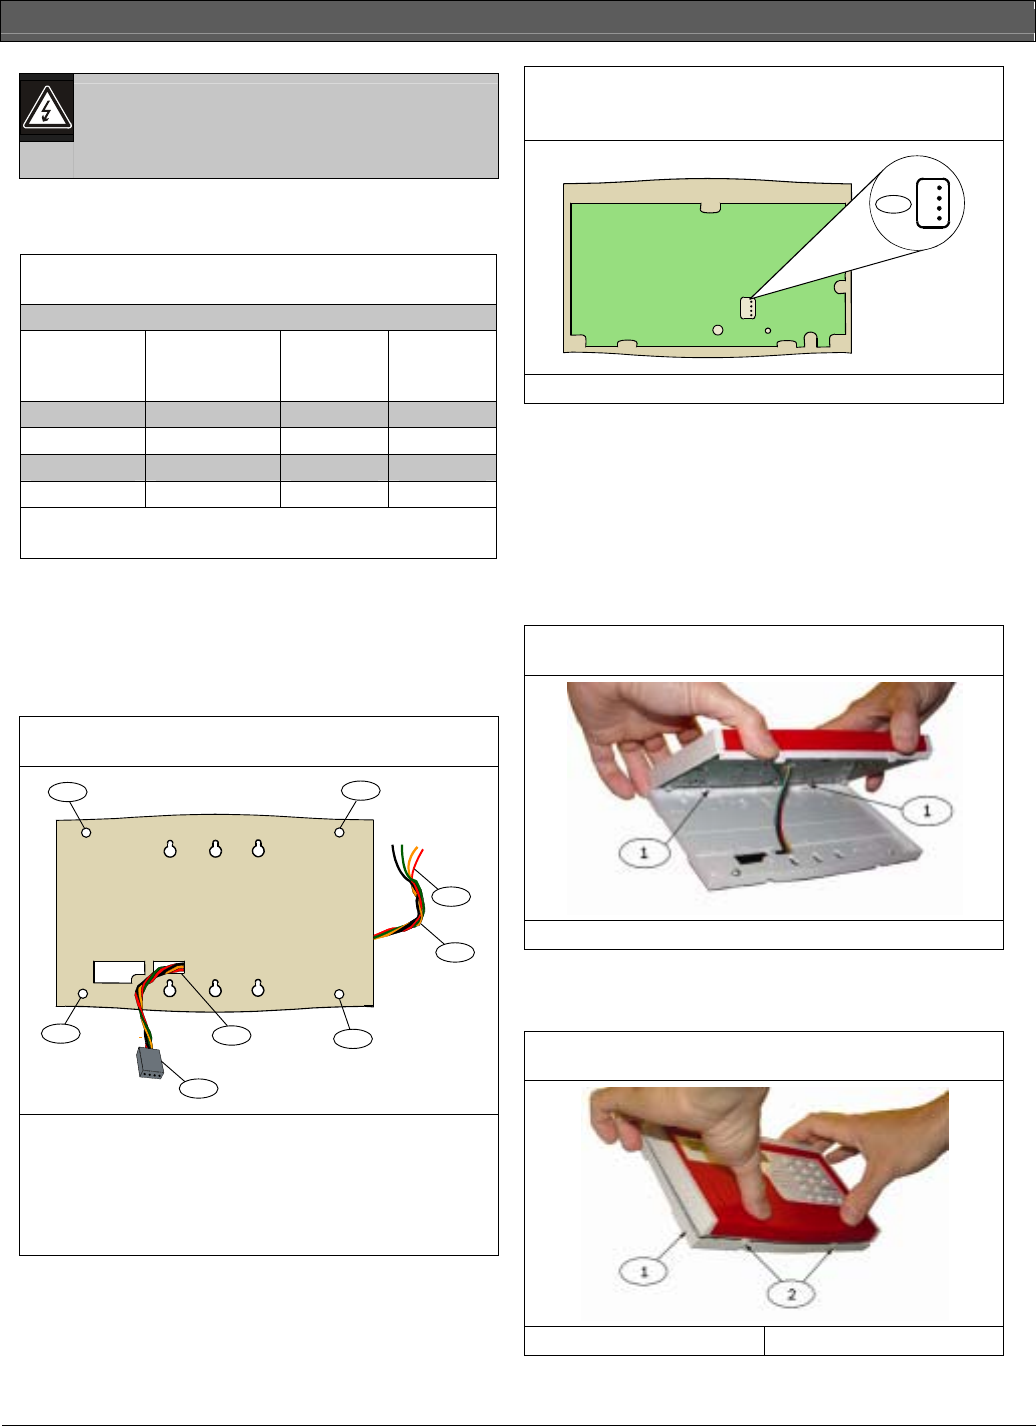
b. Press the bottom edge of the unit toward the
enclosure base until the tabs snap into the
openings in the base.
Figure 13: Closing the Enclosure Base – Bottom
1 - Enclosure base 2 Tabs