


XG1000 CONTROLLER ///
INDICATORS:
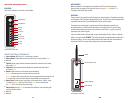
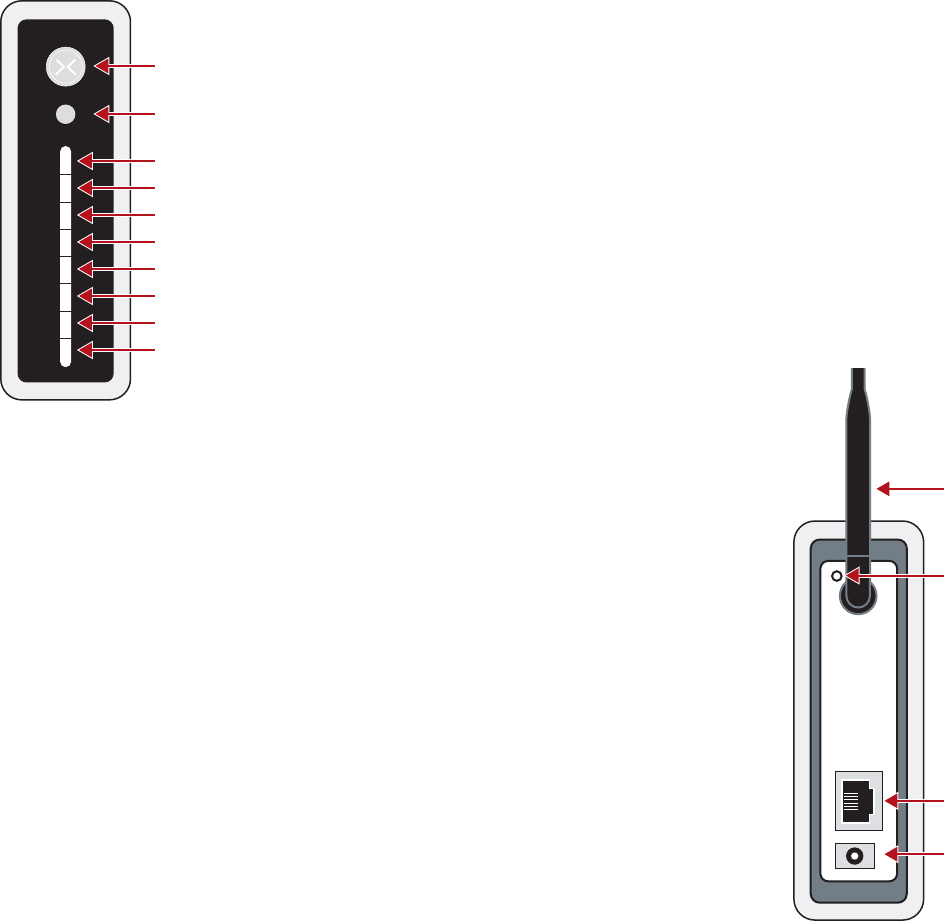
There are ten indicators on the front of the controller.
FROM TOP TO BOTTOM, THE FUNCTIONS ARE:
■
Power Indicator: Will light up Blue when power is applied.
■
Video indicator: Shows when one or more cameras are in use by flashing Green.
■
Not Used
■
LAN Link: Shows proper Ethernet connection between the controller and the router
with a solid Green
■
LAN Activity: Shows network activity between the controller and other devices
by flashing Green
■
Remote: Shows the status of the remote service connection
• Green indicates good communication with the remote site
• Amber indicates that the controller has not been registered with the remote site, yet.
• Red indicates no communication between the controller and the remote site.
■
Device Status: Shows the worst case status of the devices on the “Monitor” page.
If all devices are Green then this LED will show Green. If one or more devices
are Yellow or Red, the LED will light accordingly.
■
Device Activity: Flashes Green to show when the controller is communicating with
one of the wireless devices.
■
Not Used
■
Not Used
POWER INDICATOR
VIDEO INDICATOR
NOT USED
LAN LINK
LAN ACTIVITY
REMOTE
DEVICE STATUS
DEVICE ACTIVITY
NOT USED
NOT USED
XG1000 CONTROLLER FRONT PANEL
I2
II
XG1000 CONTROLLER REAR PANEL
ETHERNET CONNECTOR
ANTENNA
CONTROLLER REBOOT BUTTON
POWER CONNECTOR
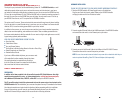
BOOT SEQUENCE
When the controller is first powered up, the bottom five LED’s on the front panel go
through a boot-up sequence. The lights start out as Red, go to Amber and then Green.
The process takes about three minutes.
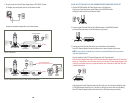
REAR PANEL:
The rear panel of the controller contains the ports for cable connections. The bottom round port
is for the power. The AC adapter is plugged into this port. The other port is for the network cable.
A standard Ethernet cable is connected between this port and your router.
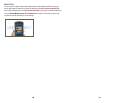
The antenna on the back panel is used for communication between the controller and
the wireless devices. It should normally be placed in an upright position. If you are having
communication problems with sensors (as indicated on the “Monitor” page) you should try
repositioning the antenna slightly.
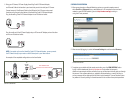
If you are unable to access the controller, you may need to reboot the unit. There is a recessed
button on the back labeled ‘REBOOT’. This button will reboot the controller while retaining all of
the internal settings. You can use the white reset tool that comes with each sensor device to
activate this button. The system will go through the normal boot sequence.