6
5
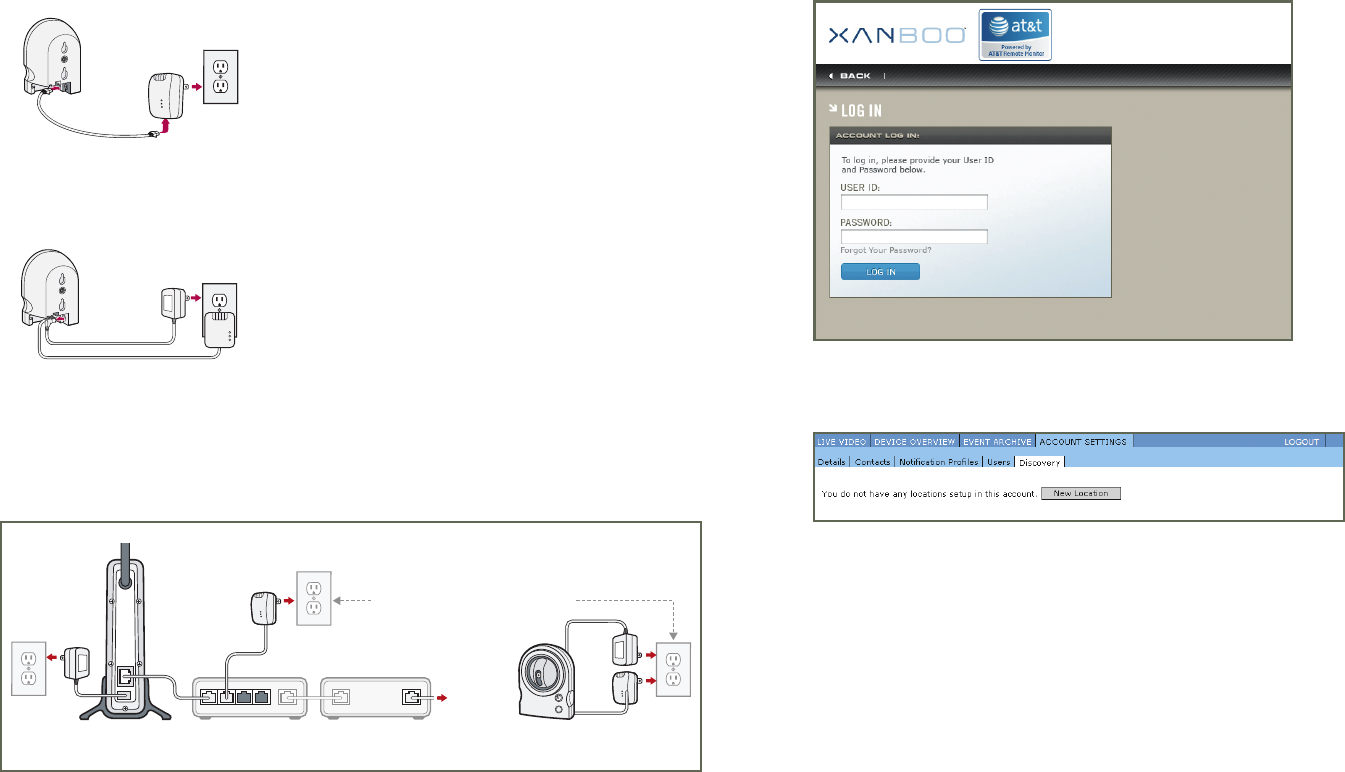
4. Bring your IP Camera, AC Power Supply, HomePlug Turbo PLC Ethernet Adapter,
and Ethernet Cable to the location in your home that you wish to install your IP Camera.
Connect one end of the Ethernet Cable to the LAN port of the IP Camera and connect
the other end to the port on the bottom of the HomePlug Turbo PLC Ethernet Adapter.
Plug the HomePlug Turbo PLC Ethernet Adapter into an AC electrical outlet.
Plug the small end of the AC Power Supply into your IP Camera AC Adapter port and the other
end into an AC electrical outlet.
NOTE: If you prefer not to use the HomePlug Turbo PLC Ethernet Adapters, you may connect
the IP Camera directly to your router or other Ethernet port in your home instead.
An example of the completed configuration can be found below.
2
ROUTER
(NOT INCLUDED)
VIDEO TRANSMITTED OVER
POWER LINES VIA PLC ETHERNET ADAPTERS
INTERNET
XG1OOO CONTROLLER
PLC
ETHERNET
ADAPTER
DSL/CABLE MODEM
(NOT INCLUDED)
IP CAMERA
1
3 4
LAN LANWAN
COMPLETED CONFIGURATION
CONTROLLER REGISTRATION
CONTROLLER REGISTRATION:
1. When you purchased your Remote Monitoring system, you created a remote account
with a UserID and Password. Using a web browser on a PC connected to the same local
network as your XG1000 Controller, go to site http://xanboo.com/login and log in
using this ID and password.
2. After successfully logging in, select the Account Settings tab and then select Discovery.
3. To register your controller with the remote service site, press the ‘NEW LOCATION’ button.
A plug-in will be downloaded from http://xanboo.com that enables the browser to
detect and communicate with the controller. A pop-up will be shown that will guide you through
the process. If the software detects any problems with downloading or running the plug-in,
an error message will be displayed that will link to help information. The most common cause
for problems is security settings in the web browser that do not allow the required operations.


