8
7
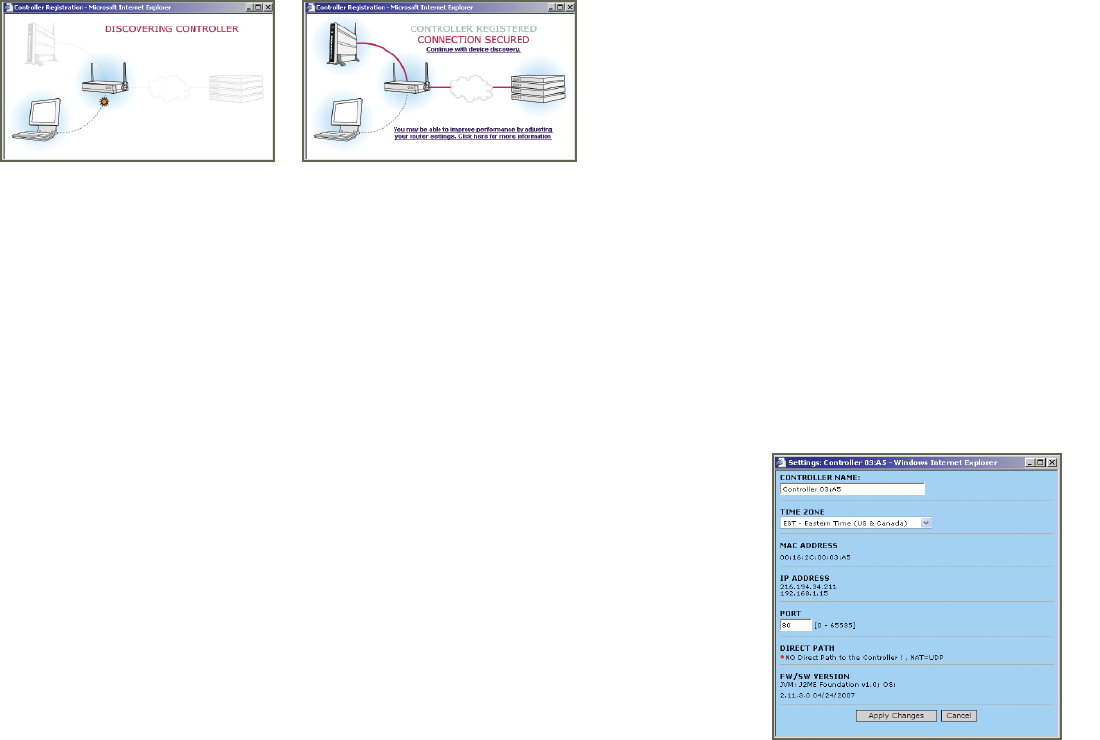
4. When the controller registration has completed, you will see a confirmation message as
in the following picture. After you successfully register your controller you may be prompted to
follow instructions in order to improve performance
5. After the controller has been successfully installed and registered, it will automatically start
device discovery. If you don’t see a message that discovery is initializing or in progress, press
the ‘START DISCOVERY’ button. Any cameras that are detected will be registered automatically.
Any other wireless devices need to be registered one at a time. You can do this now or you can
register the additional devices later. To do this, examine the documentation that came with the
device and locate the discovery button on the device. It is usually in a small hole in the case.
Wait until one device is finished registering before you press the discovery button on the next device.
When you are done, press the ‘STOP DISCOVERY’ button.
6. Select the Device Overview tab and verify that all of your devices are shown.
DEVICE DISCOVERY ///
YOU CAN ADD DEVICES ANY TIME BY USING THE FOLLOWING PROCEDURE:
1. Select the Account Settings tab and then select Discovery.
2. Press the ‘START DISCOVERY’ button and wait until you get a message indicating
discovery is in progress.
3. Cameras should be detected and registered automatically. If you receive a message
that the camera needs to be reset, press the Factory Defaults button on the camera.
4. For wireless devices, press the Discover button on each device, one at a time
and wait until the device is registered before proceeding to the next one.
5. When you are finished adding devices, press the ‘STOP DISCOVERY’ button.
Go to the Device Overview page and make sure that all of the devices appear in the list
YOU CAN ALSO DELETE DEVICES AT ANY TIME:
1. Select the Account Settings tab and then select Discovery.
2. Press the ‘DELETE’ button next to the device that you would like to remove.
3. Confirm that you want the device to be deleted.
4. Go to the Device Overview tab and confirm that the device no longer appears in the device list.
CONTROLLER SETUP POP UP WINDOW
USING THE SYSTEM WITH A CORPORATE FIREWALL ///
If you are using the Remote Monitoring system in an environment that is protected by a corporate
firewall, you may need to make some settings that will allow you to get the best performance out
of your system. The great majority of users will not need to use these settings.
Select Account Settings and then Details. In the section labeled ‘HTTP PROXY’ there are fields
for proxy UserID and Password. These settings will enable the live video window to use the most
efficient method to get data from your camera. If you do not know what to enter in these fields,
you need to ask you System Administrator.
TIME ZONES ///
You must set the time zone in your controller so that events are time stamped with the
correct information. This will also ensure that events you have set up to occur at certain times
will perform as expected.
Because you can access the system from anywhere, there is the possibility that the controller is in
a different time zone than where the remote viewing PC or cell phone is located. The default time zone
for the controller is United States EST. If you need to change this, select the Device Overview tab.
In the bar where the controller name is shown, click on the icon next to the controller name. You will
be shown a pop-up where you can set various controller settings. Select a time zone and click ‘Apply’.
The controller will be reset after this change, which may take a minute or so.
YOUR REMOTE MONITORING ACCOUNT! ///
Your account is set up into 4 sections: Live Video, Device Overview, Event Archive and Account
Settings. Each section has a specific role, and understanding each role will allow you to maximize
the Remote Monitoring experience.


