


40
settings - adjustment - problem identi cation menus
Accessing the settings - adjustment - problem identi cation
menus
The boiler can be used to manage the heating and domestic hot
water production system in its entirety.
Navigation within the menus enables the boiler system +
connected peripheral units to be customised, optimising
operation for maximum comfort and maximum saving. It also
provides important information relating to the e cient operation
of the boiler.
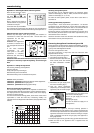
Before access to the menus, the display show some “quick
settings” to have direct access to the parameters.
To see all available parameters and menu access to view FULL
MENU.
GAS - Direct access to the parameters:
220 - 231- 232- 233 - 234 - 270
SET - Direct access to the parameters:
220 - 231- 223 - 245 - 246
PCB - Direct access to the parameters:
220 - 228 - 229 - 231- 232- 233 - 234 - 247 - 250 - 253
VIS - Direct access to the parameters:
821 - 822 - 824 - 825 - 827 - 830 - 831 - 832 - 833- 840 - 835
ZONE - Direct access to the parameters:
402 - 502 - 602 - 420 - 520 - 620 -434 - 534 - 634 - 830
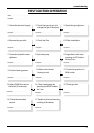
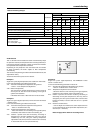
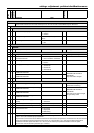
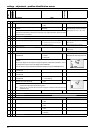
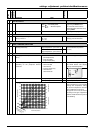
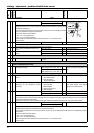
FULL MENU - see table on following pages
0 NETWORK
0 4 User Interface
2 Boiler Parameter
2 0 General setting
2 2 General setting
2 3 C.H. Parameters - Part 1
2 4 C.H. Parameters - Part 2
2 5 Domestic Hot Water
2 6 Boiler manual settings
2 7 Test & Utilities
2 8 Menù 2 Reset to factory setting
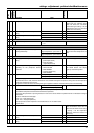
4 Zone 1 Parameters
4 0 Set-point Zone1
4 2 Zone 1 Setting
4 3 Diagnostics
5 Parametri Zona 2
5 0 Set-point Zone2
5 2 Zone 2 Setting
5 3 Diagnostics
6 Parametri Zona 3
6 0 Set-point Zone3
6 2 Zone 3 Setting
6 3 Diagnostics
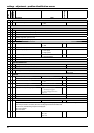
8 Service Parameter
8 1 Statistics
8 2 Boiler
8 3 Boiler Temperature
8 4 Solar & Storage
8 5 Service
8 6 Error History
The parameters relating to each individual menu are listed in the
following pages.
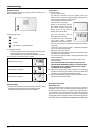
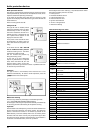
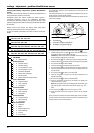
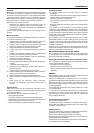
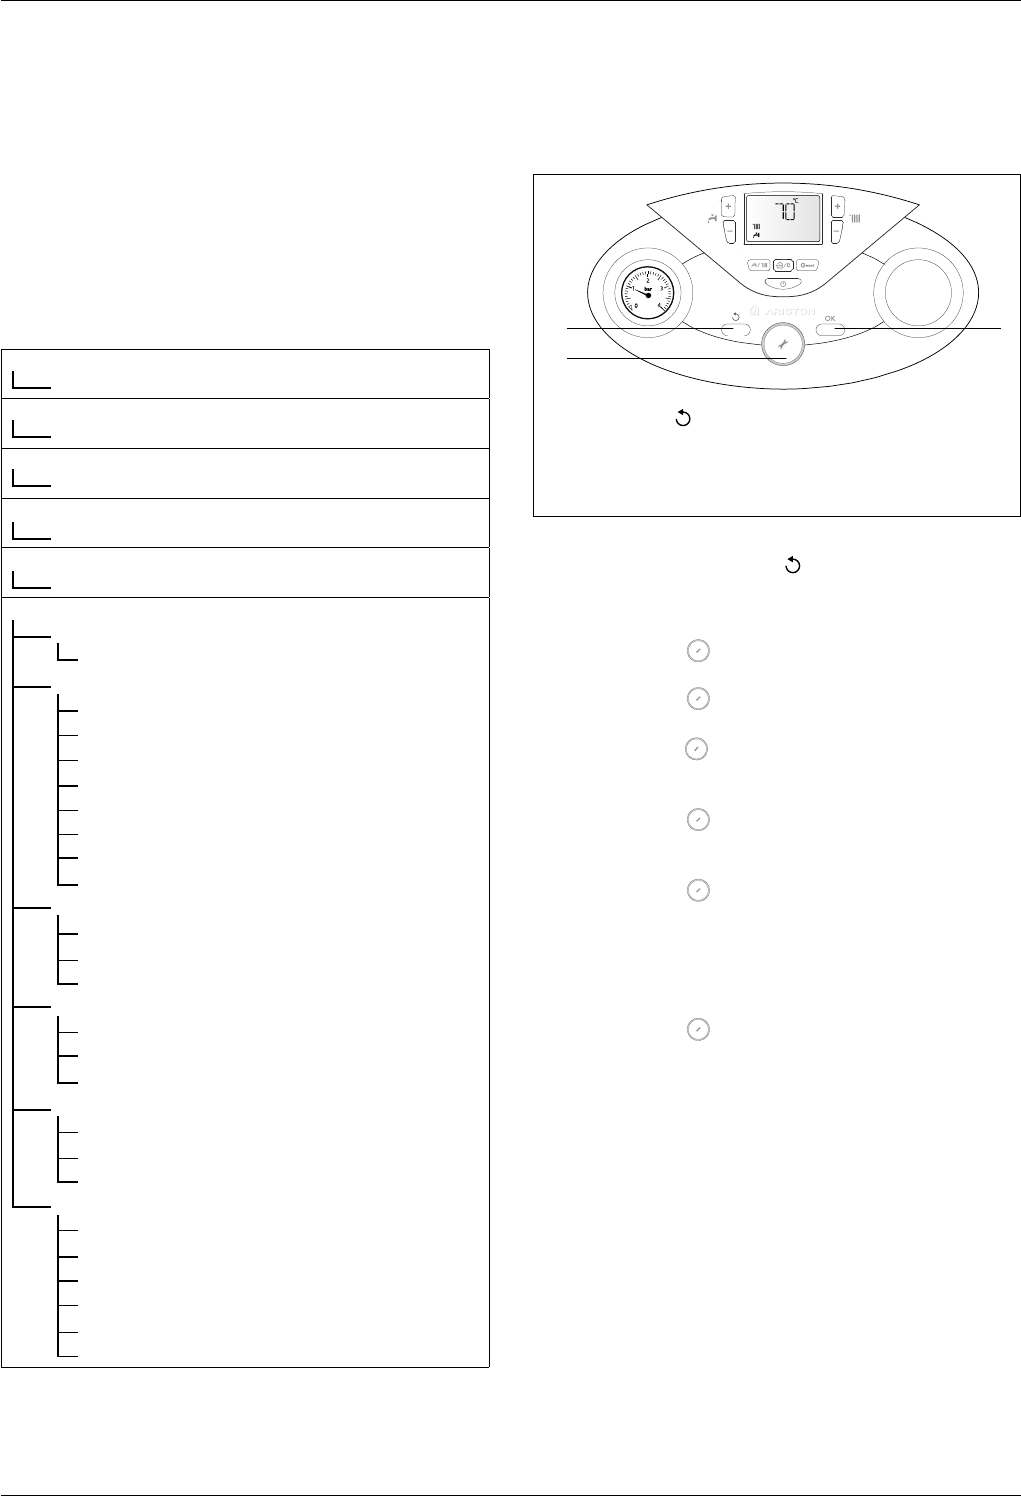
The various parameters can be accessed and modi ed using the OK
button and the encoder (see g. below).
The description of the menus and of each individual parameter will be
shown on the display.
6. ESC button
7. “encoder” programming knob
8. OK button programming key
6
7
8
To access the Menus, proceed as follows (for example: “
231
231”:
1. Simultaneously press the
ESC button and OK button for 5
seconds; the display show
CODE
and
222
.
Caution! The menus reserved for quali ed technicians may only
be accessed after setting the access code.
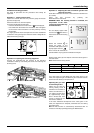
2. Turn the encoder
in a clockwise direction to select code
234
3. Press the OK button; the display show the rst “quick setting”
GAS
4. Turn the encoder to select
MENU
;
5. Press the OK button; the dispaly show the menu
0
.
6. Turn the encoder
in a clockwise direction to select the menu 2
7. Press the OK button to access to the menu. The display show the
sub-menu
20
8.
Turn the encoder to select a sub menu
23
;
9. Press the OK button to access the sub menu parameters; the
display show
230
10. Turn the encoder to select a parameter
231
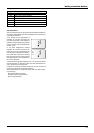
11. Press the OK button to access the parameter; the display will
indicate the value, e.g “
70
”.
Note: The parameter value will be displayed for 20 seconds, then
will begin to ash in alternation with the parameter, e.g. “
70
>
231
“.
12. Turn the encoder
to select the new value, e.g. “
75
”.
13. Press OK button to save the change or press ESC to exit without
saving.
To exit, press the E
SC button until the normal display screen is restored.
For menus which do not require the access code, it is possible to pass
directly from the menu to the sub menu.