


36
commissioning
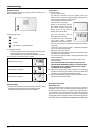
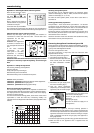
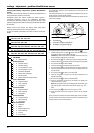
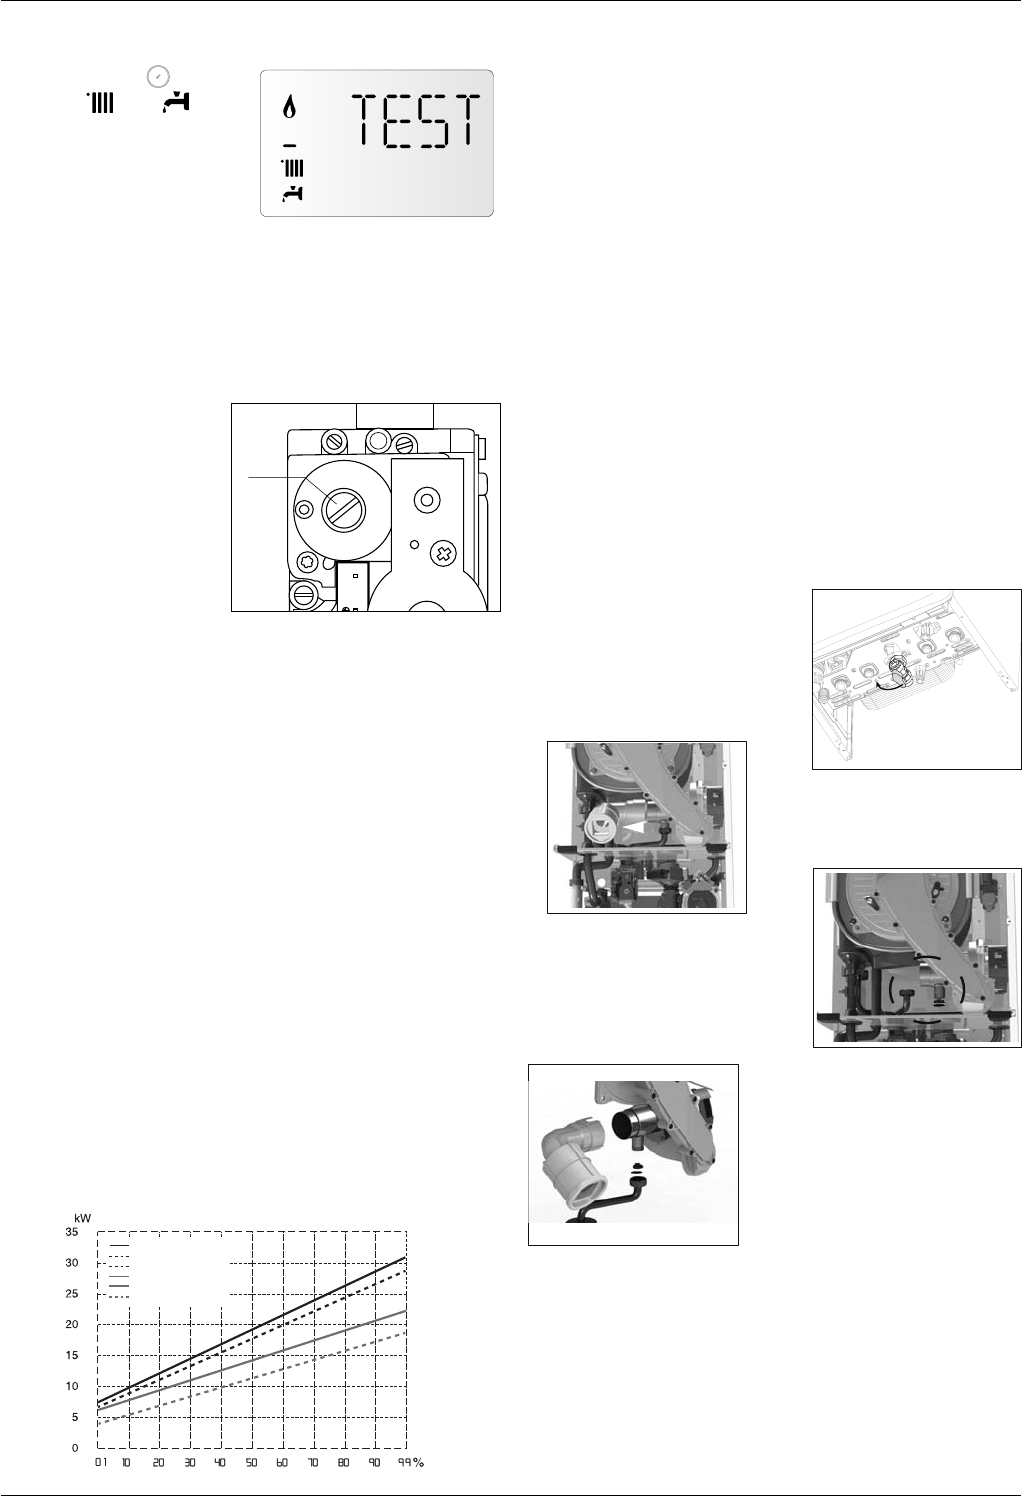
Operation 4 - Checking the CO2 at minimum gas ow
With the Test function active,
rotate the encoder to select
the icom
and . The
boiler is forced to the minimum
power.
Wait 1 minute for the boiler to
stabilise before carrying out the
combustion analyses.
If the
CO2 value (%) read di ers
by 0.5 % from the value found, then adjust the gas valve following
the instructions below, otherwise move directly onto operation 5.
Adjusting the gas valve to minimum gas ow
Remove
cap and adjust screw 2 by turning anti-clockwise in
increments to reduce the CO2 level. Wait 1 minute after each
adjustment for the CO2
value to stabilise.
WARNING! this adjustment
is sensitive: a rotation of a 1
turn corresponds to 0.2% of
CO2.
If the value measured
corresponds to the
value given in the table,
adjustment is complete,
otherwise start the setting
procedure again.
Attention! If the value of the CO2 at the minum power has been
changed, it is necessary repet the adjusting at maximum gas
ow.
Operation 5 - Ending the adjustment
Exit cleaning mode by pressing RESET.
Stop the draw-o .
Verify and repair any leaks of gas.
Re t the front panel to the device.
Re t the blanking cover at combustion test point.
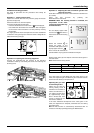
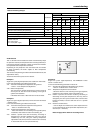
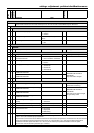
menu 2 - Boiler parameters
submenu 3 - parameter 1 Maximum Heating Power adjustment
submenu 2 - parameter 0
Soft light Ignition
submenu 3 - parameter 5 Heating ignition delay
Maximum Heating Power adjustment
The maximum heating power can be adjusted to between the
maximum power allowed by the boiler and the minimum power).
The display shows the value between 100% (“100” on the display)
and 0% (“0”) of this interval.
To check the maximum heating power, access menu 2/sub menu
3/parameter 1, check the value and, if necessary, modify it as
indicated in the Gas Regulation table below. (See page 40 for more
details).
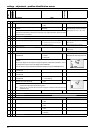
Checking slow ignition power
The soft light can be adjusted between the maximum power
(shown on the display as “100”, i.e. 100%) and the minimum power
(shown on the display as “1”, i.e. 1%).
To check the slow ignition power, access menu 2/sub menu 2/
parameter 0.
Heating ignition delay adjustment
This parameter – menu 2/sub menu 3/parameter 5 - can be used
to manually (0) or automatically (1) set the delay time before the
subsequent reignition of the burner after it has switched o on
reaching the desired temperature in central heating mode.
By selecting manual, it is possible to set the delay in minutes using
the successive parameter (menu 2/sub menu 3/parameter 6), to a
time between 0 and 7 minutes.
Automatic selection means that the boiler will establish the delay
time based on the set-point temperature
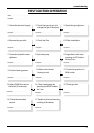
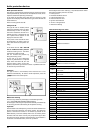
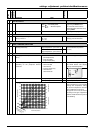
Converting the appliance from Natural gas to LPG
These appliances are designed to operate with di erent gas types.
The appliance must only be converted for use with a di erent gas
type by a Gas Safe Registered installer.
To convert the appliance to LPG:
(use these instructions in conjunction with the Instruction sheet
supplied with the LPG Kit).
1. Electrically isolate the appliance
2. Turn o the gas supply ( g 1)
3. Remove the outer case, lower the
front control panel and remove
the front combustion chamber
panel.
4. Remove the green silencer ( g 2)
5. Disconnect the gas supply from
the venturi assembly ( g 3)
6. Inset the correct diaphragm
(depending on the output of the
appliance) into the venturi spigot
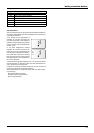
7. Reassemble the gas supply onto
the venture assembly ( g 4)
8. Turn on gas supply and test for
tightness
9. Purge gas supply
10. Turn the electrical supply on to
the appliance.
11.Commission the appliance, check the working pressure is
adequate then test and adjust the CO values at maximum and
minimum output described in the commissioning section of the
appliance installation instructions. Ensure the ue gas analyser
used is calibrated and set for the gas group the appliance is
being adjusted for.
12. Check the appliance for gas leaks using gas leak detection uid.
13. A x the label to the appliance that is supplied with the
conversion kit.
CLAS HE EVO 38
CLAS HE EVO 30
CLAS HE EVO SYSTEM 30
CLAS HE EVO 24
CLAS HE EVO SYSTEM 24
CLAS HE EVO SYSTEM 18
1
2
3
4