


21
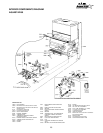
PROCEDURE FOR REPLACING A THERMOSTAT
Into Left Side of
Heat Exchanger
5. Pull down on the thermostat
piston assembly to remove it from
the gas valve.
NOTE: There is a Steel Wedge and
an "O" Ring which should come out
with the piston assembly. If they do
not, reach up with tweezers and/or a
magnet for the Steel Wedge and
remove them. Be especially careful
not to push the Steel Wedge into the
valve housing.
6. Remove the two screws at the
other end of the thermostat (located
on the upper left side of the heat
exchanger) and slide the capillary
sensor out of the heat exchanger.
Note: You should have a basin ready
to collect the water that will then be
released from the heat exchanger.
TO INSTALL NEW
THERMOSTAT:
B. When working with the
thermostat, be careful not to damage
it: The copper capillary tube is
hollow and can be damaged if
crimped or bent too sharply.
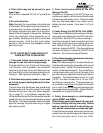
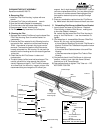
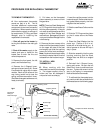
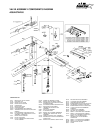
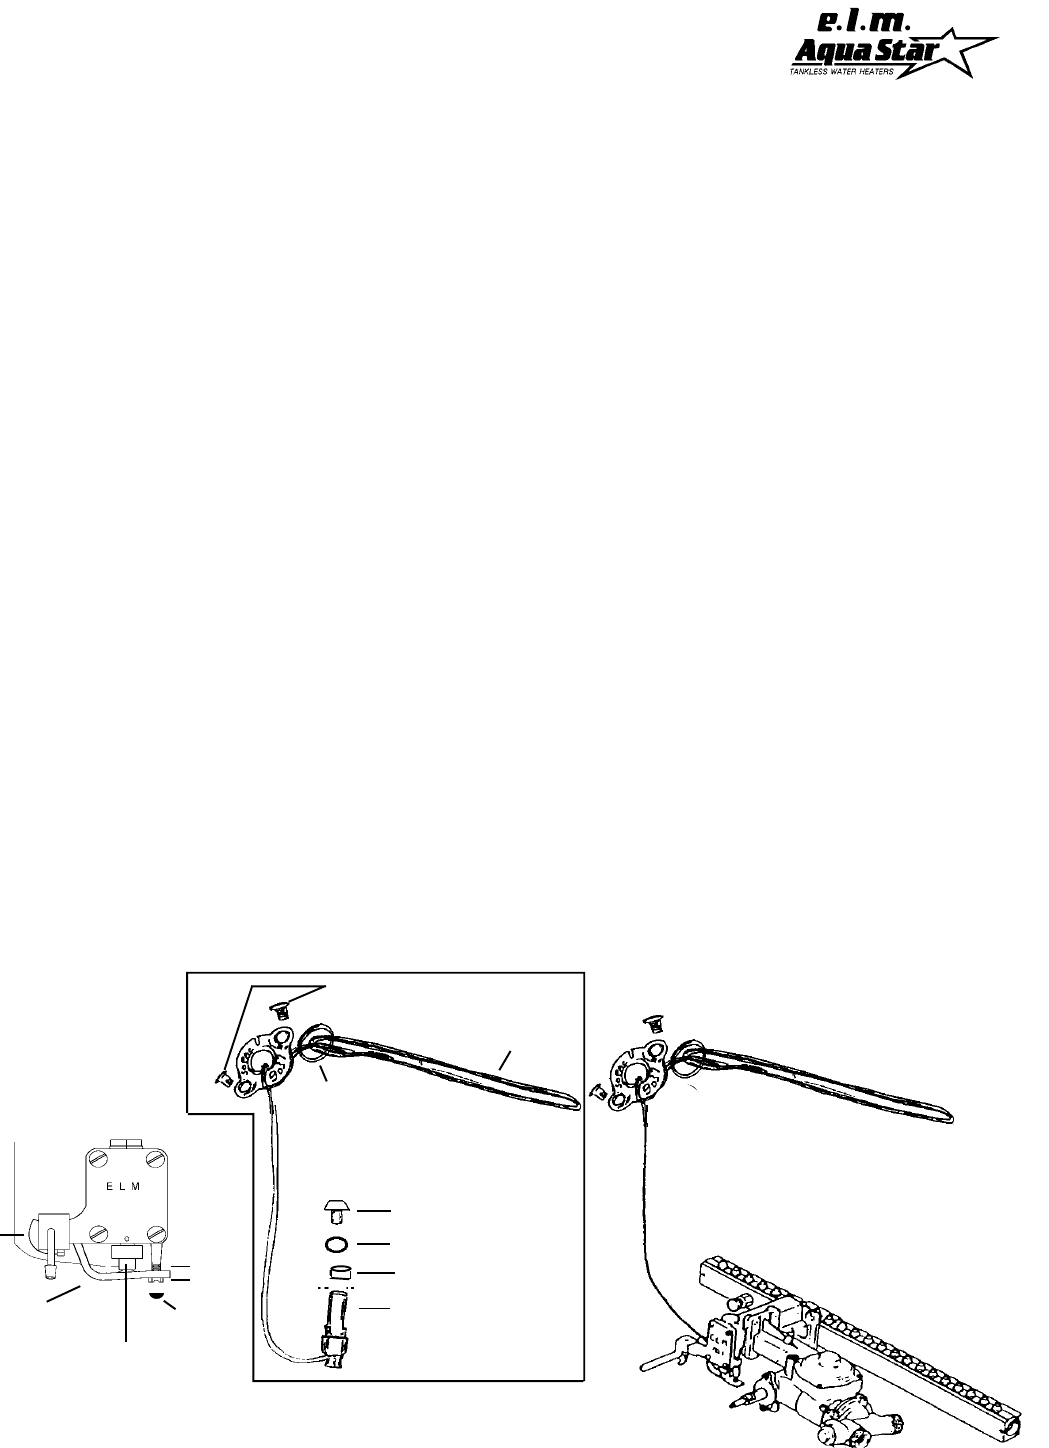
Brass Collar
Rubber Gasket
Complete Gas Block Assembly
Steel Wedge
"O" Ring
Piston Cup
Capillary Sensor
L-Shaped Lever
Thermostat
Tubing to
Heat Exchanger
Spring
Screw
Thermostat
Piston
Assembly
Cam
Grey cap
fig.A
TO REMOVE THERMOSTAT:
A. Your replacement thermostat
comes as part of a kit. The kit
includes additional replacement
components to ensure a successful
installation. When removing the old
thermostat be certain to remove all
its components ("O" Ring, and Steel
Wedge) prior to installing the
replacement thermostat.
1. Shut off gas to the heater by
turning the handle on the main gas
valve.
2. Shut off the water supply to the
heater and open a faucet on the
lowest floor to drain the line and
relieve the pressure.
3. Remove the front panel, the left
panel, and the bottom tray.
4. Remove the L-Shaped Lever,
spring and screw (see fig.A). Screw
is covered with a grey cap on newer
models. Back out the screw all the
way, being careful not to lose the
spring, and then remove the L-lever.
(Set these three parts aside as a unit,
ready to reinstall).
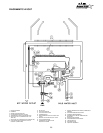
1. Insert the capillary sensor into the
heat exchanger. Be sure that the rub-
ber gasket seats properly and then
retighten the two screws.
2. Slide the new Brass Collar over the
piston.
3. Slide the "O" Ring over the piston
so that it seats above the Brass
Collar.
4. Place the Steel Wedge into the
piston cup. Position it so it is ori-
ented with a flat side facing you. A
dab of grease or silicone will help it
stay in place.
5. Slide the assembly into the valve
housing, ensuring that the Steel
Wedge does not shift to an angled
position.
6. Reinstall the L-Shaped Lever,
spring and screw. Be sure the left
side of the L-lever is positioned over
the cam. Tighten the screw in all the
way so the spring is compressed.
Now calibrate the thermostat.
7. To calibrate the thermostat prop-
erly, continue with the calibration and
thermostat test on the following page.
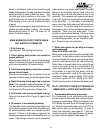
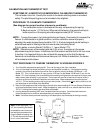
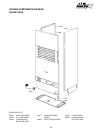
Retaining screw
Thermostat assembly