


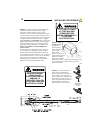
FIBERGLASS, ALUMINUM OR LIGHTWEIGHT STEEL GARAGE
DOORS WILL REQUIRE
REINFORCEMENT BEFORE
INSTALLATION OF DOOR MOUNTING BRACKET. CONTACT
YOUR DOOR MANUFACTURER FOR A REINFORCEMENT KIT
OR INSTRUCTIONS.
CAUTION!
DOOR ARM CONNECTION AND
INSTALLATION
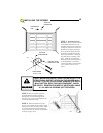
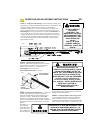
NOTE: If the door is of light construction it is
necessary to reinforce the center stile with steel
angle or wood to prevent damage to the door if it
encounters an obstruction on closing.
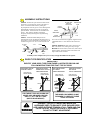
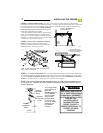
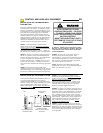
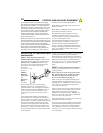
Step 7: Connecting Door Arm to Trolley
Release the outer trolley slide such as to effect manual
operation, see Page 7.
The door arm assembly consists of the door arm tube
section and door arm rod which are packaged
separately. To assemble, screw the door arm rod into
the the door arm tube in a clockwise direction
approximately ten turns. Connect the door arm rod to
the trolley ensuring the hook end goes through both
holes on the front end of the outer trolley.
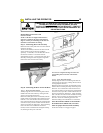
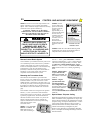
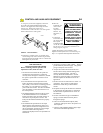
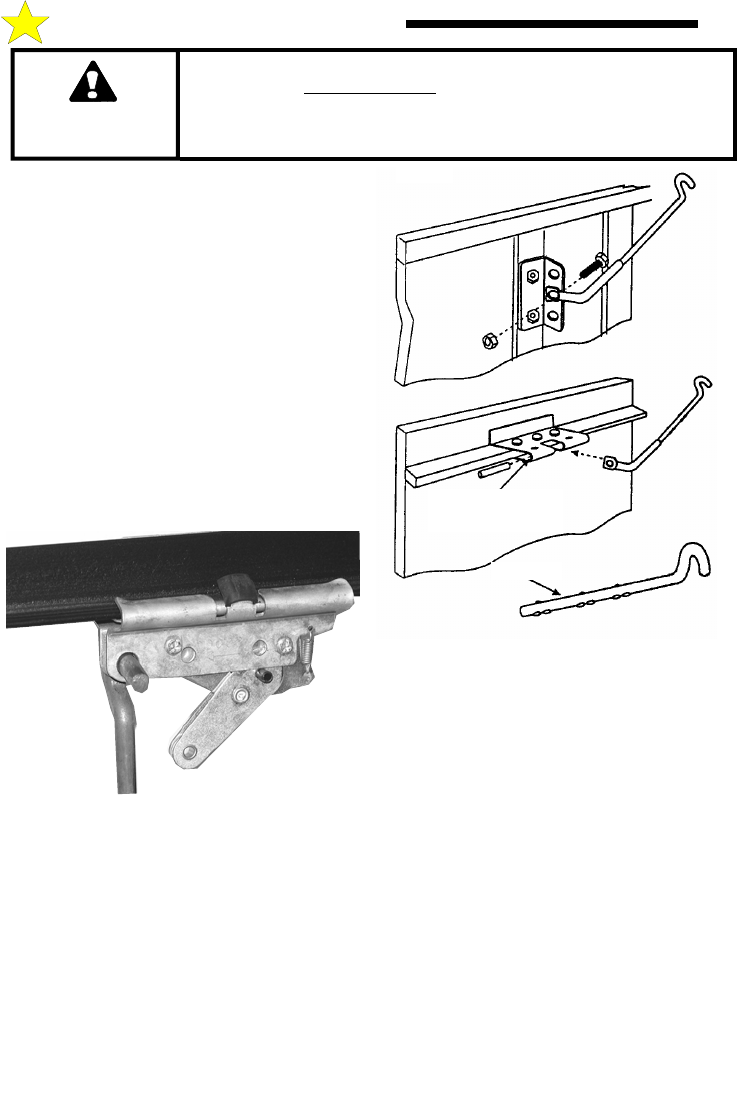
Step 8: Connecting the Door Arm to the Door
Type 1: Door Mounted Bracket
Visually align the door arm connecting hole with the
middle hole of the door bracket by rotating the tube
section in the appropriate direction.
Release the trolley (leave door arm attached) with the
manual release cord and pull trolley toward the power
head unit. Now rotate the door arm tube section two
turns counterclockwise (increasing the exposed length
of the door rod) to provide a cushion when the door is
closed or encounters an obstruction. Align connecting
hole in the door arm to middle hole in the door
bracket; insert 3/8” diameter bolt and tighten locking
nut, allowing for free pivot of the arm.
Note: Do not overtighten locking nut as this will
cause binding between the door arm and door
bracket.
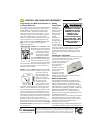
Type 2: Strut Mounted Bracket
Visually align the door arm connecting hole with the
connecting pin of the strut by rotating the tube section
in the appropriate direction.
Release the trolley (leave door arm attached) with the
manual release cord and pull trolley toward the power
head unit. Now rotate the door arm tube section two
turns counter-clockwise (increasing the exposed length
of the door rod) to provide a cushion when the door is
closed or encounters an obstruction. Align connecting
hole in the door arm with the strut mounted connecting
bracket. Insert connecting pin through the hole in the
door arm. Secure the connecting pin to the strut
bracket according to the manufacturer’s instructions.
Note: Door Bracket Mount or Strut Mount -
If rod bottoms in cushion tube, cut rod to
allow for proper function of this assembly.
Set the outer trolley to re-engage, see page 7.
Alternate Strut
Connecting Bracket
Cut to Fit
110054-2
INSTALLING THE OPERATOR
8