Epson Stylus Photo R260
9/06 Epson Stylus Photo R260 - 9
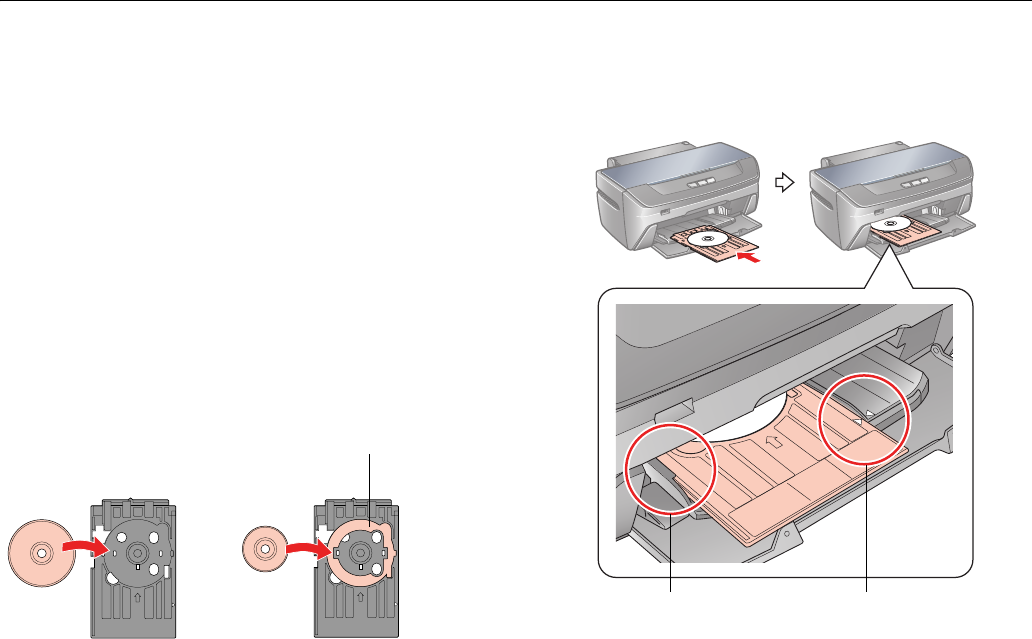
To print on a small CD (8-cm), place the small CD ring on
the tray first, then place the CD inside the ring.
Note: Use one CD/DVD at a time.
Caution: Before you position the CD or DVD, make sure that no
dust or dirt is on the CD/DVD tray, as this may damage the disc’s
data side.
Be sure to use the CD/DVD tray provided with this printer. If you
use another CD/DVD tray, there may be a gap in the print position
and printing may not be performed properly.
Make sure you always use the small CD ring when printing on
8-cm CDs and that the CD and ring lies flat on the tray; otherwise
the printer may be damaged.
4. Gently insert the CD/DVD tray along the base of the front
tray until the marks on the CD/DVD tray and the front
tray match each other.
Caution: Make sure both sides of the CD/DVD tray slide
underneath the brackets on the front tray.
Do not insert the CD/DVD tray while the printer is printing;
otherwise, your printer may be damaged or the surface of the CD
or DVD may become dirty or scratched.
5. Follow the instructions in “Printing Your Design” below to
print with Epson Print CD.
Designing CDs and DVDs
You can use the Epson Print CD program (included on the
Printer Software CD-ROM) to create and print a design with
images, graphics, and text. See your on-screen User’s Guide or
Printer Basics book for instructions.
Printing Your Design
After you have created your design and loaded a CD or DVD,
you’re ready to print.
1. Open the File menu and select
Print.
2. Make sure
EPSON Stylus Photo R260 Series (Windows)
or
Stylus Photo R260 (Macintosh) is selected.
3. Select
CD/DVD or CD/DVD Premium Surface as the
Media Type setting.
4. Select
None as the Print Confirmation Pattern setting
(Windows) or Test Print Pattern setting (Macintosh).
Always use this piece
with 8-cm CDs or DVDs
12-cm CD/DVD
8-cm CD/DVD
Make sure the
arrow marks
match
Make sure the CD/DVD
tray slides under the
bracket (on both sides)


