Epson Stylus Photo R260
9/06 Epson Stylus Photo R260 - 11
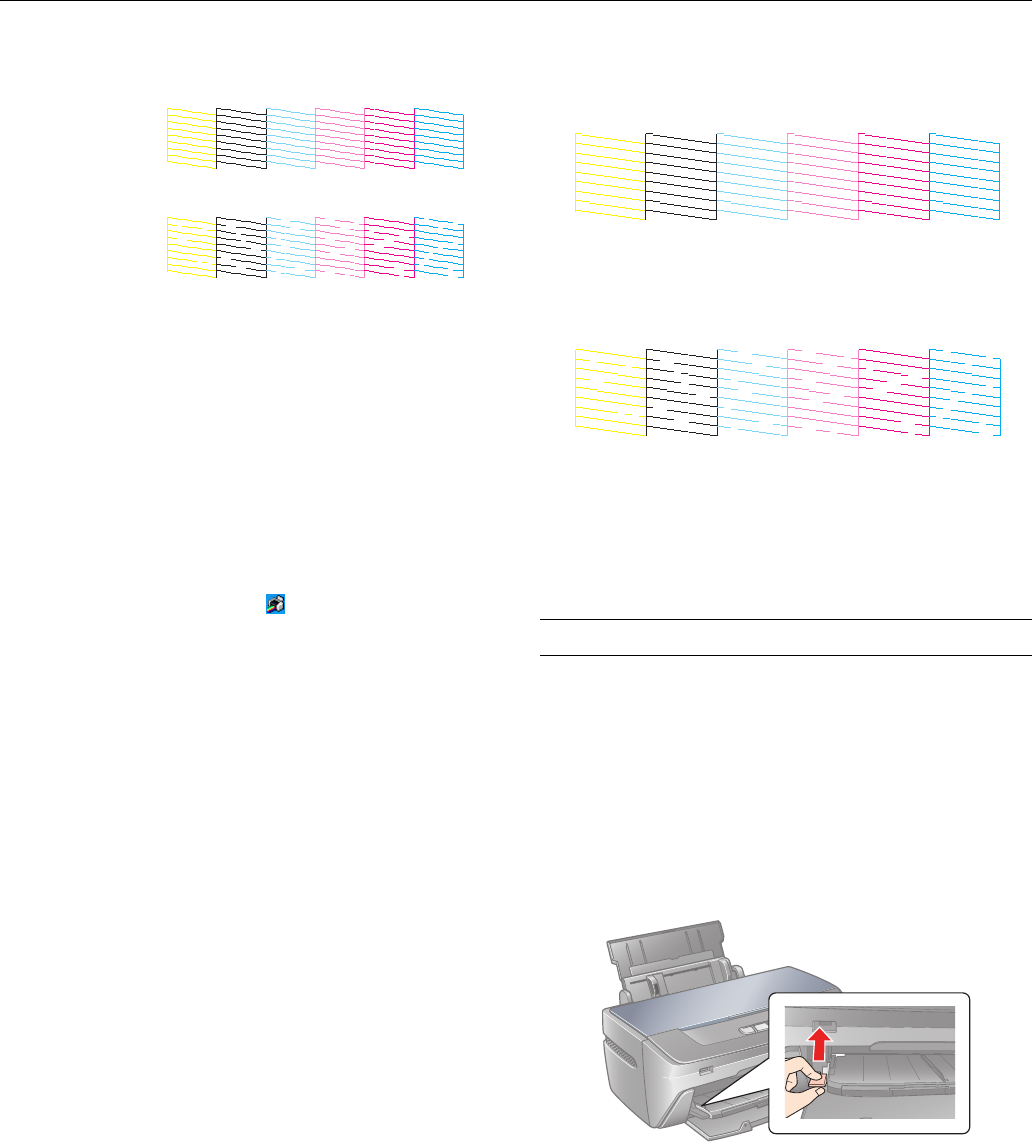
4. Click Print or Next. The nozzle check pattern prints:
5. If there are no gaps or lines, click
Finish.
If there are gaps or lines, or the test patterns are faint, click
Clean. Then skip to step 3 below to clean the nozzles.
Running the Head Cleaning Utility
1. Make sure the printer is turned on but not printing, and the
red H ink light is off. (If the H ink light is flashing or on, you
need to replace a cartridge; see page 4 for details.)
2. Do one of the following:
❏ Windows: Right-click the printer icon on your
taskbar (in the lower right corner of your screen). Select
Head Cleaning.
❏ Macintosh: Open the
Applications folder and select
EPSON Printer Utility2. Select SP R260 Series in the
printer list, click
OK, then select Head Cleaning.
3. Follow the instructions on the screen to clean the print
head.
Cleaning takes several seconds. The printer makes noise and
the green P power light flashes.
Caution: Never turn off the printer while head cleaning is in
progress; you may damage it. Do not insert the CD/DVD tray until
cleaning has finished.
4. When the green P power light stops flashing, make sure
paper is loaded in the printer, then do one of the following:
❏ Windows: Click
Print nozzle check pattern, then click
Print.
❏ Macintosh: Click
Confirmation, then click Next.
The nozzle check pattern prints.
5. If the nozzle check pattern has no white lines or gaps (as
shown below), click
Finish.
If the pattern has white lines or gaps (as shown below), click
Clean to clean the print head again.
If you don’t see any improvement after cleaning four times,
you can also turn the printer off and wait overnight—this
allows any dried ink to soften—and then try cleaning the
print head again.
Aligning the Print Head
If your printouts look grainy or blurry, or you see light or dark
lines, you may need to align the print head.
You may also see lines in your printouts if your cartridges are
low on ink or you need to clean the print head.
Before you align the print head, make sure the CD/DVD tray
is not inserted in the printer, and make sure the front tray is in
the paper (lower) position. If it is not, lift the tray lever up to
reposition the front tray.
1. Turn on the printer.
2. Make sure none of the lights are indicating errors. See
“Control Panel” on page 4 for details.
3. Load several sheets of plain, letter-size paper.
4. Do one of the following:
Print head does
not need to be
cleaned:
Print head needs
to be cleaned:


