Epson Stylus Photo R260
8 - Epson Stylus Photo R260 9/06
Paper Loading Guidelines
You can load up to 120 sheets of plain paper. You can load the
following number of sheets of Epson special media:
❏ Leave enough space in front of the printer for the paper to
be fully ejected.
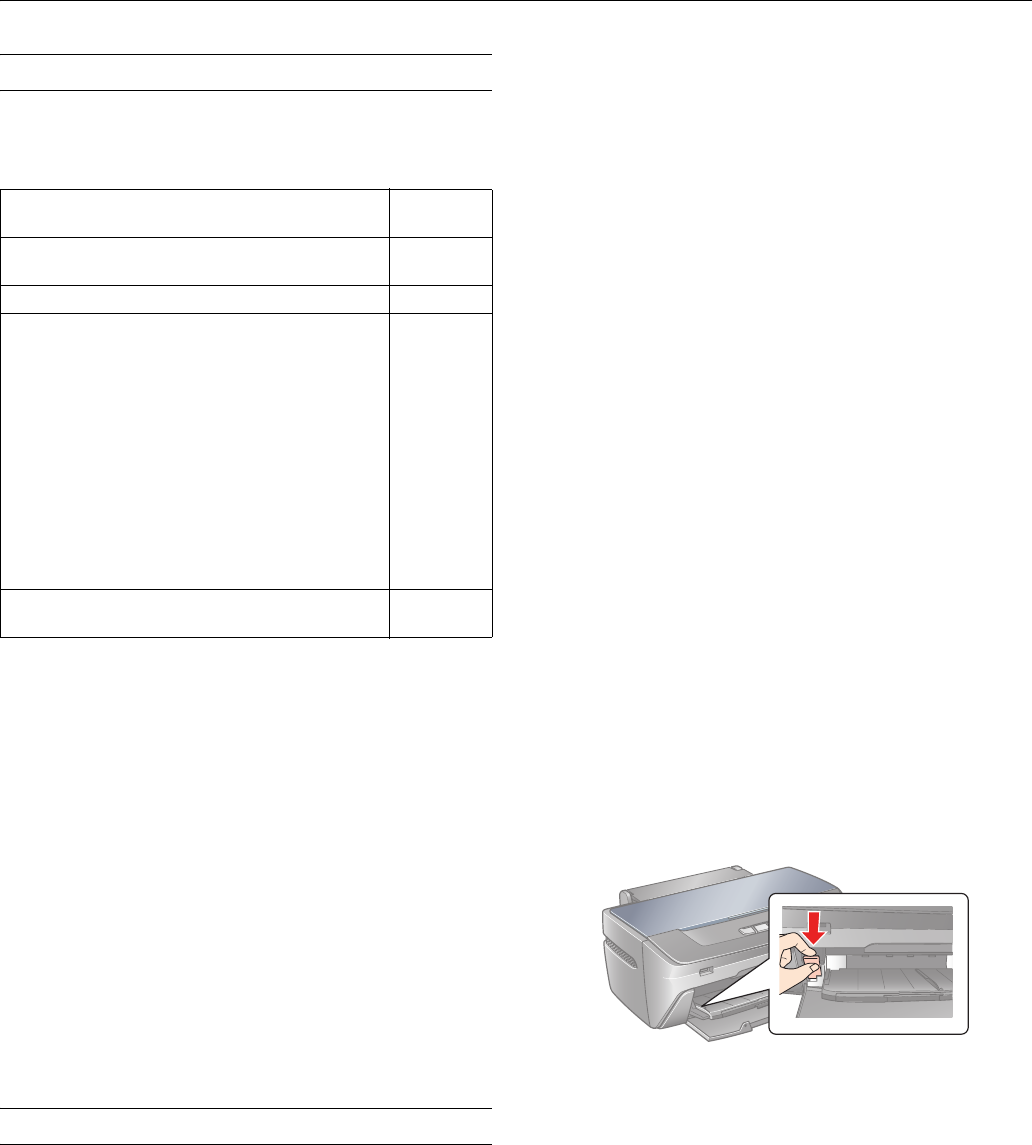
❏ Don’t load paper above the arrow mark on the left edge
guide.
❏ Load the printable side face-up. It’s often brighter or whiter
than the other side.
❏ Always load the short edge first, even when printing in
landscape mode.
❏ Load letterhead or preprinted paper into the printer top
edge first.
❏ If you experience paper feeding problems, try loading fewer
sheets.
❏ If you’re using special paper, follow the instructions that
came with the paper.
Printing CDs and DVDs
Your printer includes a special tray that lets you print
customized text, graphics, and photos directly on any ink jet-
printable CD or DVD. The Epson Print CD software makes
it easy to import your own photos, add text, and modify your
designs with a variety of special effects. You can print on both
regular 12-cm and 8-cm CDs and DVDs.
Caution: Use only ink jet-printable CDs and DVDs for printing.
Thermal-printable and regular CDs and DVDs should not be used
with this printer; otherwise the ink may smear.
Cleaning the Rollers
Before you print on CDs or DVDs, it’s a good idea to clean
the rollers inside your printer. You can do this by feeding and
ejecting several sheets of plain paper.
1. Make sure your printer is turned on and several sheets of
letter-size paper are loaded.
2. Press the ) paper button to feed a sheet of paper through
the printer.
3. Repeat step 2 several times.
Inserting a CD or DVD
Make sure the data, music, or video is burned on your
ink jet-printable CDs or DVDs before you print. Otherwise,
dirt or scratches on the surface may cause errors when you
burn the data. If you plan to print a large number of CDs or
DVDs, it’s a good idea to print a small sample, then wait a day
and check the quality to make sure it’s satisfactory.
If you want to check the print position or color, see your
on-screen User’s Guide or Printer Basics book.
Before you insert a CD or DVD, make sure the printer is
turned on. Otherwise, the disc may not be positioned
correctly. Then follow these steps:
1. Push in the output tray extension, but leave the tray open.
2. Open the front cover, then set the front tray to the
CD/DVD position by pulling the tray lever down.
Caution: Before you move the tray lever, make sure no paper or
other objects are on the front tray and the front tray is not
extended.
Do not touch the front tray when you move the tray lever.
Do not move the tray lever while the printer is printing.
3. Place the CD or DVD on the CD/DVD tray with the white
or printable side face-up. Make sure the disc lies flat in the
tray.
Paper type
Loading
capacity
Epson Presentation Paper Matte
Epson Photo Quality Ink Jet Paper
100 sheets
Epson Bright White Paper 80 sheets
Epson Ultra Premium Photo Paper Glossy
Epson Ultra Premium Glossy Photo Paper
Epson Premium Photo Paper Glossy
Epson Premium Glossy Photo Paper
Epson Premium Photo Paper Semi-gloss
Epson Premium Semi-gloss Photo Paper
Epson Photo Paper Glossy
Epson Glossy Photo Paper
Epson Premium Presentation Paper Matte
Epson Matte Paper Heavyweight
Epson Premium Presentation Paper Matte Double-sided
Epson Double-sided Matte Paper
Epson Ultra Premium Photo Paper Luster
Epson Premium Luster Photo Paper
20 sheets
Epson Iron-on Cool Peel Transfer paper
Epson Photo Quality Self Adhesive Sheets
1 sheet


