– 6 –
GAS CONNECTION
Gas supply connections and any pipe joint compound must be resistant to the action of propane gases.
Location of the gas inlet is at the rear of the oven. Codes require that a gas shutoff valve must be
installed in the gas line ahead of the oven.
Connect gas supply after leveling the oven. The gas supply line must be at least the equivalent of
3
/4 inch (19 mm) iron pipe. Make sure the pipes are clean and free of obstructions, dirt or pipe joint
compound.
The ovens are equipped with fixed burner orifices which coincide with installation elevation.
The oven is provided with a regulator integral to the gas solenoid valve and requires no external
regulator.
Natural gas pressure regulators are preset for 3.5 inches W.C. (Water Column) (0.9 kPa); propane gas
pressure regulators are preset for 10 inches W.C. (2.5 kPa).
Prior to lighting, check all joints in the gas supply for leaks. Use soap and
water solution. Do not use an open flame.
A. Check all joints prior to the gas valve (solenoid) before lighting unit.
B. Check all joints beyond gas valve (solenoid) after unit is lit.
After piping has been checked for leaks, all piping receiving gas should be fully purged to remove air.
ASSEMBLING STACKED OVENS (OPTIONAL)
Unpack the ovens and stack kit. Position the oven to be
used as the bottom oven on its back for access to the
oven bottom, taking care not to scratch or damage it. The
gas pipe protrudes beyond the back; provide for this
when the oven is tipped back by resting it on suitable
spacers (2 x 4's, etc.). Attach the four leg assemblies with
the 24 bolts and lockwashers (six per leg).
Place the lower oven (with legs) on the floor and remove
two
7
/16 inch (11 mm) diameter knockouts on each side of
the top cover. Remove vent guard and discard it.
Move the oven with legs to the installed position and place
upper oven on top of lower oven using the locating studs.
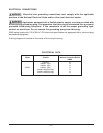
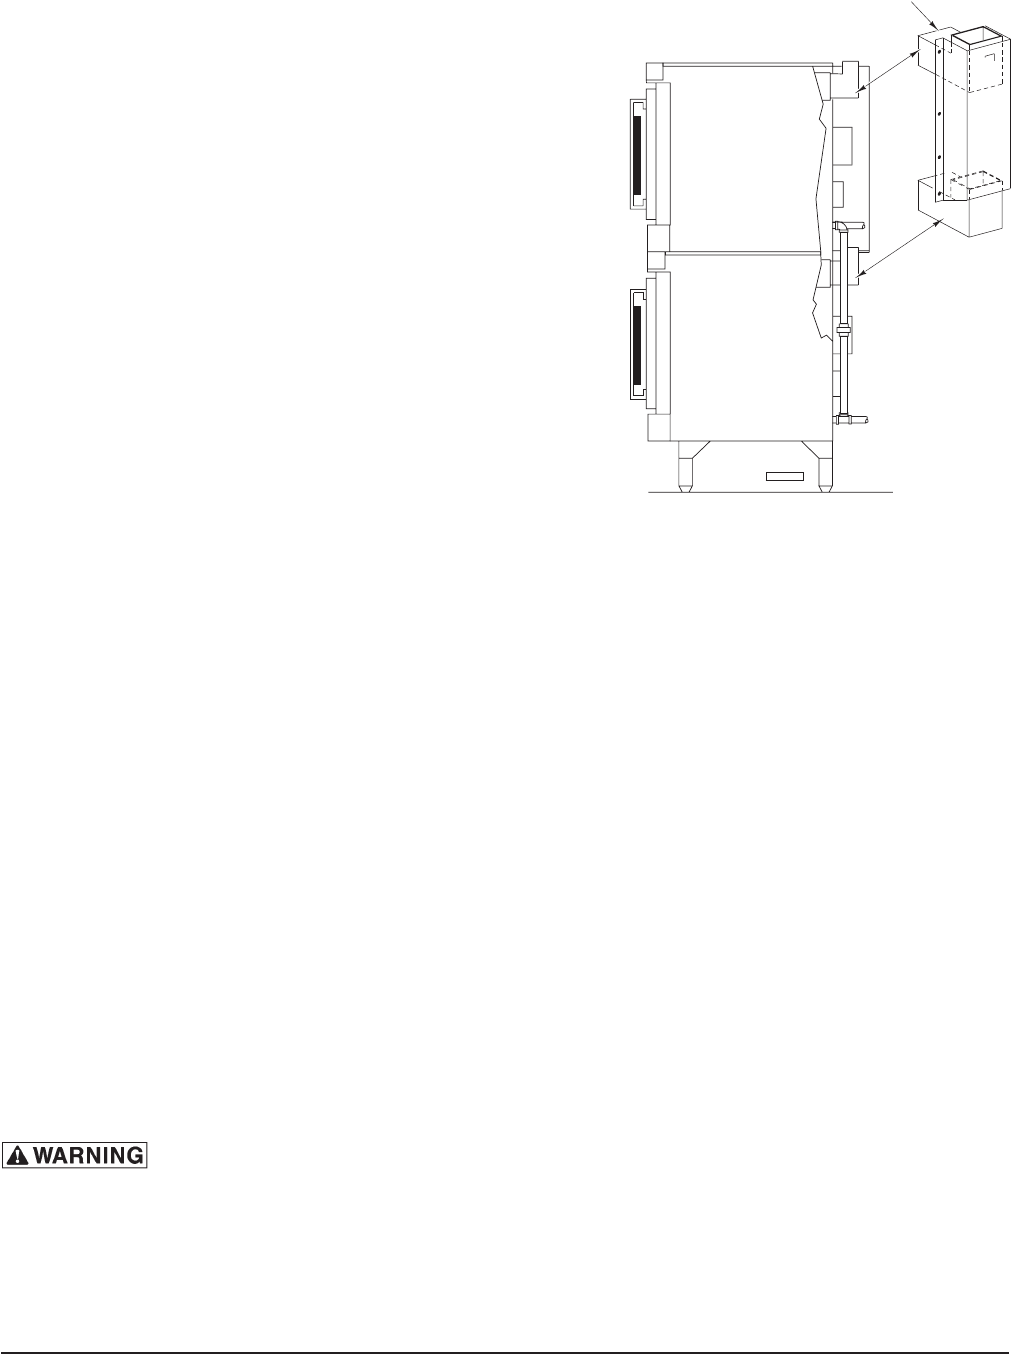
Install the stacking flue (Fig. 3) with the four screws
provided.
Connect the piping between the top oven and bottom
oven. For all gas supply connections, pipe joint compound
must be resistant to the action of propane gases.
LEVELING
Make sure that the oven racks are level in the final installed position. If the oven is installed on legs,
turn the adjustable feet in or out to level the oven front-to-back and side-to-side. If the oven is installed
on casters, loosen set screws and turn casters in or out to level the oven front-to-back and side-to-side.
Retighten set screws after leveling.
Fig. 3
STACKING FLUE
PL-53564


